A PLATTER OF COOKIES FOR OLD SAINT NICK

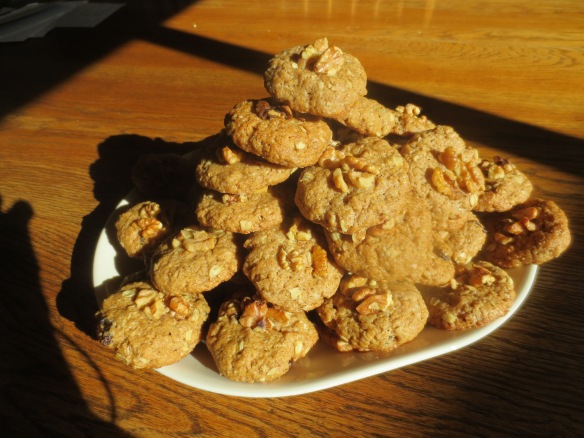
Because so many cookies share common ingredients like flour, sugar, and margarine or oil, they need that little something unique to make them stand apart. With a generous measure of creamy pureed walnuts, these delicious cookies offer melt-in-the-mouth soft centers and delightfully crunchy outsides.

But giving them that extra-special touch is black walnut extract, a flavor that makes these cookies an outstanding treat for Old Saint Nick.

I wasn’t able to find black walnut extract at the grocery store but discovered JR Watkins an excellent online source for unique flavoring extracts.

Going to a cookie exchange party or a holiday potluck?  Bring along a batch or two of these little gems and reap the compliments.

OLD SAINT NICK’S WICKED WALNUT COOKIES

Yield: 4 1/2 dozen

2 cups raw walnuts

3 cups whole wheat pastry flour

1 1/4 cups organic sugar

1 cup old-fashioned rolled oats

1/2 cup raisins

1 teaspoon baking powder

1/2 teaspoon baking soda

1/4 teaspoon ground cinnamon

1 cup mashed bananas (about 2 large)

2/3 cup vegan margarine

1 1/4 teaspoons black walnut extract, maple extract, almond extract, or an extra teaspoon vanilla extract

1 teaspoon vanilla extract

1/4 cup water

2 tablespoons flaxseeds or ground flaxseed meal

  1. Preheat the oven to 350 degrees F. Line two large rimmed baking sheets with parchment paper.
  2. Chop 1/2 cup of the walnuts into small pieces and set aside. Combine the flour, sugar, oats, raisins, baking powder, baking soda, and cinnamon in a large bowl and mix well. Make sure the raisins are well coated with flour to prevent them from sinking to the bottom of the batter. Set aside.
  3. Put the remaining 1 1/2 cups of walnuts in a food processor. Process until they become a creamy walnut butter, stopping occasionally to scrape down the work bowl. Add the bananas, vegan margarine, black walnut extract, and vanilla extract and process until smooth and creamy, stopping occasionally to scrape down the work bowl.
  4. Add the wet ingredients to the dry ingredients and mix well. The dough will become quite stiff.
  5. Pour the water and flaxseeds in a blender. Process on high speed for 1 to 2 minutes to form a thick slurry. Stir the slurry into the dough, mixing thoroughly to distribute it evenly.
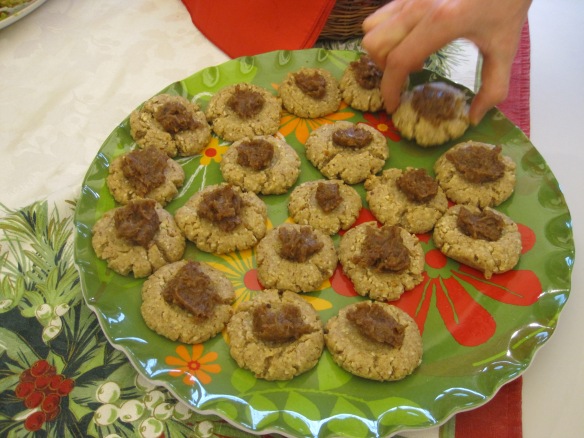
  6. Roll teaspoonfuls of dough into 1-inch balls and place them 1 1/2 inches apart of the prepared baking sheet. Flatten them slightly with your hands or the bottom of a glass and press a piece of the reserved chopped walnuts into the center of each cookie.
  7. Bake for 14 to 18 minutes or until the cookies are lightly browned on the bottom. If the cookies on the top rack need browning, move them to the bottom rack for another 2 to 3 minutes. Transfer the cookies to a cooling rack or plate and let cool completely.


THE FBI LOVES THESE THUMBPRINTS!

ALMOND THUMBPRINT CUTIES

If you’re hunting for a super-easy cookie recipe you can whip up in a hurry, this is your sweet treat–you and these little cuties will be best buds in a flash! But a quick assembly is not their only assets. These babies are delicious and make good keepers as well.

Traditional thumbprint cookies are filled with fruity jam, but these little treats feature centers filled with dates and almond butter, giving them an edge over jam because they deliver an appealing depth of flavor with more complexity that goes beyond sweetness from the jam.

You’ll know what I mean when you taste them. Admittedly, dates certainly are sweet, but their sweetness is strictly from nature and more subtle and satisfying–not like the extreme sweetness you get from processed sugar.

Yield: about 3 dozen

ALMOND THUMBPRINT CUTIES

Cuties

1 cup almonds

1 1/3 cups all purpose flour

1/2 cup plus 2 tablespoons vegan margarine

1/2 cup plus 3 tablespoons organic sugar

2 tablespoons water

1 teaspoon almond extract

1/2 teaspoon vanilla extract

Filling

15 pitted dates, snipped in half

2 tablespoons almond butter

2 tablespoons water

1/2 teaspoon almond extract

1/2 teaspoon vanilla extract

  1. Preheat the oven to 350 degrees F. Line two large rimmed baking sheets with parchment paper.

2. To make the cuties, put the almonds in a food processor. Process until they are ground into a finely textured meal. Add the flour, vegan margarine, sugar, water, almond extract, and vanilla extract, and process until well blended, stopping occasionally to scrape down the work bowl.

3. Roll heaping tablespoonfuls of dough into 1-inch balls and place them 1 1/2 inches apart on the prepared baking sheet.

4. Use your thumb or finger to press a deep indentation into the top of each cookie. Use your fingers to smooth out any cracks in the dough. Bake for 12 to 15 minutes, or until the tops turn a light golden. Transfer the cookies to a cooling rack or plate and let cool completely.

5. To make the filling, put the dates, almond butter, water, almond extract, and vanilla extract in a food processor. Pulse to break up the dates, and then process until smooth and creamy, stopping occasionally to scrape down the work bowl.

6. Place heaping teaspoonfuls of the date mixture into each thumbprint. Set the cookies aside in a single layer for about 3 hours, or until the filling becomes firm and dry. Stored at room temperature in a covered container, Almond Thumbprint Cuties will keep for 1 or 2 days; refrigerated, for 1 week, and in the freezer, 3 months.

THE CHRISTMAS COOKIE TRAY HAD HIDDEN SURPRISES!


 PUMPKIN PINE NUT COOKIES

Pumpkin Pine Nut CookiesThese delightful pumpkin cookies give the tongue a delightful little tingle and make ideal treats for holiday gifting. If giving the cookies as as gifts is the goal, it would be best to double or triple the recipe. If these are simply an after-dinner treat or mid-day nibble, stick with the recipe measurements as is.

To make the cookies really unique, I’ve added a bold flavor surprise from three ingredients seldom found in a cookie recipe–coriander seeds, black pepper, and cayenne.

The fun part is watching expressions on people’s faces when they take their first bite. The flavor-hit doesn’t happen immediately–it takes a few seconds before it registers–and when it does–puzzled looks begin showing up.

It’s fun to see if people can guess what’s making those cookies so lively. The guesses are all over the place–some are even interesting enough to add to a future batch of  cookies.

I’ve chosen to add pine nuts because they stand out in bright contrast to the pumpkin color, but you can add any nut of your choice.  Because these babies keep so well, they can be wrapped in plastic and stored at room temperature  for up to 5 days.

If you’re a long-range planner, make the cookies well ahead, place them on a parchment-lined metal tray with parchment between the layers, and freeze them until solid. Then transfer them to a plastic-wrap-lined box or heavy-duty plastic bags and freeze them for up to three months.

Vegan Holidays highresThis is one of the recipes in the Christmas section of my Vegan for the Holidays cookbook–Happy Baking!

PUMPKIN PINE NUT COOKIES

 Yield: 2 1/2 dozen

1 1/2 cups whole-wheat pastry flour

1 1/2 cups old fashioned rolled oats

1 cup plus 2 tablespoons dark brown sugar, firmly packed

2 teaspoons ground cinnamon

1 1/2 teaspoons baking powder

1 1/4 teaspoons whole coriander seeds, ground in a mortar and pestle, or 1

teaspoon ground coriander seeds

1 teaspoon ground nutmeg

3/4 teaspoon ground black pepperPumpkin Pine Nut Cookies

1/2 teaspoon baking soda

1/4 teaspoon salt

1/4 teaspoon cayenne


1/2 cup pine nuts


1 1/4 cups cooked fresh pumpkin or canned pumpkin

1/2 cup canola oil

1 teaspoon vanilla extract


1/4 cup water

2 tablespoons whole flaxseeds or ground flaxseeds

  1. Preheat the oven to 350 degrees F. and line two large rimmed baking sheets with parchment paper.
  2. Combine the pastry flour, oats, brown sugar, cinnamon, baking powder, coriander, nutmeg, pepper, baking soda, salt, and cayenne in a large bowl and mix well. Stir in the pine nuts and set aside.
  3. Combine the pumpkin, oil, and vanilla extract in a medium bowl and mix well. Add the wet ingredients to the dry ingredients and mix well to form a thick dough.
  4. Put the water and flaxseeds in a blender. Process on high speed for 1 to 2 minutes to form a thick slurry. Stir the flaxseed slurry into the dough, mixing thoroughly to distribute it evenly.
  5. Place heaping tablespoonfuls of dough 2 inches apart on the prepared baking sheets, spreading with the back of the spoon to form 1 1/2-inch diameter cookies.
  6. Bake for 15 minutes. Switch the oven rack positions of the baking pans and bake 13 minutes longer for soft cookies, or about 17 minutes for crisp cookies. Transfer the cookies to a cooling rack or plate and let cool completely.

Note: If you use ground flaxseeds, make Step #1 combining the flaxseeds and water in a small bowl. Mix well and set aside. By the time you’re ready to add the flaxseeds, they will have thickened and can be added to the cookie dough without the need of blending.

Taste the Irrestibles — Resistance is Futile!

irresistible on platterIRRESISTIBLES

My goal was to come up with a special cookie for the holiday cookie tray–and to make a cookie with a long shelf life so the recipe could be prepared in advance for giving as gifts.

I just love it when a first-time experiment comes together on the first try. That was my reward when I decided to do something unique with a fruit and nut mixture that often serves as the base of many commercial raw fruit bars.

I loaded the fruity mixture with tons of nuts and wanted to see what would happen if I formed it into cookies and baked them. But for how long? And how big should I make them?

I took a stab at making them 2 inches in diameter and baking them 15 for minutes. OMG! Irresistible On baking panThey were absolutely IRRESISTIBLE! Yet, with their unusual texture they really weren’t like the familiar crispy cookies most people know, nor were they confections–but, interestingly, somewhere in-between.

It was not only the irresistible flavor these offer, but also the exceptional crunchy-on-the-outside chewy-on-the-inside texture that was so appealing. Here’s another thing I noticed: They kept amazingly well sitting on my kitchen counter in a heavy-duty plastic bag I had left open for several days. When I sealed the plastic bag, the cookies would lose their crunch. The following week I packed them in my suitcase and took them to Massachusetts when visiting my daughter, and they still tasted irresistibly delicious.

I had a few of these little goodies left at home sitting on the counter in an open plastic bag and was delighted that time (about 3 weeks) had not diminished their exceptional flavor or texture.

They’re great travelers! Take them on a plane trip, pack them on a road trip (the kids will love ’em), wrap them in a gift box and ship them to far-away friends and family. All they need is a good home equipped with a pack of cookie monsters.

I knew I had something special and that they would make welcome little homemade gifts during the holidays. If I wrapped them in blue ribbon, I might bring them to a Hanukkah party. I could tie them up with a red and green bow and they would be perfect nibbles for my friend’s Grandma for Christmas.  And by putting the Irresistibles in a gift box wrapped with red, green, and black, they would make the perfect homemade Kwanzaa gift for someone special.

Here are a few handy notes that will help bring the recipe together with ease. You’ll need:

  • A hammer for coarsely chopping the almonds
  • A hand-crank nut mill for coarsely grinding the walnuts
  • A large food processor, at least 11 cup capacity
  • Kitchen scissors for snipping the dates and dried apricots

When the Irresistibles are baked and cooled, treat yourself to one, or two, or—-maybe just one more!

IRRESISTIBLES

Yield: about 50 cookies


2 1/2 cups almonds, dividedIrresistible Single

1 1/2 cups walnuts, divided

2 tablespoons raw cacao nibs


1 1/2 cups pitted dates, snipped in half

3/4 cup maple syrup

1/2 cup Turkish apricots, snipped in half

1/2 cup rolled oats

3 tablespoons unsweetened cocoa powder or raw cacao powder

2 tablespoons water

1 teaspoon ground cinnamon

1/2 teaspoon ground nutmeg


30 whole almonds

  1. Preheat the oven to 325 degrees F. and line 3 large rimmed baking sheets with parchment.
  2. Put 1 cup of the almonds in a heavy-duty plastic bag, seal it, and coarsely chop the nuts with a hammer. Transfer the nuts to a large mixing bowl. Put 1/2 cup of the walnuts in a hand-crank nut mill and coarsely grind them. Add them to the bowl with the the almonds, add the cacao nibs, and set aside.
  3. Put the remaining 1 1/2 cups of almonds into the food processor and process to form a coarse meal. Add the remaining 1 cup walnuts, the dates, maple syrup, apricots, rolled oats, cocoa powder, water, cinnamon, and nutmeg and pulse and process to form a slightly chunky mixture. You may have to stop the machine several times to redistribute the ingredients, but patience pays off. The mixture will be very solid.
  4. When the ingredients are evenly distributed and none of the apricots and nuts are larger than 1/8 inch in size, transfer the mixture to the bowl with the chopped nuts.
  5. Roll up your sleeves and use your hands to work the nuts and nibs into the mixture, incorporating them thoroughly into the firm “dough.”
  6. Lightly oil your hands and roll the mixture into balls about 1 to 1 1/4 inches in diameter. Space them about 1-inch apart on the prepared baking sheets. Use the heel of your hand or fingers to press down on the balls, forming cookies about 2 inches in diameter.
  7. Press an almond into the center of each cookie and bake for 15 minutes. Do NOT overbake! Cool the cookies completely before removing them from the pan.
  8. To store the Irresistibles, put them in a heavy-duty plastic bag, but do not seal it. They keep well at room temperature for up to 1 week. For longer storage, put the Irresistibles in the refrigerator for up to 3 months.