ANYONE READY FOR DESSERT?

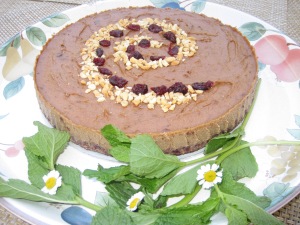
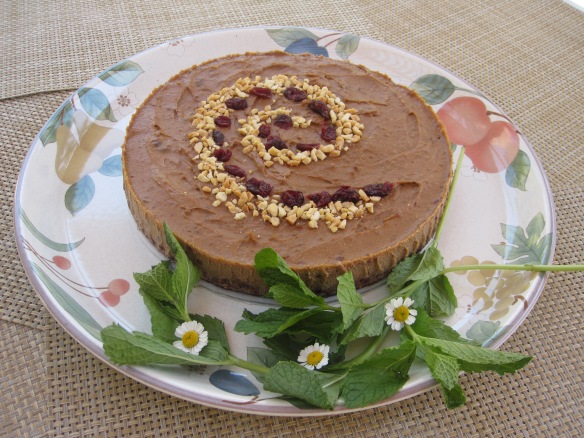
CINNAMON PEANUT BUTTER TORTE

You’ve planned a delicious appetizer for your holiday gathering and decided the entrée will be a savory dish–a cherished old family favorite. You’ve added a few well-loved side dishes and everyone’s favorite roasted potatoes. Now, what to do for an awesome dessert that doesn’t take too much fussing, yet looks sensational?

Here’s what I noticed over the years after preparing and serving many a holiday dinner: The appetizers and entrée may be exceptional, and perhaps even lavish, but most likely it’s the dessert that everyone remembers. And it’s no surprise–sweet memories linger longer.

If you loved peanut butter since you were a kid and could never get enough of it, you’ll find this well-endowed peanut butter torte easy to ravish. This torte is deliriously rich in flavor, densely packed with peanut butter, and perfectly accented with cinnamon to bring out its sweetness. The list of ingredients in this dessert relies mostly on simple, whole foods, yet, the dessert gives the impression of a much more complex preparation.

The bonus for the host is that this tantalizing treat can be prepared several days ahead and left in the freezer until shortly before serving. That’s such a bonus for a crazy-busy holiday season when you really don’t have lots of time to spend on each course. I consider it a blessing when I can make the dessert well ahead and tuck it out of site until serving time.

CINNAMON PEANUT BUTTER TORTE

Yield: 10 to 12 servings

Crust

1 1/2 cups whole almonds

1 1/2 cups sweetened dried cranberries

4 to 5 tablespoons water


Filling

1 1/3 cups pitted dates, snipped in half

1 cup smooth or chunky unsalted peanut butter

3/4 cup well-mashed firm tofu

1/2 cup unsweetened soy milk

1/4 cup organic sugar

2 teaspoons ground cinnamon

1/2 teaspoon vanilla extract


Garnish

2 tablespoons sweetened dried cranberries

1 tablespoon coarsely ground dry-roasted unsalted peanuts

6 to 8 sprigs fresh min

TO MAKE THE CRUST, cover the base of a 9-inch springform pan with a piece of parchment paper 2 inches larger. Snap the collar back onto the base, and cut off the excess paper with scissors. Lightly oil the sides of the pan and set aside.

Put the almonds into the food processor and process until they become a coarse, slightly chunky meal.

Add the cranberries and water and pulse and process until the cranberries are broken down into tiny bits and the mixture holds together when gently pressed. You may have to stop occasionally to scrape down the work bowl. Spoon the crust mixture into the bottom of the springform pan and press the mixture firmly with the back of a spoon to distribute it evenly. Set aside and wash and dry the work bowl.

TO MAKE THE FILLING, put the dates, peanut butter, tofu, soy milk, sugar, cinnamon, and vanilla extract in the food processor. Process until the mixture is smooth and creamy.

Transfer the filling to the springform pan, and use a rubber spatula to spread the filling evenly over the crust.

Sprinkle the cranberries and peanuts over top and gently press them into the surface. If desired, sprinkle them in a design of your choosing. Freeze the torte until firm, about 8 to 12 hours. Remove it from the freezer about 10 to 15 minutes before serving.

TO SERVE THE TORTE, run a knife around the edge of the pan to loosen the torte. Place the pan on a large serving platter. Carefully lift off the collar. Decorate the platter with the mint and cut the torte into wedges.


NAUGHTY LITTLE NIBBLES MAKES US HAPPY!

CHOCOLATE FIREBALLS and TAHINI PEANUT CONFECTIONS

Homemade fruit and nut confections are often considered non-glamorous and too homespun by some. True, they may not be perfectly shaped and are a bit out of round, but let’s look from a different point of view. By others, they’re beloved, delicious, and most appreciated because they’ve been lovingly hand-made by someone whose desire is to bring a tasty little treat to the table or to offer as a sweet gift.

I’ve made two happily concocted confections to share on this blog–Chocolate Fireballs and Tahini Peanut Confections. Each one is vastly different from the other, yet they pair well together.
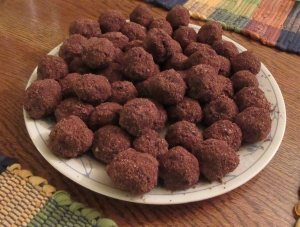
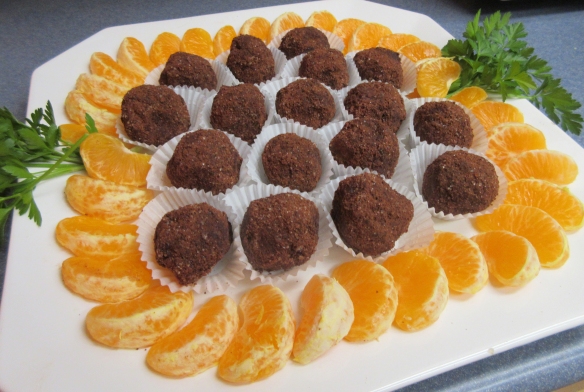
First, the Chocolate Fireballs: Most people find chocolate a total charmer. It’s no wonder–chocolate has compelling flavor that hits the tongue and totally wins you over. I say, “Go ahead–devour the chocolate!” These little treats contain no sugar, yet they’re deliciously sweet with nothing more than the earthy gifts of Mother Nature.

A little heads-up: These babies contain cayenne within the confections and also in the coating. I would judge the heat level to be between mildly spiced to just a tad more–not at the medium level, though. But, since everyone has a different spice tolerance, I thought it would be helpful to prepare you for a delightful little touch of heat and provide a little warning to those with sensitive taste buds.

If you know your guests enjoy spicy foods, say nothing and let the touch of spice be a pleasant surprise. You can enjoy watching them light up when that tiny blast of heat hits those little receivers on the tongue.
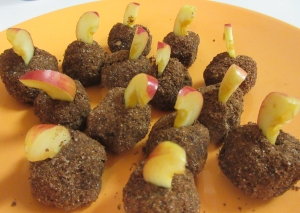
One day, when unexpected relatives dropped in for a visit, I reached into the freezer for these treats and arranged them on a dessert platter lined with a doily. Unwilling to wait for them to defrost, the cousins snapped them up and devoured them with gusto. That defining moment revealed that the confections were just as enjoyable eaten at room temperature or taken directly from the freezer. These tasty nibbles also make ideal gifts for the grandparents on your holiday list.
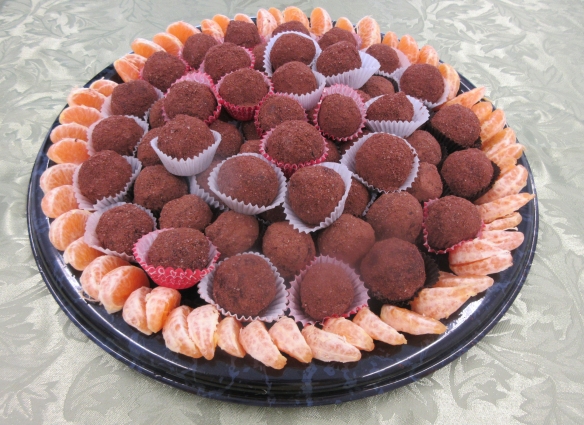
CHOCOLATE FIREBALLS

Yield: about 25 one-inch confections

Confections

1 1/2 cups whole almonds

1 1/2 cups walnuts

3 cups pitted dates, snipped in half

5 tablespoons raw cacao powder or unsweetened cocoa powder

1/4 cup plus 1 tablespoon maple syrup

2 teaspoons vanilla extract

1 teaspoon ground cinnamon

1/2 teaspoon caramel extract
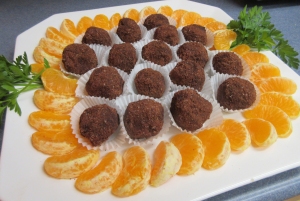
1/2 teaspoon black pepper

1/2 teaspoon cayenne

5 to 6 tablespoons water

Coating

6 tablespoons almond meal

4 tablespoons unsweetened cocoa powder

3 tablespoons organic sugar

1/4 teaspoon cayenne

TO MAKE THE CONFECTIONS, put the almonds and walnuts in the food processor and process until the nuts are finely ground but still retain a little texture. If you prefer a confection with a little crunch, process briefly so the nuts still retain their crunchy nature. Process a little longer for a smoother texture. Transfer the nuts to a large bowl.

Put the dates, cacao powder, maple syrup, vanilla, cinnamon, caramel extract, pepper, and cayenne in the food processor. Add 5 tablespoons of the water and pulse and process until the ingredients are smooth and creamy or lightly textured as desired.

Pour the date mixture into the bowl with the nuts and use your hands to thoroughly combine the ingredients. If the mixture seems too stiff, add the remaining 1 tablespoon of water and mix well to incorporate it completely. Set aside for 5 minutes.

TO MAKE THE COATING, combine the Coating ingredients in a separate bowl. Using your hands, roll the confection mixture into 1-inch balls or small logs, then, roll them in the coating, covering them completely.

Put the confections in a covered container. If using within a week or two, store the confections in the refrigerator. For longer storage, put them in the freezer. Frozen, the confections will keep for up to 3 months.

There are several ways to enjoy the confections. Some people enjoy them right from the freezer. Others prefer them partially defrosted, about 10 minutes out of the freezer. They’re also delicious served completely defrosted.

Notes:

When preparing this recipe, be sure to snip the dates in half with a kitchen scissors to avoid date pits that might damage the food processor.


Cocoa Powder vs. Raw Cacao

Most supermarkets sell unsweetened cocoa powder, while natural food markets sell both unsweetened cocoa powder and raw cacao powder. Between them there’s a world of difference.

Unsweetened cocoa powder has shed all or most of its natural fat content, leaving only a minute amount of its natural cocoa butter intact. Raw cacao powder is considerably more expensive, but some cooks consider it worth the extra price. Because it still contains its natural cocoa butter (the magical fat that boosts the flavor of the chocolate), raw cacao delivers richer flavor with more depth.

The two points to consider when deciding which chocolate to buy for baking or confections are flavor and fat content. If you’re aiming for lower fat foods, stick to the unsweetened cocoa powder. If the fat content is not a consideration, go for the more intense flavor and choose the raw cacao powder.

Caramel Extract: Caramel extract is not available in grocery stores. I order it online from J.R. Watkins – https://www.jrwatkins.com

******************************************************
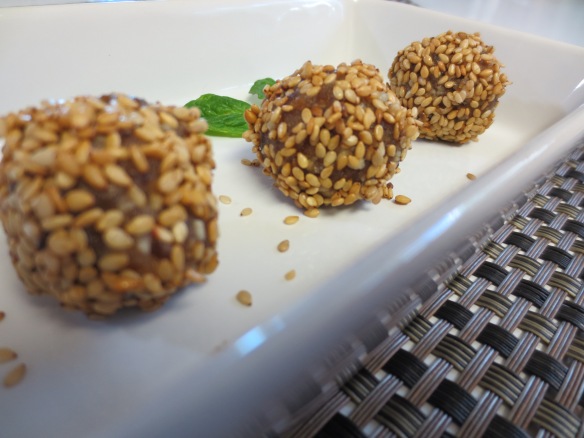
TAHINI PEANUT CONFECTIONS

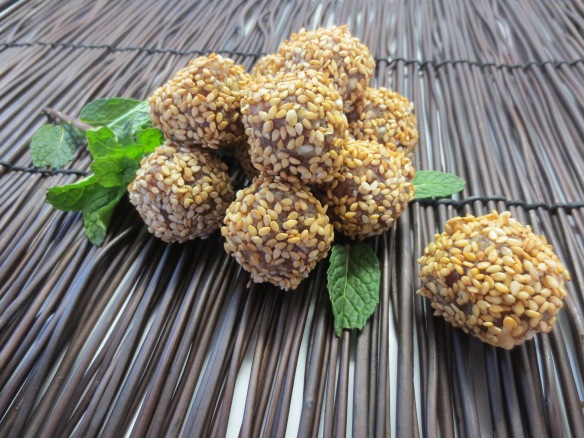
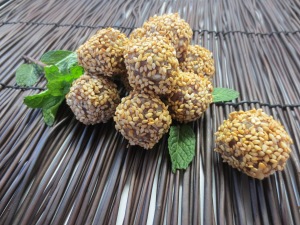
If you’re invited to dinner or a holiday party, bring some of these confections along as a hostess gift and watch the recipients beam with joy. With their captivating sesame flavor and date-sweetened goodness, these little tidbits make outstanding holiday gifts. Prepare these well ahead and keep them frozen so you can be ready when the festive season comes along. The act of giving is reward itself, but you’ll receive extra gratitude when you present these treats in an attractive jar or box attractively wrapped in their holiday best.
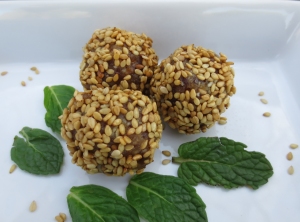
My hubby is a happy camper when he can reach into the freezer any time year-round and pluck a sweet frozen treat from the plastic container I attempt to keep filled. He claims they taste better when frozen–personally, I think he just doesn’t want to wait the ten or fifteen minutes for them to reach room temperature.

Yield: 45 to 50 confections

2 cups firmly packed pitted dates, snipped in half

1 cup roasted unsalted peanuts
1/2 cup tahini

2 to 6 tablespoons water

1/4 teaspoon caramel extract

Coating

1 cup natural or toasted sesame seeds

TO MAKE THE CONFECTIONS, combine the dates, peanuts, tahini, water, and caramel extract in the food processor and pulse and process until well blended. Longer processing will create a smoother confection. If you prefer a chunkier confection, you can control the texture by shorter processing and stopping the machine frequently to check the results.

Form the mixture into balls, using about one teaspoon for each confection. Roll, squeeze, and use your fingers to form the mixture into balls or ovals.

TO COAT THE CONFECTIONS, put the sesame seeds in a small, deep bowl and roll each ball in the seeds, coating it completely.

IF PLANNING AHEAD FOR GIFTING, put the finished confections in a covered container and store it in the refrigerator for up to 2 weeks or in the freezer for up to 3 months. Be sure to thaw the confections completely before wrapping them for gifting.

TO SERVE THE CONFECTIONS AT HOME for your own family or guests, line an attractive dish with a doily, arrange the confections on the dish, and garnish with a sprig of fresh mint. They’re delicious eaten at room temperature, chilled, or even frozen.

THE FBI LOVES THESE THUMBPRINTS!

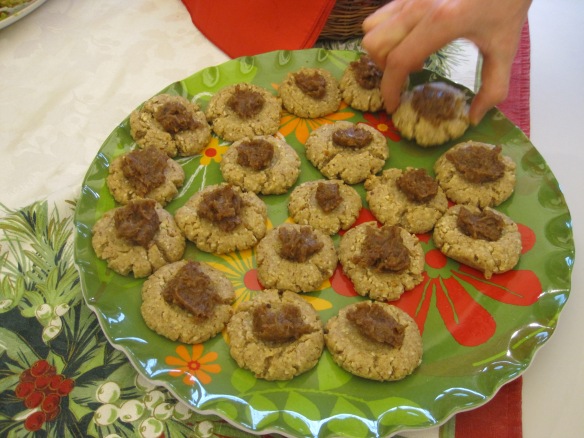
ALMOND THUMBPRINT CUTIES

If you’re hunting for a super-easy cookie recipe you can whip up in a hurry, this is your sweet treat–you and these little cuties will be best buds in a flash! But a quick assembly is not their only assets. These babies are delicious and make good keepers as well.

Traditional thumbprint cookies are filled with fruity jam, but these little treats feature centers filled with dates and almond butter, giving them an edge over jam because they deliver an appealing depth of flavor with more complexity that goes beyond sweetness from the jam.

You’ll know what I mean when you taste them. Admittedly, dates certainly are sweet, but their sweetness is strictly from nature and more subtle and satisfying–not like the extreme sweetness you get from processed sugar.

Yield: about 3 dozen

ALMOND THUMBPRINT CUTIES

Cuties

1 cup almonds

1 1/3 cups all purpose flour

1/2 cup plus 2 tablespoons vegan margarine

1/2 cup plus 3 tablespoons organic sugar

2 tablespoons water

1 teaspoon almond extract

1/2 teaspoon vanilla extract

Filling

15 pitted dates, snipped in half

2 tablespoons almond butter

2 tablespoons water

1/2 teaspoon almond extract

1/2 teaspoon vanilla extract

  1. Preheat the oven to 350 degrees F. Line two large rimmed baking sheets with parchment paper.

2. To make the cuties, put the almonds in a food processor. Process until they are ground into a finely textured meal. Add the flour, vegan margarine, sugar, water, almond extract, and vanilla extract, and process until well blended, stopping occasionally to scrape down the work bowl.

3. Roll heaping tablespoonfuls of dough into 1-inch balls and place them 1 1/2 inches apart on the prepared baking sheet.

4. Use your thumb or finger to press a deep indentation into the top of each cookie. Use your fingers to smooth out any cracks in the dough. Bake for 12 to 15 minutes, or until the tops turn a light golden. Transfer the cookies to a cooling rack or plate and let cool completely.

5. To make the filling, put the dates, almond butter, water, almond extract, and vanilla extract in a food processor. Pulse to break up the dates, and then process until smooth and creamy, stopping occasionally to scrape down the work bowl.

6. Place heaping teaspoonfuls of the date mixture into each thumbprint. Set the cookies aside in a single layer for about 3 hours, or until the filling becomes firm and dry. Stored at room temperature in a covered container, Almond Thumbprint Cuties will keep for 1 or 2 days; refrigerated, for 1 week, and in the freezer, 3 months.

FIGGY LOVE IN EVERY BITE!

Fig CrackersFIGGY WAFERS

Hunting for a stand-out holiday appetizer? I think I’ve got just the one!

Welcome your holiday guests with something warming to sip and a surprise taste adventure to invigorate the appetites –a platter of Figgy Wafers. Beautiful little flavor-infused morsels, these delicious crackers stand out because of a generous measure of aromatic cardamom to complement the sweetness of the figs.

While these irresistible little wafers make wonderful tidbits without accompaniments, pair them with a thin slice of vegan cheese and send your happy little flavor receptors into vegan nirvana. Even better, top the crackers with a slice of banana and then put the cheese on top.

Fig CrackersPlan ahead for the holidays by making one or more batches of the recipe, rolling them into logs, and freezing them. Then, when you’re planning to serve them, it takes only a few minutes to slice and bake them.

 FIGGY WAFERS


Yield: about 40 slices

10 dried figs, either black or golden

1/4 cup rum or brandyFig Crackers

1/2 cup whole almonds

1 cup Old Fashioned rolled oats

1/4 cup whole-wheat pastry flour

1/2 to 1 teaspoon ground cardamom

1/4 teaspoon salt

1/4 cup dairy-free margarine

  1. Have ready a large bowl and a pair of kitchen scissors. Using the scissors, snip off and discard the tough stems from the figs and snip the figs into small dice into the bowl. Pour the rum over the figs and set aside to soak for several hours or overnight.
  2. Combine the almonds, rolled oats, flour, ground cardamom, and salt in a food processor. Pulse until the ingredients are finely ground.
  3. Add the margarine and pulse until the mixture becomes crumbly. Transfer the mixture to the bowl with the figs and use a fork to blend the mixture into a dough.
  4. Form the dough into a long log about 2 inches in diameter. Wrap in plastic and freeze for at least 3 or 4 hours, or until solidly frozen. The log will stay fresh in the freezer for up to 3 months.
  5. When ready to bake the wafers, preheat the oven to 350 degrees F. and line a large, rimmed baking sheet with parchment.
  6. Unwrap the frozen log and use a firm, thin-bladed knife to cut it into 1/8-inch slices. Put them on the prepared baking sheet and bake for 15 to 18 minutes. Carefully, lift the wafers with a metal spatula and transfer them to a platter to cool completely.

Fig CrackersA Note About Cardamom

Because cardamom is not as familiar a spice as cinnamon, it frequently gets overlooked. But give it an opportunity to show its mojo and you’ll be hooked.

cardamom-greenYou can buy this spice already ground into a powder in the spice section of most markets. You can also find it in Asian and Indian markets where it’s available in whole pods or already ground. While the ground cardamom is certainly more convenient, it quickly loses its pungency and its flavor fades.Cardamom brown

For its flavor delightful strength I much prefer to buy the whole pods and crush the small seeds with a pestle. Really fresh pods are green, but if they’ve been around awhile, they turn beige. It’s a bit painstaking because first I pound each pod to open it. The, one-by-one by hand I open each pod and empty the seeds into the mortar. You can also put the seeds into a spice grinder for a quicker grinding process.

A PANFORTE TO DAZZLE CHOCOLATE LOVERS!

Chocolate Panforte

Panforte

CHOCOLATE PANFORTE

For those unfamiliar with this very special holiday treat, panforte is a divinely rich confection packed with dried fruits, nuts, and spices, baked in a 7-or 8-inch slab, and coated with confectioner’s sugar. The traditional Italian recipe contains glazed fruits, but I much prefer the sweet, tangy flavor dried fruits contribute to the recipe. When chocolate and lots of spice is added to the mixture, each bite becomes pure nirvana, delivering a delicious melt-in-the-mouth medley of fruit, nut, spice, and chocolate flavors all at once. In other words, all those heavenly flavors and textures you could possibly desire in a holiday candy.

This recipe is ideal for plan-ahead kitchen wizards who love to make their cookies and confections well-ahead of the holiday and freeze or refrigerate them. Then, when they need them, they can easily reach into the fridge or freezer and the muss and fuss is well behind.

Chocolate PanforteDuring the autumn season, I make several batches of panforte, wrap them in double layers of plastic wrap, and tuck them into the fridge. Knowing I’ll be entertaining and going to several parties during the holiday season, my early prep serves me quite well.

A homemade panforte also makes an fabulous gift that can be safely shipped to friends and family across the country without spoilage. Once they taste, the lucky recipients will send you messages filled with OMGs!

Panforte

Entertaining at home during the holidays, I like to serve the panforte as an extra treat. Several hours before dessert time, I remove the panforte from the refrigerator and allow it to come to room temperature for best flavor. Then, I unwrap a slab and put it on a colorful plate garnished with real or plastic holly. If the panforte is the only dessert, I’ll cut it into thin wedges like a pie. When serving it along with other desserts, I cut it into bite-size pieces, about 1-inch square. Because it’s quite rich, a little goes a long way.

Panforte makes an impressive homemade gift. Before gifting, tie a holiday ribbon over the plastic wrap, make a large bow, and present the panforte with a happy holiday wish. I like to add a touch of holly to the wrapping–it does such a great job of conveying the holiday message and makes an attractive addition to the presentation.

Here’s the process: Line the pie pans with parchment. Roast the nuts. Cut the fruits, Combine the fruits. Add spices and nuts. Make syrup and add to mixture. Spoon and press into parchment-lined pans. Bake. Cool. Dust with confectioner’s sugar. Ready to wrap.

Chocolate PanforteChocolate Panforte


Chocolate PanforteChocolate Panforte

Chocolate PanforteChocolate Panforte

Chocolate PanforteCHOCOLATE PANFORTE

Yield: four 8-inch round slabs

Panforte

2 cups pecansChocolate Panforte

1 3/4 cups walnuts

1 1/4 cups almonds

1 cup dried dried apricots, diced (i used Melissa’s)

1 cup flour (oat, all purpose, or whole wheat pastry flour)

3/4 cup plus 2 tablespoons organic sugar

1/2 cup raisins

1/2 cup chopped dates

1/2 cup sweetened dried cranberries (I used Melissa’s from melissas.com)

Zest of 1 lemon or orange

1 tablespoon plus 1 1/2 teaspoons ground cinnamon

1 1/2 teaspoons ground nutmegChocolate Panforte

3/4 teaspoon ground cloves

3/4 teaspoon ground cardamom

3/4 teaspoon ground black pepper

Chocolate Syrup

1 cup organic sugar

1 cup agave nectar

4 ounces unsweetened chocolate, broken into several pieces

1 cup powdered sugar

Preheat the oven to 350 degrees F. and have ready 2 large rimmed baking sheets and four 8-inch pie pans or cake pans lined with enough parchment to drape generously over the sides. Place 2 pans on each baking sheet. Set aside.

TO MAKE THE PANFORTE, spread the pecans, walnuts, and almonds on one of the baking sheets and toast them in the oven for 9 minutes. Immediately transfer the nuts to a large platter to cool and turn off the oven.

In an extra large bowl, combine the apricots, flour, sugar, raisins, dates, cranberries, lemon zest, cinnamon, nutmeg, cloves, cardamom, and pepper.

When the nuts are cool, add them to the bowl and mix well to distribute the ingredients evenly. Set aside.

TO MAKE THE SYRUP, combine the sugar and agave nectar in a 2 to 3-quart saucepan and mix well. Put the chocolate in a bowl and place it near the stove-top. Attach a candy thermometer to the side of the saucepan and place the pan over medium-high heat. Boil until the temperature reaches 225 degrees F., approximately 5 minutes. This can happen very quickly. Do not stir during the boiling.

Turn off the heat as soon as the mixture reaches 225 degrees F. and stir in the chocolate. Continue stirring until the chocolate is completely melted.

Pour the chocolate syrup into the fruit-nut mixture and use a heavy-duty wooden spoon to stir and coat the ingredients completely. The mixture quickly becomes quite stiff and you’ll need to apply muscle power to combine the syrup and fruit-nut mixture.

Preheat the oven to 325 degrees F. Use a metal spoon to distribute the mixture equally among the prepared pans, a heaping spoonful at a time, packing it down before adding another. Bake for 30 minutes. Let cool completely for several hours before removing the panforte slabs from the pans.

Then, carefully, remove the parchment from each slab and dust each heavily with the powdered sugar on both sides, using your hands to coat them completely.

TO SERVE THE PANFORTE, use a sharp, heavy-duty knife to cut the panforte into very thin wedges or into 1-inch pieces. If not serving right away, double-wrap each panforte in plastic wrap. The panforte will keep for a month or two at room temperature or for 1 year in the refrigerator.

Panforte

HOW TO BLANCH ALMONDS AND HAZELNUTS

Blanched Almonds & HazelnutsWhile it’s always best to eat the whole nuts and enjoy the benefits of their high fiber and high levels of antioxidants, some recipes call for blanched nuts, that is, nuts with their skins removed. Some call these naked nuts.

I’ll have to admit that sometimes, their bright white appearance adds to the eye appeal of the final dish.

So, here are the easy methods for blanching. Surprisingly, the process is quite different for almonds than it is for hazelnuts. Yet, both are easy, but can be a bit time consuming if you have a large quantity.

BLANCHING ALMONDS

almond3Cooking: Bring a pot of water to a boil. Add the almonds and boil for 1 minute, then use a slotted spoon to transfer the nuts to a double-thick towel. Fold the towel and enclose the nuts completely. Let them sweat for 1 or 2 minutes.

Alternatively, put the nuts in a deep bowl, and pour boiling water over them to cover. Allow them to stand for 3 to 5 minutes. Then, sweat them in a towel for 1 or 2 minutes.

Peeling: Now, it’s a one-nut-at-a-time peeling project. Hold the wider end of the almond Blanched Almondsbetween your thumb and index finger and pinch. The skins should come off easily, with the nut sliding out from the pointed end. Try not to pinch too hard! Too much pressure may send those naked little almonds flying across the room. After a few of these, you’ll begin to judge just how much pressure to apply to the pinch. It’s a patient process–pour yourself a cup of tea and enjoy a few sips between nut pinching.

BLANCHING HAZELNUTS

hazelnutThe old-fashioned method of blanching hazelnuts (removing the skins) was to use a small, firm paring knife and peel the skins off with a pulling motion. But thankfully, some clever chefs have given us a much easier method.

Cooking: Preheat the oven to 350 degrees F. Roast the hazelnuts on a baking sheet for 10 to 12 minutes. Pour the nuts onto a thick, double layer terrycloth towel and seal them up tightly to sweat for about 5 minutes.

Peeling: Then, keeping the towel closed, rub the nuts like the dickens, rubbing firmly for a Blanched hazelnutsfull minute or two. You can also use a rolling motion while pressing firmly down on the nuts.

It takes a vigorous rubbing. Open the towel and you will see that many, but not all the skins have been rubbed off. Don’t worry about the skins that cling to the nuts–they provide excellent fiber and some antioxidants as well. Some find the speckled nuts quite attractive.

If you want the nuts perfectly clean, put them back in the oven for about 10 minutes and repeat the rubbing to remove the remaining skins.

MAKE IT ITALIAN–MAMA MIA!!!!

TOMATO-PINE NUT PIE WITH SWEET POTATO AND NUT CRUST

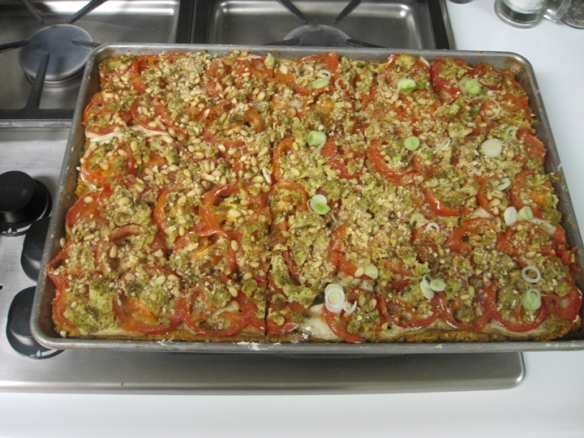
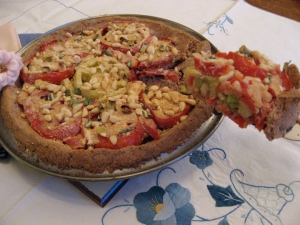
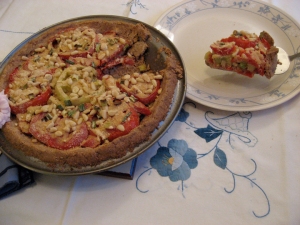
Tomato Pine Nut Pie SummerSuch a beauty and such a company favorite! You don’t even have to wait for the holidays to enjoy this tasty dish, because all the ingredients are available year-round.

In summer, when the home-grown or farm-stand tomatoes are fire-engine red, melt-in-the-mouth sweet and ultra juicy, the pie has a bright, cheery appearance. So tempting, the summer pie looks like the one above.

The bright tomato color turns a bit pastel in winter, but the pie still pops with the rich OacakesItalian-inspired flavor of homemade “Parmesan” and always makes guests ooohh and aaaahhh a little. I think it’s because this pie is so unique and looks really appetizing and festive.

The first thing my guests notice is the unusual crust. And, yes, it is certainly different. Rather than a standard flour-based pie crust, this one features sweet potatoes and almonds and balances the savory flavors with a pleasant, delicate sweetness.

For a small gathering, one pie is just right and can actually go a little farther if there are several other dishes on the menu. When I was expecting about 15 people, I doubled the recipe and prepared it in a large rimmed baking sheet. Of course, I planned an additional entrée and several side dishes, too. Made in the baking sheet, the pie becomes more of a tart and makes a delicious appetizer, too.

Pine Nut Tomato TartTOMATO-PINE NUT PIE WITH SWEET POTATO AND NUT CRUST

Yield: 1 (9-inch) pie or 6 servings

Crust

12 ounces sweet potatoes or yams, peeled and cut into 1-inch pieces

1 1/4 cups whole almondsOacakes

2/3 cup mashed tofu

1/4 teaspoon salt

  1. Preheat the oven to 350 degrees F. Light oil a 9-inch pie pan.
  2. To make the crust, put the sweet potatoes in a 2-quart saucepan with water to cover. Cover and bring to a boil over high heat. Decrease the heat to medium and simmer for 5 minutes, or until the sweet potatoes are fork-tender. Drain the sweet potatoes well, transfer them to a large bowl and mash them well. Set aside.
  3. Put the almonds in a food processor. Process until they are finely ground, yet still retain a little texture. Add the tofu and salt and process until well incorporated, stopping occasionally to scrape down the work bowl. Spoon the tofu mixture into the bowl with the sweet potatoes and mix well.
  4. Spoon the sweet potato mixture into the prepared pan. Use your fingers to press it onto the bottom and up the sides of the pan. Build up the sides of the crust 1/2 -inch higher than the pie pan. Bake the crust for 15 minutes and let cool.

FillingOacakes

2 green onions, sliced

1 to 2 large cloves garlic, minced

1/3 cup pine nuts

2 to 3 tablespoons Homemade Parmesan (recipe below) or prepared vegan Parmesan

2 to 3 tablespoons cornstarch

1 small eggplant, peeled and sliced into 1/8-inch slices

Salt

Freshly ground pepper

4 to 5 large red or green tomatoes, seeded and sliced

  1. To make the filling, put the green onions, garlic, pine nuts, and Homemade Parmesan in individual bowls. Sprinkle the cornstarch on a plate.
  2. Cover the bottom of the crust with one layer of eggplant slices. (This prevents the crust from getting soggy). Reserve remaining eggplant for another use. Sprinkle the eggplant slices with salt and pepper.
  3. Dredge only the first layer of the tomato slices in the cornstarch. Arrange the dredged tomato slices over the eggplant, filling all the spaces with small bits of tomato. Sprinkle lightly with salt and pepper. Sprinkle one third each of the green onions, garlic, pine nuts, and Homemade Parmesan over the tomatoes. Repeat the process to make three layers.
  4. Bake for 45 minutes. Let cool 10 to 15 minutes before serving.Vegan Holidays lowres

Note: If using green tomatoes, the pie might have to bake another 15 minutes.

This recipe is one of the tasty dishes from my Vegan for the Holidays cookbook. Order from Vegetarians in Paradise http://www.vegparadise.com or from Amazon.com

HOMEMADE PARMESAN

Often I’ve come to rely on a sprinkle of vegan Parmesan to add sparkle to a dish, soup, a casserole, or an appetizer. With only five ingredients, this recipe is almost instant to make and tastes enough like the real thing to put the Italian touch on everything from pizza to minestrone and a host of holiday or everyday dishes.

1 cup almonds

1 tablespoon plus 1 1/2 teaspoons nutritional yeast flakes

1 teaspoon onion powder

1 teaspoon salt

1/2 teaspoon garlic powder

  1. Put the almonds in a food processor. Process until they are finely ground, yet still retain a bit of texture. (Avoid over-processing or it will turn into almond butter.)
  1. Add the nutritional yeast, onion powder, salt, and garlic powder and pulse until well mixed. Transfer to a covered container and refrigerate until ready to use. Covered and refrigerated, Homemade Parmesan will keep for 3 months.

HATCH CHILES BRING SPARKLE TO THE HOLIDAY TABLE!

Roasted Sweet Potatoes 2

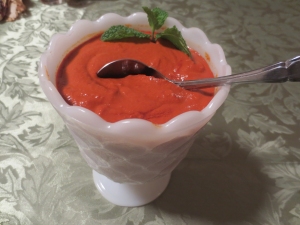
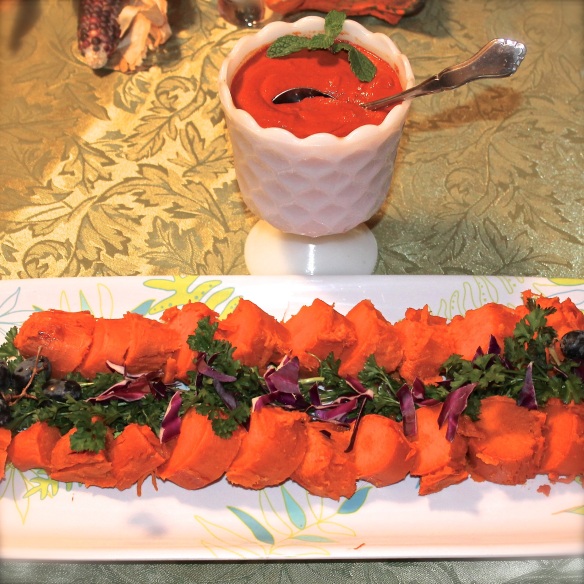
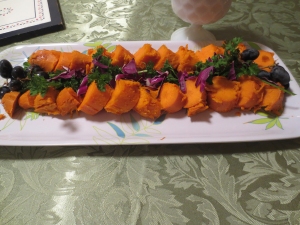
vvplogoYour roasted sweet potatoes will practically dance with holiday spirit when they’re drizzled with the zesty nature of this mild chile sauce. And I promise the sauce has just enough mojo to put a magic touch on your festive meal. The sauce can be prepared a day or two ahead and served warmed, chilled, or at room temperature. Leftovers keep well in the fridge for at least 4 or 5 days.

To create a creamy, smooth as velvet sauce, it helps to have a high-speed blender, but with patient soaking and longer blending it should work just fine with a regular blender.

I experimented with this dish for Thanksgiving for the first time. It was such a big hit, I felt it could be a terrific side dish any time during the holiday season.

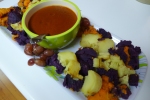
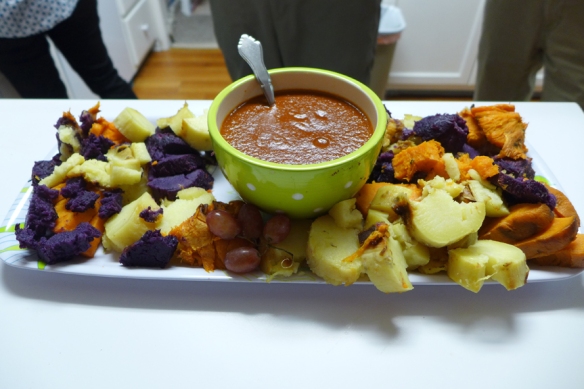
Then, the following year, I decided to bring more colors to the platter with multi-colored sweet potatoes. In addition to the familiar orange yams, my local Korean market had yellow sweet potatoes and a delicious variety of purple ones called Okinawan sweet potatoes. The lighting wasn’t at its best for a great photo, but I think the result is so appealing I wanted to share it.

Multi-color potatoes 2

ROASTED SWEET POTATOES WITH SIZZLING CHILE SAUCE

Yield: 6 servings

Sweet Potatoes

5 or 6 medium yellow or orange sweet potatoesRoasted Sweet Potatoes

Sizzling Chile Sauce (recipe below)

Parsley sprigs, for garnish

3 to 4 tablespoons chopped purple cabbage, for garnish

  1. Preheat the oven to 400 degrees F. (Gas Mark 6) and have ready a large rimmed baking sheet lined with aluminum foil.
  1. Scrub the sweet potatoes, put them on the prepared baking sheet, and roast for 50 to 60 minutes, or until they are soft when gently pressed. Prepare the Sizzling Chile Sauce while the sweet potatoes are baking.
  1. When the sweet potatoes are done, peel them and cut them into 1-inch thick slices. Multi-color Sweet PotatoesArrange them on a large platter, overlapping the slices. Garnish with the parsley and cabbage. Alternatively, drizzle some of the sauce over the center of each potato slice.


Sizzling Chile Sauce (Makes about 3 cups)

Chile Sauce2 ounces (56g) Melissa’s dried Hatch chiles or California chiles (about 8 to 10 dried chiles)

3 cups (720 ml) boiling water

2/3 cup (160 ml) chopped onions

5 garlic cloves, coarsely chopped

2 teaspoons extra virgin olive oil

1/3 cup (80 ml) coarsely chopped almonds

2 tablespoons toasted sesame seeds

1 teaspoon salt

1/4 cup (60 ml) brown sugar

1/4 cup (60 ml) rice vinegar or other mild vinegar

  1. Prepare the Sizzling Chile Sauce while the sweet potatoes are baking. Using kitchen scissors, cut the chiles open and discard the seeds, ribs, and stems. Snip the chiles into coarse pieces and put them in a bowl. Pour the boiling water over the chiles to cover. Set aside to soften for about 1 hour.
  1. Meanwhile, combine the onions, garlic, and olive oil in a 10-inch (25 cm) skillet. Cook and stir over high or medium-high heat for 2 to 3 minutes, or until the onions begin to soften. Add 1 or more tablespoons of water if needed to prevent burning the onions and garlic.
  1. Add the almonds and sesame seeds to the pan and cook another minute or two.
  1. Transfer the onion mixture to a blender and add the salt, brown sugar, and vinegar.
  1. When the chiles have softened, use a slotted spoon to transfer them to the blender. Add 1 cup (240 ml) of the chile soak water and process for a full minute or two until the sauce becomes smooth and creamy. Adjust seasonings, if needed, and serve the sauce on the side.

Alternative serving suggestion: Spoon a line of the sauce down the center of the overlapped sweet potato slices and add a pinch of minced parsley over the sauce. Serve the remaining sauce on the side.


This recipe is part of a fun blogging chain that includes about 96 innovative bloggers sharing amazing holiday recipes. You can easily move backward or forward through the Potluck chain to explore a banquet of tantalizing recipe posts crossing many continents.

To venture over to the blog that precedes mine in the Potluck, click on the go back buttongo_bck-300x257


go_forward-300x243To venture over to the blog that follows mine in the Potluck click on the go forward button


To start at the beginning of the Potluck, click on the stay calm button

Stay-Calm-Beginning-Red


Enjoy the fun holiday recipes and have a holiday blast!!!!!


Taste the Irrestibles — Resistance is Futile!

irresistible on platterIRRESISTIBLES

My goal was to come up with a special cookie for the holiday cookie tray–and to make a cookie with a long shelf life so the recipe could be prepared in advance for giving as gifts.

I just love it when a first-time experiment comes together on the first try. That was my reward when I decided to do something unique with a fruit and nut mixture that often serves as the base of many commercial raw fruit bars.

I loaded the fruity mixture with tons of nuts and wanted to see what would happen if I formed it into cookies and baked them. But for how long? And how big should I make them?

I took a stab at making them 2 inches in diameter and baking them 15 for minutes. OMG! Irresistible On baking panThey were absolutely IRRESISTIBLE! Yet, with their unusual texture they really weren’t like the familiar crispy cookies most people know, nor were they confections–but, interestingly, somewhere in-between.

It was not only the irresistible flavor these offer, but also the exceptional crunchy-on-the-outside chewy-on-the-inside texture that was so appealing. Here’s another thing I noticed: They kept amazingly well sitting on my kitchen counter in a heavy-duty plastic bag I had left open for several days. When I sealed the plastic bag, the cookies would lose their crunch. The following week I packed them in my suitcase and took them to Massachusetts when visiting my daughter, and they still tasted irresistibly delicious.

I had a few of these little goodies left at home sitting on the counter in an open plastic bag and was delighted that time (about 3 weeks) had not diminished their exceptional flavor or texture.

They’re great travelers! Take them on a plane trip, pack them on a road trip (the kids will love ’em), wrap them in a gift box and ship them to far-away friends and family. All they need is a good home equipped with a pack of cookie monsters.

I knew I had something special and that they would make welcome little homemade gifts during the holidays. If I wrapped them in blue ribbon, I might bring them to a Hanukkah party. I could tie them up with a red and green bow and they would be perfect nibbles for my friend’s Grandma for Christmas.  And by putting the Irresistibles in a gift box wrapped with red, green, and black, they would make the perfect homemade Kwanzaa gift for someone special.

Here are a few handy notes that will help bring the recipe together with ease. You’ll need:

  • A hammer for coarsely chopping the almonds
  • A hand-crank nut mill for coarsely grinding the walnuts
  • A large food processor, at least 11 cup capacity
  • Kitchen scissors for snipping the dates and dried apricots

When the Irresistibles are baked and cooled, treat yourself to one, or two, or—-maybe just one more!

IRRESISTIBLES

Yield: about 50 cookies


2 1/2 cups almonds, dividedIrresistible Single

1 1/2 cups walnuts, divided

2 tablespoons raw cacao nibs


1 1/2 cups pitted dates, snipped in half

3/4 cup maple syrup

1/2 cup Turkish apricots, snipped in half

1/2 cup rolled oats

3 tablespoons unsweetened cocoa powder or raw cacao powder

2 tablespoons water

1 teaspoon ground cinnamon

1/2 teaspoon ground nutmeg


30 whole almonds

  1. Preheat the oven to 325 degrees F. and line 3 large rimmed baking sheets with parchment.
  2. Put 1 cup of the almonds in a heavy-duty plastic bag, seal it, and coarsely chop the nuts with a hammer. Transfer the nuts to a large mixing bowl. Put 1/2 cup of the walnuts in a hand-crank nut mill and coarsely grind them. Add them to the bowl with the the almonds, add the cacao nibs, and set aside.
  3. Put the remaining 1 1/2 cups of almonds into the food processor and process to form a coarse meal. Add the remaining 1 cup walnuts, the dates, maple syrup, apricots, rolled oats, cocoa powder, water, cinnamon, and nutmeg and pulse and process to form a slightly chunky mixture. You may have to stop the machine several times to redistribute the ingredients, but patience pays off. The mixture will be very solid.
  4. When the ingredients are evenly distributed and none of the apricots and nuts are larger than 1/8 inch in size, transfer the mixture to the bowl with the chopped nuts.
  5. Roll up your sleeves and use your hands to work the nuts and nibs into the mixture, incorporating them thoroughly into the firm “dough.”
  6. Lightly oil your hands and roll the mixture into balls about 1 to 1 1/4 inches in diameter. Space them about 1-inch apart on the prepared baking sheets. Use the heel of your hand or fingers to press down on the balls, forming cookies about 2 inches in diameter.
  7. Press an almond into the center of each cookie and bake for 15 minutes. Do NOT overbake! Cool the cookies completely before removing them from the pan.
  8. To store the Irresistibles, put them in a heavy-duty plastic bag, but do not seal it. They keep well at room temperature for up to 1 week. For longer storage, put the Irresistibles in the refrigerator for up to 3 months.

Fruity Oat Bulldogs–the Cutest Little Muffins!

 FRUITY OAT BULLDOGS

Fruilty Oat BulldodgsNot really a typical muffin—not at all a cupcake—neither a scone nor a brownie. In my effort to create a delicious, honestly healthy, and easy-to-make gluten-free breakfast or brunch treat, this little creation sprung from the oven and found its way onto my dish. It was yummy and because of its stubby, compact nature, it reminded me of a little bulldog. Though it’s a strange name for a muffin-like goody, bulldog it is! Aside from the awesome flavor and delightfully dense texture, these treats are a snap to assemble–a bowl and a processor does the job and cleanup is almost instant!
Loaded with spices, made without flour, and sweetened only with dates, these unique muffin-like cakes have many additional guilt-free features: no added fats like margarine or oil, plenty of soluble fiber from old-fashioned rolled oats, and crunchy, chopped hazelnuts or almonds to help lower cholesterol. One recipe will make two lucky people on your gift list the recipients of a half-dozen Bulldogs each. To spread the joy even further, follow the suggestion below to create four dozen adorable little mini muffins and package them in small gift boxes tied with holiday ribbons.

Fruity Bulldogs parchmentIf you decide to make the bulldogs ahead of the holidays and want to freeze them for your own family, put them into heavy-duty ziplock bags and tuck them into the freezer for up to three months. To warm them for breakfast or brunch, preheat the oven to 375 degrees F. Take the bulldogs right from the freezer, put them on a parchment-lined baking sheet, and warm for 17 to 20 minutes.

Releasing the Perfect Muffin

I’ve made many a muffin that either sticks to the metal muffin tins or doesn’t come out clean from the parchment baking cups. But I’ve found perfection in silicone baking pans–and they don’t even need to be oiled. They come in several shapes for other baking needs like loaf pans and cake pans. The secret is adjusting the baking times to the silicone pans and allowing the muffins to cool completely before removing them from the pan.

FRUITY OAT BULLDOGS

Yield: 1 dozen

2 3/4 cups old fashioned rolled oatsBuldog Muffin

2 teaspoons baking powder

1 1/2 teaspoons ground cinnamon

1 teaspoon ground nutmeg

1/2 teaspoon baking soda

1/4 teaspoon ground cloves

1/4 teaspoon salt


3/4 cup almonds or hazelnuts


1 1/2 cups pitted dates, snipped in half

1/4 cup plus 2 tablespoons water


1 cup mashed bananas

1 tablespoon plus 1 teaspoon mild vinegar (rice, cider, or distilled vinegar)

1 teaspoon vanilla extract

1/2 teaspoon caramel extract

1 1/4 cups vanilla or regular soymilk


Garnish

12 whole almonds

12 dates, cut in half

Fruity Bullldogs for BreakfastPreheat the oven to 350 degrees F. and line 2 six-section muffin tins with baking cups. Alternatively, use an ungreased, 12-section silicone muffin pan. Place the muffin pans on a large rimmed baking sheet for easy handling.

  1. In a large mixing bowl, combine the rolled oats, baking powder, cinnamon, nutmeg, baking soda, cloves, and salt and mix well.
  2. Put the almonds in a heavy-duty plastic bag and use a hammer or a 1-pound can to chop them coarsely. Add the chopped almonds to the bowl.
  3. Create a coarse date puree by putting the dates into the food processor. With the machine running, drizzle in the water. Pulse and process until the dates are coarsely pureed.
  4. Add the mashed bananas, vinegar, vanilla extract, and caramel extract to the date puree. With the machine running, slowly pour in the soymilk and process briefly, just until the ingredients are well incorporated.
  5. Add the wet ingredients to the dry ingredients and mix thoroughly. Fill the muffin pans using the entire batter. They will be slightly overfull.
  6. To garnish, poke 1 almond into the center of each muffin and push 2 date halves into each muffin next to the almond. Bake for 25 to 30 minutes or until a toothpick inserted into the center comes out clean. Cool completely before removing from the pans.

Notes:

The date puree measures 1 cup.

For a touch more spice, add 1/4 to 1/2 teaspoon pumpkin pie spice.

Suggestion:

Turn your one-dozen muffins into four dozen of the cutest little mini muffins you’ve ever seen by baking them in mini muffin pans. Baked in metal mini pans, the muffins will be done in about 12 to 16 minutes. The silicone mini muffin pans make slightly larger minis and will bake in about 15 to 18 minutes.

To prepare well ahead of the holidays, put the baked mini muffins on metal or plastic dishes or trays and put them, uncovered, into the freezer. When completely frozen, transfer the muffins to a heavy-duty plastic bag and seal tightly. Defrost the muffins before packaging them for gift giving.