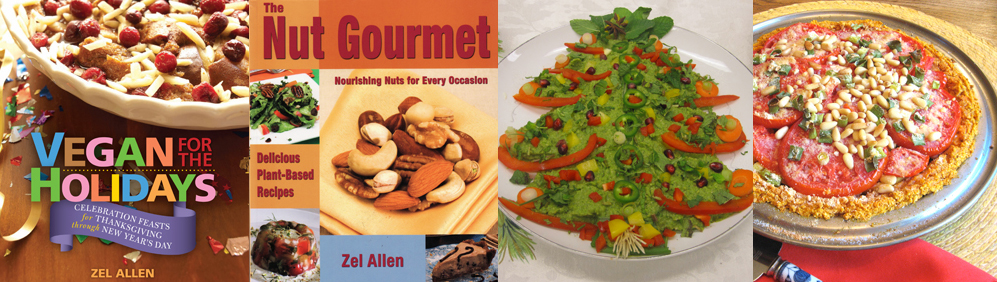
Taste the Irrestibles — Resistance is Futile!

irresistible on platterIRRESISTIBLES

My goal was to come up with a special cookie for the holiday cookie tray–and to make a cookie with a long shelf life so the recipe could be prepared in advance for giving as gifts.

I just love it when a first-time experiment comes together on the first try. That was my reward when I decided to do something unique with a fruit and nut mixture that often serves as the base of many commercial raw fruit bars.

I loaded the fruity mixture with tons of nuts and wanted to see what would happen if I formed it into cookies and baked them. But for how long? And how big should I make them?

I took a stab at making them 2 inches in diameter and baking them 15 for minutes. OMG! Irresistible On baking panThey were absolutely IRRESISTIBLE! Yet, with their unusual texture they really weren’t like the familiar crispy cookies most people know, nor were they confections–but, interestingly, somewhere in-between.

It was not only the irresistible flavor these offer, but also the exceptional crunchy-on-the-outside chewy-on-the-inside texture that was so appealing. Here’s another thing I noticed: They kept amazingly well sitting on my kitchen counter in a heavy-duty plastic bag I had left open for several days. When I sealed the plastic bag, the cookies would lose their crunch. The following week I packed them in my suitcase and took them to Massachusetts when visiting my daughter, and they still tasted irresistibly delicious.

I had a few of these little goodies left at home sitting on the counter in an open plastic bag and was delighted that time (about 3 weeks) had not diminished their exceptional flavor or texture.

They’re great travelers! Take them on a plane trip, pack them on a road trip (the kids will love ’em), wrap them in a gift box and ship them to far-away friends and family. All they need is a good home equipped with a pack of cookie monsters.

I knew I had something special and that they would make welcome little homemade gifts during the holidays. If I wrapped them in blue ribbon, I might bring them to a Hanukkah party. I could tie them up with a red and green bow and they would be perfect nibbles for my friend’s Grandma for Christmas.  And by putting the Irresistibles in a gift box wrapped with red, green, and black, they would make the perfect homemade Kwanzaa gift for someone special.

Here are a few handy notes that will help bring the recipe together with ease. You’ll need:

  • A hammer for coarsely chopping the almonds
  • A hand-crank nut mill for coarsely grinding the walnuts
  • A large food processor, at least 11 cup capacity
  • Kitchen scissors for snipping the dates and dried apricots

When the Irresistibles are baked and cooled, treat yourself to one, or two, or—-maybe just one more!

IRRESISTIBLES

Yield: about 50 cookies


2 1/2 cups almonds, dividedIrresistible Single

1 1/2 cups walnuts, divided

2 tablespoons raw cacao nibs


1 1/2 cups pitted dates, snipped in half

3/4 cup maple syrup

1/2 cup Turkish apricots, snipped in half

1/2 cup rolled oats

3 tablespoons unsweetened cocoa powder or raw cacao powder

2 tablespoons water

1 teaspoon ground cinnamon

1/2 teaspoon ground nutmeg


30 whole almonds

  1. Preheat the oven to 325 degrees F. and line 3 large rimmed baking sheets with parchment.
  2. Put 1 cup of the almonds in a heavy-duty plastic bag, seal it, and coarsely chop the nuts with a hammer. Transfer the nuts to a large mixing bowl. Put 1/2 cup of the walnuts in a hand-crank nut mill and coarsely grind them. Add them to the bowl with the the almonds, add the cacao nibs, and set aside.
  3. Put the remaining 1 1/2 cups of almonds into the food processor and process to form a coarse meal. Add the remaining 1 cup walnuts, the dates, maple syrup, apricots, rolled oats, cocoa powder, water, cinnamon, and nutmeg and pulse and process to form a slightly chunky mixture. You may have to stop the machine several times to redistribute the ingredients, but patience pays off. The mixture will be very solid.
  4. When the ingredients are evenly distributed and none of the apricots and nuts are larger than 1/8 inch in size, transfer the mixture to the bowl with the chopped nuts.
  5. Roll up your sleeves and use your hands to work the nuts and nibs into the mixture, incorporating them thoroughly into the firm “dough.”
  6. Lightly oil your hands and roll the mixture into balls about 1 to 1 1/4 inches in diameter. Space them about 1-inch apart on the prepared baking sheets. Use the heel of your hand or fingers to press down on the balls, forming cookies about 2 inches in diameter.
  7. Press an almond into the center of each cookie and bake for 15 minutes. Do NOT overbake! Cool the cookies completely before removing them from the pan.
  8. To store the Irresistibles, put them in a heavy-duty plastic bag, but do not seal it. They keep well at room temperature for up to 1 week. For longer storage, put the Irresistibles in the refrigerator for up to 3 months.

Pecan Lovers Scramble for a Piece of Pie!

DOWN HOME PECAN PIE

Because pecans are native to the American South, they frequently turn up as pecan pie on Southern dessert menus in homes and restaurants. And many home cooks have their own treasured family recipe–possibly even one handed down from grandma’s cherished blend of pecans, sugar, and spices. pecan downhomeI have great respect for those heirloom recipes that bring families together at special times like the holiday season. And I also love the way Southerners say pecans– south of the Mason-Dixon line they call them puh cons.

My holiday version has all the eye-appealing and flavorful attributes of its traditional counterpart with the added benefit of being totally vegan. Taking the place of the eggs that usually bind the saucy ingredients together is a combination of tapioca flour and flaxseeds that gives the pie its unique, creamy texture.

The tapioca flour also performs the double duty of thickening the filling as well as providing an inviting glaze that enhances its appeal.

So when is it the perfect time to serve pecan pie? All throughout the holiday season and any time you can buy gorgeous pecans. The new crop of nuts are harvested in early autumn, around September, so they’re fresh and flavorful. My family tradition is bringing a pecan pie to the Thanksgiving table along with the traditional pumpkin pie.

Converting a conventional recipe to a vegan version can often be an easy swap-out of ingredients. Sometimes, though, it’s just a bear of a task. Pecan pie was my biggest challenge and it took 9 tries with different methods to get the pie to bind together. Many of the versions ended up as too soupy. About the 8th time the top baked perfectly and I thought I had achieved success at last. But, no. As soon as I cut into it, it was soup.NGcover8 copy 2

The key was tapioca flour –it worked like magic! Now I’m thrilled to share this recipe that’s from my cookbook The Nut Gourmet.

You can also create an irresistible, love-at-first-glance pecan pie by taking the time to sort out beautiful pecan halves for the topping and then arranging them side-by-side in concentric rings.

Down Home Pecan Pie

Yield: 1 (9-inch) pie


Nutty Wheat Pie Crust

1 1/2 cups whole wheat pastry flour

1/2 cup almond meal

2 tablespoons organic sugar

1/2 teaspoon salt


1/2 cup organic canola oil

2 tablespoons cold water


Pecan Filling

1 1/4 cups coarsely broken pecans


2 tablespoons (1 ounce) dairy-free margarine

1 1/2 cups dark corn syrup

1/2 cup dark brown sugar

2 teaspoons vanilla extract


1/2 cup regular soymilk

1/2 cup tapioca flour, packed


5 tablespoons flaxseeds

1 1/4 cups pecan halves


  1. TO MAKE THE PIE CRUST, preheat the oven to 350 degrees F. and have ready a large rimmed baking sheet. Combine the pastry flour, almond meal, sugar, and salt in a medium bowl and mix well.
  1. Add the oil and mix with a spoon until all the flour is incorporated. Add the water and stir thoroughly until the mixture forms a soft dough and all the water is absorbed.
  1. Form the dough into a ball and roll it out between two sheets of waxed paper. Remove the top sheet of waxed paper, place the pie pan over the dough, and invert the dough and pan together. Remove the waxed paper carefully and firm the edges of the crust. Trim the excess crust with a knife. Bake the Crust for 5 minutes and set it aside on the baking sheet to cool.
  1. TO MAKE THE PECAN FILLING, put the coarsely broken pecans on a small, rimmed baking sheet and toast them in the oven for 8 minutes. Immediately pour them onto a dish to cool. When cool, spoon the pecan pieces into the bottom of the pie shell.
  1. Melt the margarine over medium heat in a 2-quart saucepan. Add the corn syrup, brown sugar, and vanilla extract and bring to a full boil over medium heat, stirring frequently. Boil 5 minutes and set aside to cool for about 30 minutes.
  1. Put the soymilk in a small bowl and stir in the tapioca flour. Set it aside for 5 minutes to allow the tapioca flour to absorb some of the liquid. Don’t rush this step. The tapioca flour needs a full 5 minutes to absorb some of the liquid.
  1. Meanwhile, put the flaxseeds in a blender or mini chopper and grind them to a fine meal. Add the flaxseeds and the soymilk mixture to the cooled corn syrup mixture. Stir to combine, and pour the mixture into the blender. Blend for 1 minute, until smooth. Pour over the toasted pecans.
  1. Top the pie with the pecan halves, arranging them in concentric circles, beginning in the center. Bake for 40 minutes. Cool thoroughly before chilling in the refrigerator. The pie will firm after it is thoroughly chilled.

Portobello Mini Pies–a Vegan for the Holidays Spectacular!

Portobello MinisPORTOBELLO MINI PIES

WITH MEDITERRANEAN RELISH

Portobello mushrooms, with their intense, earthy, and woodsy flavor, claim the limelight to offer a platter of richly flavored mini pies with winning charm that has enough pizazz to stand alone. Top the little pies with Mediterranean Relish and they morph into an eye appealing, elegant, and compellingly delicious main dish for the holiday season.

These little mini pies are ideal for a quiet family meal, but they’re also compelling and sophisticated enough to serve your most discriminating foodie guests for a holiday dinner.

Prepare the mini pies and the relish in advance so after a busy day of holiday shopping you can tuck them into the oven for a quick warming. They’ll be ready in minutes.

Add a salad and a steamed vegetable and dinner is done. Then you’ll have plenty of time to relax and share your shopping finds at the dinner table–unless they’re a surprise!

PORTOBELLO MINI PIES

WITH MEDITERRANEAN RELISH

Makes 10 to 12 mini pies 3-inches in diameter.


Mushroom Mini Pies

2 tablespoons water

1 tablespoon flaxseed meal


2 to 3 giant portobello mushrooms (about 3/4 pound), or 3/4 pound cremini or button mushrooms


1 cup cooked brown rice, barley, or buckwheat

1 cup diced onions

1/2 cup almond meal or hazelnut meal

1/2 cup old fashioned rolled oats

2 tablespoons nutritional yeast flakes

1 1/4 teaspoons salt

1/4 teaspoon ground black pepper


Mediterranean Relish

1 (14-ounce) can water-packed artichoke hearts, drained and diced

1 1/4 cups diced fresh tomatoes

10 pitted Kalamata olives, diced

6 pitted Spanish olives, diced

1 green onion, minced

2 tablespoons nutritional yeast flakes

2 cloves garlic, minced

Pinch cayenne

Freshly ground pepper to taste


Few sprigs fresh basil


  1. TO MAKE THE MUSHROOM MINI PIES, preheat oven to 375 degrees F. and have ready a large, rimmed baking sheet lined with parchment or a Silpat.
  2. In a small bowl, combine the water and flaxseed meal. Mix well and set aside to thicken.
  3. Coarsely chop the mushrooms, put them into the food processor in batches, and pulse until finely minced. Transfer the mushrooms to a large bowl.
  4. Add the cooked brown rice, onions, almond meal, rolled oats, nutritional yeast, salt, and pepper to the bowl and mix well with clean hands to distribute ingredients evenly.
  5. If the reserved flaxseed meal has not thickened, beat it with a fork until it forms a thick slurry or put it into the blender and blend for 1 minute to form the thick slurry, about the texture of cooked oatmeal. Add the slurry to the mushrooms and mix thoroughly to distribute the slurry evenly.
  6. Using your hands, form the mixture into mini pies or patties and place them on the prepared baking sheet. Press lightly on the tops to flatten them slightly. Bake for 30 minutes. Turn the mini pies with a metal spatula and bake 12 to 15 minutes longer until tops are firm.
  7. TO MAKE THE MEDITERRANEAN RELISH, combine all the ingredients in a medium bowl and mix well. Adjust seasonings if needed.
  8. TO SERVE, place the mushroom mini pies on a platter and garnish each with a generous dollop of the Mediterranean Relish. Artfully place a basil leaf on each mini pie and bring the remaining relish to the table.

Note: The mini pies and the relish are also the ultimate convenience foods—prepare them a day ahead and chill them separately. Reheat the mini pies at 350 degrees F. for 10 to 15 minutes before serving. The relish will keep for up to 4 days.

Important: If you’ve chosen to use the buckwheat in the in the mini cakes, you may need to add a small amount of water. If the mixture is too dry to hold together when forming the mini pies, add 1 to 3 tablespoons water and mix well with the hands. The mixture should be firm, yet moist but not watery.

Here Comes the Thanksgiving Centerpiece!

THANKSGIVING TORTE

Thanksgiving Torte2_edited-1 copyVegans looking for that exceptional main-dish centerpiece for the Thanksgiving table need look no further!

Standing a full three inches tall and garnished to the max, this elegant and very robust torte is the ideal choice. The torte features all the pleasing qualities one might crave in an autumn dish that will take the place of that greasy Standard Thanksgiving favorite that unfortunately graces American tables across the country.

We vegans prefer a kinder, gentler, and far more earth-friendly main dish for which we can truly give thanks on this special occasion.

This sumptuous, finger-lickin’ torte evolved over a period of several years as I NGcover8 copy 2tweaked it just a tad each year, gave it more sage one year, enhanced it with liquid smoke  another year, and finally developed the Mushroom gravy to give it the finishing touch. The recipe is from my cookbook The Nut Gourmet.

One year my daughter asked how I ever came up with this  dish. After giving it a moment’s thought, I focused on the specific flavors that bring us pleasure during the autumn and long winter season.

This time of year we seek the intense flavor of dried herbs more than the lighter fresh herbs. We need robust ingredients that stick to the ribs like nuts and whole grains–winter foods to bring us warmth and satisfaction.

Thanks Torte 5So I added a generous amount of poultry seasoning, a seasoning blend that contains a fair amount of sage, and turned to wild rice, potatoes, mushrooms, pecans, walnuts, and a package of fat-free vegan sausage.

Because Thanksgiving can be a busy time with extra family and friends coming for dinner, I cook the wild rice two days ahead. Then it’s ready to just toss into the mix. I also make the Mushroom Gravy ahead and simply warm it on the stovetop just before serving time.

I always make this dish the day before Thanksgiving simply because it tastes so much better the next day when the flavors have had a chance to do their dance together. I pack it into a springform pan and tuck it into the oven. After cooling, it goes into the fridge until next day.

About 2 hours before Thanksgiving dinner, I take the torte out of the fridge and let it come to room temperature. Then, I warm it for 20 to 25 minutes before serving. Served with a robust mushroom sauce on the side, it makes an impressive presentation perched on a footed cake plate.

Thanksgiving Torte MichaelTHANKSGIVING TORTE

Yield: 8 to 10 servingsThanks Torte 4

3 1/3 cups water, divided

2/3 cup  wild rice

2 1/8 teaspoons salt, divided


3/4 pound red or white rose potatoes, scrubbed, and cut into 1-inch cubes


1/2 cup coarsely chopped pecan pieces

1/4 cup coarsely chopped walnut pieces


1 (14-ounce) package vegan ground sausage

3/4 pound  portobello mushrooms, chopped (about 4 large mushrooms)

1 large onion, diced

2 tablespoons extra virgin olive oilthanksgiving torte copy

2 teaspoons poultry seasoning

1/4 teaspoon freshly ground black pepper


1/2 teaspoon hickory liquid smokeThanks Torte 3


2 ripe tomatoes, sliced

Fresh herbs (dill, sage, parsley, basil, or mint)


Mushroom Gravy

1/2 pound sliced button mushrooms

1 3/4 cups plus 3 tablespoons water, dividedThanksgiving Torte2_edited-1 copy

1/4 cup soy sauce

1/4 cup dry red wine

2 tablespoons lemon juice

3 tablespoons cornstarch

3 tablespoons water

  1. TO MAKE THE TORTE, lightly oil the sides of a 9-inch springform pan. Remove the collar and line the base with parchment paper (for easier cleanup). Snap the collar back on and set aside.
  2. Combine 2 cups of the water, wild rice, and 3/4 teaspoon of the salt in a 2-quart saucepan. Cover and bring to a boil over high heat. Decrease the heat  to medium-low and steam for 45 to 50 minutes, or until the rice is tender. Drain any excess liquid and set the rice aside.
  3. Combine the potato cubes, 1 cup of the water, and 1/8 teaspoon of the salt in a 2-quart saucepan. Cover and bring to a boil over high heat. Reduce the heat to medium and simmer for 5 to 7 minutes, or until the potatoes are fork tender. Using a slotted spoon, transfer the potatoes to a medium bowl, mash them, and set them aside.
  4. Preheat the oven to 375 degrees F. Put the pecans and walnuts on a small rimmed baking sheet and roast them for 9 minutes. Transfer the nuts to a dish to cool.
  5. Combine the vegan sausage, mushrooms, onion, the remaining 1/3 cup water, olive oil, poultry seasoning, and pepper in a large, deep skillet. Cook over high for 5 to 7 minutes, or until the onion is transparent, stirring frequently with a wooden spoon to break up the sausage chunks. Drain and reserve any excess liquid. Add the remaining 1 1/4 teaspoons salt and hickory liquid smoke to the sausage mixture and mix well.
  6. Add the mashed potatoes to the skillet along with the toasted nuts and cooked wild rice. Mix well to combine the ingredients thoroughly. Adjust seasonings if needed.
  7. Spoon the mixture into the prepared springform pan, spreading evenly to the edges and pressing firmly to avoid air pockets. Arrange the tomato slices over the top and bake, uncovered, for 1 hour. Allow the torte to stand for 20 minutes before removing from the pan.
  1. TO MAKE THE MUSHROOM GRAVY, combine the mushrooms, 1 3/4 cups of the water, soy sauce, red wine, and lemon juice in a 2-quart saucepan and bring to a boil. Decrease the heat slightly and simmer gently for 5 minutes.
  2. Combine the cornstarch and remaining 3 tablespoons of water in a small bowl and stir with a spoon to make a runny paste. Add the paste to the bubbling sauce, a little at a time, stirring constantly for about 1 minute, until the sauce has thickened to the desired consistency. Serve the gravy on the side.

TO SERVE THE TORTE, run a clean flatware knife around the edge of the springform pan, release the springform collar, and set the torte on a large serving platter or footed cake plate. Garnish the platter with herbs.

Prep Ahead 1: To ease the feast-day preparations, make the torte the day before, store it in the refrigerator, and reheat it at 350 degrees F. for about 20 to 25 minutes just before serving.

Prep Ahead 2: The recipe comes together more quickly if you cook the wild rice before beginning the torte, preferably even a day ahead. Make the Mushroom Gravy up to two days ahead and warm it shortly before serving.

Add a gourmet touch by serving the torte on a footed cake plate and garnish the edges with sprigs of fresh herbs and orange or Fuyu persimmon slices.

A Sweet Dish for Sweet Potato Season

Sweet Potato CakesSWEET POTATO CAKES

If you’ve baked too many sweet potatoes for Thanksgiving and have leftovers, count on these scrumptious little patties to put them to work.

If you don’t have leftover baked sweet potatoes, make some tonight and put an extra 1 or 2 in the oven so you can make these fun-to-eat patties. This is one of those treasured, easy-prep side dishes that you can even make ahead and simply warm briefly in the oven.

The neat thing is they don’t need lots of your attention–once you’ve got them in the oven, you’re free to catch up on the latest issue of your favorite veggie magazine or make a sumptuous salad for dinner.

Yield: about 10 pattiesSweet Potato Cakes 2

2 tablespoons water

1 tablespoon flaxseed meal


1 (15-ounce) can cannellini or Great Northern beans, thoroughly drained and rinsed

1 cup baked, mashed sweet potatoes or yams

1/2 cup diced onions

1 teaspoon fresh lemon juice

3/4 teaspoon salt

1/2 teaspoon pepper


1 cup panko (Japanese bread crumbs) or regular bread crumbs


Garnish

5 cherry tomatoes, halved

Clusters of herbs (sage, basil, parsley, cilantro) or cooked broccoli florets


  1. Preheat the oven to 375 degrees F. and line a large rimmed baking sheet with parchment paper.
  1. In a small bowl, combine the water and flaxseed meal and stir well to moisten the meal completely. Set aside to thicken. Alternatively, combine them in a blender and process until the mixture forms a thick slurry.
  1. Put the beans in the food processor and add the sweet potatoes, onions, lemon juice, salt, and pepper. Process until well combined. Add the flaxseed meal and process briefly until incorporated.
  1. Sprinkle the panko onto a large, shallow bowl or recessed dish and have a spoon ready. Use about 3 to 4 heaping tablespoons of the sweet potato mixture to form patties. Drop each one into the panko and spoon the panko over the top and sides. Use a metal spatula to carefully transfer the patties to the prepared baking sheet and use your hands or the back of a spoon to flatten them slightly.
  1. Bake for 20 to 25 minutes. Carefully turn the patties over with the spatula and bake 15 to 20 minutes longer, or until firm. Transfer the patties to an attractive serving platter and top each one with a cherry tomato half. Garnish the platter with herbs or cooked broccoli florets.


Cooking & Peeling Chestnuts, Illustrated

COOKING & PEELING FRESH CHESTNUTS

If you’ve visited my NutGourmet blog, then you may be aware I have an insatiable passion for chestnuts. Fresh chestnuts are top of the list of special seasonal foods during the holidays. Part of what makes them so special is that they’re available for such a short season. They’re harvested in September and by Christmas they will be a rarity in the grocery store, except for the Asian markets that import chestnuts from China.

Chestnuts offer delicate sweetness and potato-like texture

So what is it about chestnuts that makes some of us fall passionately in love them? It’s a complex question, because chestnuts have so many wonderful qualities. There’s nothing like them on the planet! Their appearance, flavor, and texture are not like any familiar nuts like almonds or walnuts, yet they’re classified as tree nuts. For me, it’s their divine sweetness–not the kind of sweetness sugar or other sweeteners offer. They’re not as sweet as dates or even a ripe apple or pear. Yet, chestnuts have a distinct sweetness that could be considered somewhat delicate, yet deliciously definitive.

Chestnuts inNout mesh bagThey also have a texture unlike any other nut we’re familiar with. Instead of being firm and crunchy like almonds or softer like pine nuts, chestnuts are starchy with a texture that could be compared to a cooked potato. Yet, they’re able to retain their firm shape when cooked and can be eaten whole or chopped. They can be mashed into a puree and incorporated into sauces, puddings, beverages, or included in baked desserts.

Unlike other nuts, chestnuts are practically fat free and contain only 2% fat compared to almonds, which are about 80% fat. Chestnuts also contain vitamin C, while other nuts do not. Chestnuts can be eaten raw but deliver far better flavor and texture with cooking. You can incorporate cooked chestnuts into beverages, soups, salads, stir-fries, casseroles, puddings, pies, baked goods, and desserts of all kinds.

If this is the first time you’ve considered buying fresh chestnuts, think of it as the perfect time to jump in and give these wonderful nuts an opportunity to show their stuff in a delicious dish. Many years ago, chestnuts totally won me over. Give them a try—I’ll bet you’ll get hooked on them, too.

So many people feel intimidated by chestnuts and haven’t the faintest idea how to cook them, peel them, or even incorporate them into a recipe. With this step-by-step guide that follows, you’ll see how easy it is to work with them and store them until you’re ready to add them to a tasty recipe.

Chestnut Cooking and Peeling Step-by Step Guide

Tools: All you really need is a paring knife with a firm, short blade and a good point. The blade should be no longer than 2 or 3 inches long. If you have a chestnut knife, all the better, but it’s really not essential.

Firm paring knife    Chestnut knife 2


A chestnut knife has a blade only 1 1/4 inches long with a curved tip. The blade is very firm, making it easy to grip the chestnut peel and pull it off.  You can do the same thing with a firm paring knife, but if you would like to buy a special chestnut knife, you won’t find it in the average kitchen shop. You can order one directly from some of the chestnut growers in the resources section below.

American Grown vs. Asian Imported Chestnuts: American grown chestnuts can be purchased online. They’re considerably smaller and more expensive than those imported from other countries. I think they’re also much sweeter. The quality I like best about American grown chestnuts is that they’re far easier to peel than the ones imported from China or Italy. If I run out of the chestnuts I’ve ordered, then I turn to the imported ones I find in the grocery store. And I sigh resentfully as I peel every last one of them, muttering under my breath, “These are such a bitch to peel!” The one advantage of imported chestnuts is that they’re often available through March.

Step 1: Make a criss-cross cut into each chestnut to help it release steam. SomeCriss-cross cut 2 people make the cut only on one side, but I find chestnuts much easier to peel with criss-cross cuts on both sides. To make the cuts, put a chestnut on a cutting board, hold it firmly with one hand, and make the cuts with the other. Don’t be timid. Poke the tip of the knife right into the chestnut shell, about 1/4-inch to 3/8-inch deep.

Alternatively, make a horizontal cut through the shell, all the way around the center portion of the chestnut, as if you were drawing the equator with your knife . This kind of cut makes it very easy to peel the chestnut after cooking.

Step 2 Cooking the Chestnuts:

Pot on stoveMethod 1 Boiling (preferred): Put the prepared chestnuts in a saucepan and add enough water to cover the nuts by about three inches. For 1 pound of chestnuts, I use a 4-quart saucepan. Cover the pot and bring it to a boil over high heat. Reduce the heat to medium and simmer the chestnuts, covered, for 25 to 35 minutes. TimerThen, turn off the heat. The shorter time will result in firm, fully cooked chestnuts. Longer cooking will make them softer to use in puddings and creamy recipes. Some varieties of chestnuts cook more quickly, while others take a few minutes longer. After 25 minutes of cooking, take one out of the pot, peel it, and give a taste test. If it’s done, turn off the heat.

Method 2 Roasting: Preheat the oven to 375 degrees F. Pile the prepared chestnuts onto a baking sheet and roast them 15 to 20 minutes. Cool them slightly and peel away. Some chestnut aficionados suggest soaking the chestnuts for about 20 minutes before roasting, claiming it makes them easier to peel.

Method 3 Stir-frying: Put the prepared chestnuts into a large, deep skillet with a small amount of oil, about one tablespoon for each pound of chestnuts in the shell. Use high heat and cook the chestnuts for about 10 minutes, tossing them continuously with a wooden spoon or shaking the pan to prevent the direct heat from burning them.

I prefer the boiling method because I’ve experienced uneven results with the roasting and stove-top methods. Quite often the chestnuts also need to be boiled to soften them enough for most recipes.

Step 3: Use a slotted spoon to remove only a few chestnuts at a time from the Removing from pot 2pot, about 4 or 5, and put them into a small bowl. The nuts will peel much easier when they’re quite warm. Have ready a bowl for the discarded nut shells and another bowl for the peeled chestnuts.

Step 4: Now you’re ready to peel. You can use the firm paring knife or a chestnut knife. Fix yourself a nice cup of tea, turn on some of Cup of teayour favorite music, and prepare for a relaxed peeling session that might take 20 to 30 minutes, depending on how many chestnuts you’ve cooked. Poke the point of the knife into the criss-cross cut and pull up on the peel.

Step 5: Chestnuts have a firm outer shell and and a soft inner skin called the pellicle. Sometimes both the outer shell and inner skin will come off together, but frequently they’ll have to be peeled away separately. Imported chestnuts cling fiercely to their pellicle (the skin) and do not release them without a tug of war.Peeling chestnut 2

Peeling shell 4

Peeling pellicle 4If you notice the chestnuts becoming difficult to peel, they’re probably quite cool. Don’t fight with them. Just put them back into the pot. Make sure there is enough water to cover the chestnuts and bring them to a boil again. Turn off the heat and return to the zen of peeling.

Peeled chestnuts jd3I hope you’ve rewarded yourself and tasted a few tidbits of broken chestnuts during the peeling session. The cooked and peeled chestnuts are now ready for incorporating into a recipe.

Family Tradition: I’ve become very fond of chestnut peeling and have convinced my family to join me in a peeling session the night before Thanksgiving. It’s actually become a cherished family ritual with everyone sitting around the kitchen table, knives in hand, and peeling away. it certainly makes quick work of the task with the American grown chestnuts. If I’ve saddled them with imported chestnuts, they swear just like I do and often leave me to finish the job. I really can’t blame them.

Storing the Chestnuts: If you plan to use the chestnuts within 3 or 4 days, coverCooked, peeled, & bagged them with plastic wrap and store them in the coldest part of the refrigerator. For longer storage, put them into a heavy-duty plastic bag and freeze them. Allow several hours to defrost them at room temperature before using. Defrosting chestnuts in the refrigerator will result in mushy nuts.

Well, you’ve just finished one of the most challenging task of the season. Now you’re ready to add those tasty nuggets of freshly cooked chestnuts to a delicious recipe.

Below are online resources for ordering fresh American-grown chestnuts.

Chestnut Resources:

Girolami Farms

11502 East Eight Mile Road

Stockton CA 95212

209.931.0158


Croft LLC,

121 E Front St., Suite 100

Traverse City, MI 49684

231-633-1277


Correia Farms

Phone: 866-492-4769


Allen Creek Farm

29112 NW 41st Ave.

Ridgefield, WA 98642

PO Box 841, Ridgefield, WA 98642

360-887-3669

Pattycake, Pattycake, Bring Me Some Chestnuts

CHESTNUT PATTYCAKES

Chestnut PattycakesCroquettes and patties fall into that wonderful zone of ordinary comfort foods we tend to rely on when we’ve collected a few leftovers in the fridge. But patties generously packed with bits of chestnuts, carrots, and onions are anything but pedestrian, even with the leftovers. It’s those precious little chestnuts, with their mystical sweetness, that brings these little cakes to life. Save those scanty leftovers of cooked rice and potatoes—they’re just what these little pattycakes need to hold them together.

These irresistible little patties are just right for a small family meal. If you plan on having an extra guest or two, double the recipe so no one will leave hungry.

Because these delicious patties are fried, I consider them an indulgent treat and save them for a special occasion–and there’s always a special occasion during the holidays. Because chestnuts are available for only a short season (October through December or January) they become one of the tasty treasures of the holiday season.

Cooking a peeling fresh chestnuts is a bit time consuming, so if you don’t want to bother cooking and peeling them, you can buy them already cooked and peeled in vacuum-sealed packages or jars. Avoid the ones that come water-packed in cans. They’re simply awful–they’re mushy and tasteless.

I may be a glutton for punishment, but to my mind, there’s nothing that quite takes the place of fresh chestnuts, and I’m a willing sucker for the laborious task. It actually becomes a seasonal ritual I’ve come to love. If you do want to take the time to cook and peel them yourself, you can order fresh chestnuts directly from the grower. Here’s a link to the post that has all the contact information for several growers in the U.S. Go to the websites and ask to be added to the mailing list. That way, they’ll let you know as soon as the fresh chestnuts are harvested and ready for sale in late September or October. Place your order soon, because they may be sold out by Thanksgiving.

One last comment, these little pattycakes are so tasty on their own, they really don’t need any kind of sauce to jazz them up. But if you’re a diehard sauce enthusiast, try a little vegan mayo, a dab of Hoisin, or a dollop of vegan sour cream.

CHESTNUT PATTYCAKES

Yield: 6 pattycakes

1 cup diced cooked and peeled chestnuts

1 medium carrot, coarsely shredded


3/4 cup cooked short-grain brown rice

1/2 cup chopped sweet onions

1 medium white or red rose potato, boiled and coarsely chopped


2 tablespoons waterChestnut Pattycakes

3/4 teaspoon salt

1/8 teaspoon ground black pepper


1/2 to 2/3 cup almond meal

1/4 cup canola oil, divided

  1. Combine the chestnuts and carrots in a large mixing bowl and set them aside.
  2. Combine the rice, onions, and potato in the food processor and process until they are completely pureed. You may have to scrape down the sides of the work bowl, redistribute the ingredients, and process again.
  3. Spoon the rice mixture into the bowl with the chestnuts and add the water, salt, and pepper. Stir the mixture thoroughly with a fork to incorporate all the ingredients and distribute them evenly.
  4. Pour the almond meal onto a flat dish. Form the chestnut mixture into 6 patties, two inches in diameter, and dip both sides into the almond meal to coat them completely.
  5. Pour half the canola oil into a 10-inch non-stick skillet over high heat. The oil is ready when a drop of water makes it sizzle. Cook the patties about two minutes on each side, or until they are golden brown, and transfer them to a serving dish lined with a double layer of paper towels to drain.
  6. Transfer the patties to a serving plate and sprinkle them lightly with salt and pepper.


Can You Make Apple Crisp Blush?

HOLIDAY READY APPLE CRISP

A venerable, time-honored dessert as homespun as they come, this old-fashioned apple crisp spruces up for the holiday with a blush of cranberries and a touch of citrus zest.

applecrispWhile the name “apple crisp” may evoke a ho-hum response when you tell guests what’s for dessert, you’ll find them nodding and mmmmm-ing after they’ve taken the first taste. Honest, it’s a winner! Thank the cranberries and blow a sweet kiss to the dried apricots for making this apple crisp zing and dance with exceptional flavor. This yummy dessert is one ofVegan Holidays highres the special gems in my Vegan for the Holidays cookbook.

When you take the baked crisp out of the oven, it doesn’t look especially enticing–all brown and lumpy. So, if you’re dishing it out at the table, try putting the pan on a colorful placemat or napkin and toss a few fresh cranberries over the top. Each time I make the crisp, I play a little more with garnishing.

applecrisp2Truthfully, how it looks may seem unimportant to some people who are much more interested in how it tastes. But when I bring a dish to the table looking like a knockout, I know it stirs excitement and anticipation–and this little flavor-infused dessert really delivers.

After a large, festive meal guests will welcome this dessert. Because it’s mostly fruit, it’s lighter than a cake, sweetly satisfying, and leaves everyone with a smile.

It’s so easy to prepare you might even convince the family to pitch in and help put it together while you prepare another dish. And, taking part in the dinner or dessert preps has a special reward for the host–it makes the participants so much more appreciative.

I like to make the crisp a day or two ahead and warm it a bit before serving. Preheat the oven to 350 degrees F. and pop it into to warm for about 15 to 20 minutes. You can also serve it room temperature. If you’re an ice cream nut, you might include an indulgent scoop of vegan vanilla ice cream on top.

HOLIDAY READY APPLE CRISP

Yield: 6 generous servings

Filling

3 large Granny Smith apples, peeled, quartered, and sliced

1 1/4 cups fresh cranberries

1/3 cup raisins

1/3 cup Turkish apricots, snipped into quarters

1/2 teaspoon orange or lemon zest (optional)

1/3 to 1/2 cup organic sugar

1/4 cup whole wheat pastry flour

1/2 teaspoon ground cinnamon


ToppingHoliday Ready Apple Crisp copy

3/4 cup old fashioned rolled oats

1/2 cup whole wheat pastry flour

1/2 cup brown sugar, packed

1/2 teaspoon ground cinnamon

1/2 cup dairy-free margarine

Preheat the oven to 350 degrees F. and have ready an 8-inch square baking dish.

  1. TO MAKE THE FILLING, combine the apples, cranberries, raisins, Turkish apricots, and orange zest in a large bowl and toss together.
  2. In a medium bowl combine the organic sugar, flour, and cinnamon, mix well, and add to the apple mixture. Mix thoroughly until well combined and spoon the fruits into the baking, dish. Set aside and prepare the topping.
  3. TO MAKE THE TOPPING, combine the rolled oats, flour, brown sugar, and cinnamon in a medium bowl and mix well. Add the margarine and use a pastry blender or your hands to work it into the topping mixture.
  4. Sprinkle the topping loosely over the apple mixture, forming a crumbly, uneven, lumpy topping. Bake uncovered for 50 to 60 minutes, or until the apples are soft when gently pierced with a fork. Cool 15 minutes and serve warm or cool completely and refrigerate until ready to serve.

Note:

If you prefer your apple desserts a little more toward the tart side, use the 1/3 cup measurement of organic sugar. Those with a die-hard sweet tooth will be happier with 1/2 cup of organic sugar.

Beets Never Tasted this Good!

BOUND FOR GLORY BEETS

This is a charming side dish perfect for any occasion. It looks great on the buffet table but you can easily plop in into a bowl and pass it at the table. It’s so versatile you can serve it hot, cold, or room temperature so it makes the ideal prep-ahead recipe. Here’s an extra bonus–you can even make it two days ahead and it still tastes great. That means that leftovers will still be delicious the next day.

If you’ve got a crowd coming, count on this recipe to go a long way. For a small family dinner, consider cutting the recipe in half or you’ll have tons left over. Bound for Glory BeetsBecause of the unique seasonings, the beets make a tasty salad topper or even a crown for polenta, or the base of a Russian salad –you name it.

I love that this recipe comes together so quickly with the food processor playing a key role in prepping the beets and carrots. That very special appliance is truly one of the miracles of our modern day  kitchens. Our grandmothers never dreamed of such things that cold do the work of shredding and chopping in seconds.

One little heads-up: Horseradish can be brazenly spicy! Use it with moderation unless your family adores its pungent nip. I start with 1 tablespoon, mix it in well, and taste. That’s usually enough for my family. But–and this is worth noting. If the horseradish has been hanging around your fridge for some time, it has lost a good bit of its zesty nature. In that case, even two tablespoons of it might be pretty darned good. If you buy a fresh jar, though, you’ll find that even one tablespoons can clear your sinuses.

BOUND FOR GLORY BEETS

Yield: 8 to 10 servings

Beets

3 large golden or red beets (1 1/2 to 2 pounds), peeled and coarsely shredded

2 medium onions, chopped

1 large carrot, coarsely shredded

1 cup water or more as needed


Sauce

1 /4 cup plus 2 tablespoons Dijon mustard

2 tablespoons water

2 tablespoons agave nectar or maple syrup

1 to 2 tablespoons prepared non-dairy horseradish

3 tablespoons fresh chopped dill or 1 tablespoon dried dill weed


Garnish

1 cucumber, scored with fork tines, and sliced

Bound for Glory Beets 21 medium carrot, peeled and coarsely shredded or sliced into thin          matchsticks with a julienne peeler

2 to 3 tablespoons coarsely ground walnuts

2 tablespoons chopped parsley

  1. Combine the beets, onions, carrot, and water in a large, deep skillet and cook and stir over high heat for 8 to 10 minutes, or until softened and most of the water has evaporated. Add 1 or more tablespoons of water only as needed to cook the vegetables and prevent burning.
  2. While the beets are cooking, combine the Dijon mustard, water, agave nectar, horseradish, and dill in a small bowl and mix well. Decrease the heat to medium and add the Dijon mixture. Cook for 1 or 2 minutes longer, stirring well to marry the flavors.
  3. Transfer the beets to an attractive serving platter, spooning them into the center to leave a border.
  4. To garnish, surround the beets with the cucumbers. Spoon the carrots next to the beets. Sprinkle the center of the beets with the ground walnuts and sprinkle with parsley.

Alternative Serving Suggestions

Change the whole look of the dish by using beets of two colors. Cook 2 medium golden beets and 2 medium red beets separately, adding 1 onion and medium carrot each. Divide the sauce between the 2 kinds of beets and arrange them in unique ways on the platter:

  • Form the two colors in a yin-yang shape
  • Arrange the two colors side-by-side or
  • Place one color in the center of the serving platter and surround it with the other color

Fruity Oat Bulldogs–the Cutest Little Muffins!

 FRUITY OAT BULLDOGS

Fruilty Oat BulldodgsNot really a typical muffin—not at all a cupcake—neither a scone nor a brownie. In my effort to create a delicious, honestly healthy, and easy-to-make gluten-free breakfast or brunch treat, this little creation sprung from the oven and found its way onto my dish. It was yummy and because of its stubby, compact nature, it reminded me of a little bulldog. Though it’s a strange name for a muffin-like goody, bulldog it is! Aside from the awesome flavor and delightfully dense texture, these treats are a snap to assemble–a bowl and a processor does the job and cleanup is almost instant!

Loaded with spices, made without flour, and sweetened only with dates, these unique muffin-like cakes have many additional guilt-free features: no added fats like margarine or oil, plenty of soluble fiber from old-fashioned rolled oats, and crunchy, chopped hazelnuts or almonds to help lower cholesterol. One recipe will make two lucky people on your gift list the recipients of a half-dozen Bulldogs each. To spread the joy even further, follow the suggestion below to create four dozen adorable little mini muffins and package them in small gift boxes tied with holiday ribbons.

Fruity Bulldogs parchmentIf you decide to make the bulldogs ahead of the holidays and want to freeze them for your own family, put them into heavy-duty ziplock bags and tuck them into the freezer for up to three months. To warm them for breakfast or brunch, preheat the oven to 375 degrees F. Take the bulldogs right from the freezer, put them on a parchment-lined baking sheet, and warm for 17 to 20 minutes.

Releasing the Perfect Muffin

I’ve made many a muffin that either sticks to the metal muffin tins or doesn’t come out clean from the parchment baking cups. But I’ve found perfection in silicone baking pans–and they don’t even need to be oiled. They come in several shapes for other baking needs like loaf pans and cake pans. The secret is adjusting the baking times to the silicone pans and allowing the muffins to cool completely before removing them from the pan.

FRUITY OAT BULLDOGS

Yield: 1 dozen

2 3/4 cups old fashioned rolled oatsBuldog Muffin

2 teaspoons baking powder

1 1/2 teaspoons ground cinnamon

1 teaspoon ground nutmeg

1/2 teaspoon baking soda

1/4 teaspoon ground cloves

1/4 teaspoon salt


3/4 cup almonds or hazelnuts


1 1/2 cups pitted dates, snipped in half

1/4 cup plus 2 tablespoons water


1 cup mashed bananas

1 tablespoon plus 1 teaspoon mild vinegar (rice, cider, or distilled vinegar)

1 teaspoon vanilla extract

1/2 teaspoon caramel extract

1 1/4 cups vanilla or regular soymilk


Garnish

12 whole almonds

12 dates, cut in half

Fruity Bullldogs for BreakfastPreheat the oven to 350 degrees F. and line 2 six-section muffin tins with baking cups. Alternatively, use an ungreased, 12-section silicone muffin pan. Place the muffin pans on a large rimmed baking sheet for easy handling.

  1. In a large mixing bowl, combine the rolled oats, baking powder, cinnamon, nutmeg, baking soda, cloves, and salt and mix well.
  2. Put the almonds in a heavy-duty plastic bag and use a hammer or a 1-pound can to chop them coarsely. Add the chopped almonds to the bowl.
  3. Create a coarse date puree by putting the dates into the food processor. With the machine running, drizzle in the water. Pulse and process until the dates are coarsely pureed.
  4. Add the mashed bananas, vinegar, vanilla extract, and caramel extract to the date puree. With the machine running, slowly pour in the soymilk and process briefly, just until the ingredients are well incorporated.
  5. Add the wet ingredients to the dry ingredients and mix thoroughly. Fill the muffin pans using the entire batter. They will be slightly overfull.
  6. To garnish, poke 1 almond into the center of each muffin and push 2 date halves into each muffin next to the almond. Bake for 25 to 30 minutes or until a toothpick inserted into the center comes out clean. Cool completely before removing from the pans.

Notes:

The date puree measures 1 cup.

For a touch more spice, add 1/4 to 1/2 teaspoon pumpkin pie spice.

Suggestion:

Turn your one-dozen muffins into four dozen of the cutest little mini muffins you’ve ever seen by baking them in mini muffin pans. Baked in metal mini pans, the muffins will be done in about 12 to 16 minutes. The silicone mini muffin pans make slightly larger minis and will bake in about 15 to 18 minutes.

To prepare well ahead of the holidays, put the baked mini muffins on metal or plastic dishes or trays and put them, uncovered, into the freezer. When completely frozen, transfer the muffins to a heavy-duty plastic bag and seal tightly. Defrost the muffins before packaging them for gift giving.