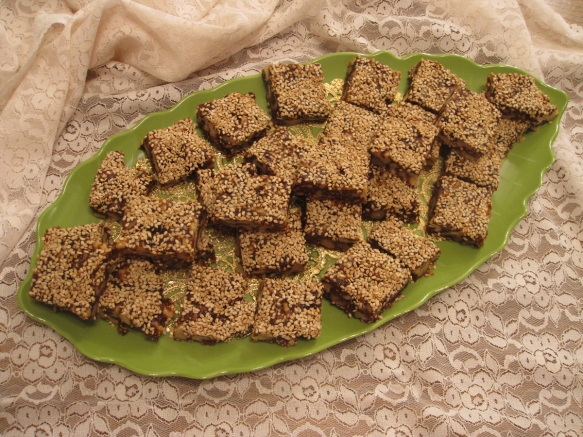
PLUM GOODIES FOR THE SWEET TABLE!


PLUM GOODIES

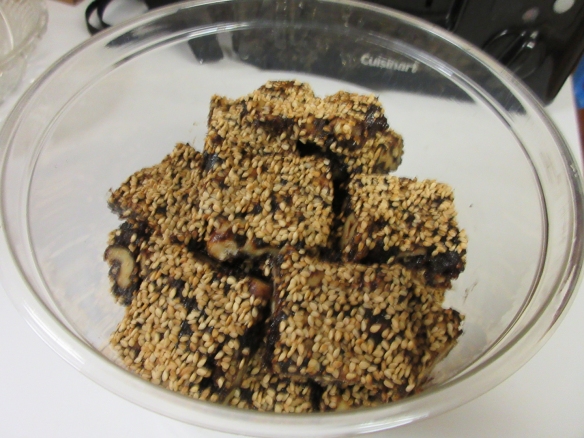
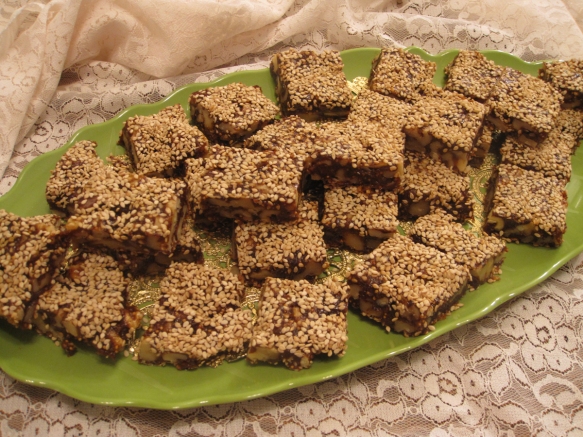
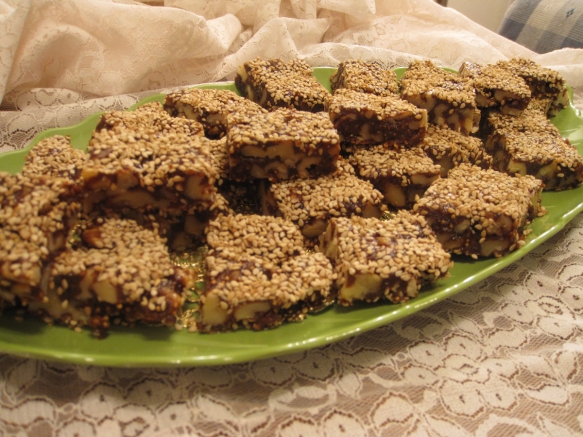
Plum Goodies B copyFigs and prunes seldom get the respect they deserve, but when they’re combined with walnuts and formed into delicious, bite-sized nibbles, they command much more than just respect. They get a blast of loving attention with smiles. Serving these at small gatherings as little after-lunch confections, I noticed guests reaching for seconds and thirds.

These little tidbits not only become desirable confections on the dessert tray, but they also make healthful treats to include in school kids’ lunchboxes or a between-meal snacks for little ones who need a healthful energy boost during the day.

They’re great keepers, too! Just pile them into a plastic container with a cover and set them aside on the countertop so they’re convenient for frequent nibbling—especially for the little ones.

For holiday parties, we tend to pull out all the stop. After all, the holidays come only once a year and we just have to go all out and prepare a fun sweet table loaded with everything from cookies and bars to truffles and confections. Be sure to add these little two-bite treats to your repertoire of collected recipe favorites. They might just become new favorites.

I made a batch of these for our own pleasure and put a heaping mound of them on a dish when a neighborhood friend came over with a loaf of his delicious sourdough bread. With enthusiasm, he popped one into his mouth and nodded with a smile of approval. As we sat at the table with our foodie friend and chatted about recipes, we noticed he kept reaching for another Plum Goodie, and another, and another. When he took the last one, he looked at me in wonder and asked, “Did I just eat the whole plate of these?”

Of course, my husband and I just giggled. It was the best testimonial I have ever encountered.
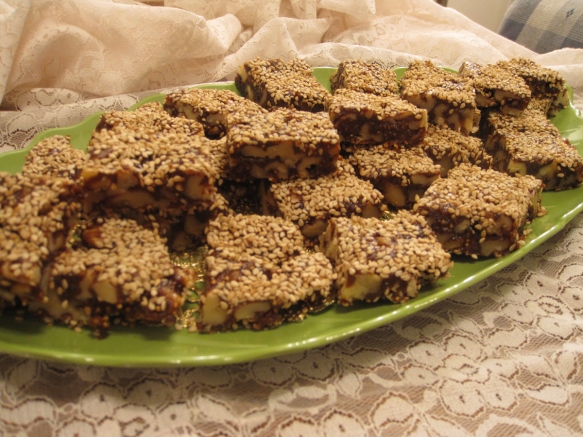
Plum Goodies E copy

They disappeared so quickly I didn’t have the chance to plate them. That means I have to get to work and bake up another batch — soon! I love that this recipe makes a hearty quantity of about 40 little squares.

Because these tasty confections are so unique, they would even make a lovely homemade hostess gift to bring when visiting friends during the holiday season. Consider these as a delicious holiday gift for Grandma, who doesn’t need another scarf or pair of slippers but  loves to nibble on sweet treats.

Dried fruits are a holiday bonus, providing pleasant diversity from the limited variety of fresh fruits like apples, pears, and oranges available during the winter season. To vary this recipe, try replacing the prunes with dried apricots or peaches. Both would offer delightful flavor paired with the definitive flavor of the sesame seeds that cover both the top and bottom of these treats.
PLUM GOODIES

 Yield: about 40 one-inch squares

10 ounces dried calmyrna or golden figs, trimmed and snipped in half

1 1/4 cups pitted prunes

12 pitted dates, snipped in half

3/4 cup water

2 3-inch cinnamon sticks

2 to 3 whole star anise
 

1/4 cup plus 3 tablespoons organic sugar

1 or 2 tablespoons water, as needed

1 tablespoon fresh lemon or lime juice

1/2 teaspoon ground cinnamon


3 cups walnuts


3/4 cup toasted sesame seeds

Combine the figs, prunes, dates, water, cinnamon sticks, and star anise in a 2 to 3-quart Plum Goodies A copysaucepan. Cover the pan and bring to a boil over high heat. Decrease the heat to low and steam for 10 minutes.
Discard the cinnamon sticks and anise and transfer the mixture to a food processor, including any liquid remaining in the pan. Add the sugar, water, lemon juice, and ground cinnamon and process until smooth and completely pureed. The mixture will be very thick.

Spoon the mixture into a medium bowl and add the walnuts. Mix well with a large spoon to incorporate the walnuts evenly throughout the mixture.

Preheat the oven to 200 degrees and have ready two large rimmed baking sheets. Cut 2 pieces of parchment to fit the baking sheets. Place one piece of parchment directly on the countertop, and set the other aside.

Sprinkle 1/3 of the sesame seeds into the center of the parchment and spread them evenly over a 6-inch diameter.

Carefully drop small spoonfuls of the walnut-fig mixture to cover the sesame seeds, and flatten the mixture with the back of a spoon, spreading it out to create a rectangle about 11 inches by 14 inches. Sprinkle the next 1/3 of the remaining sesame seeds over the top, pressing them down with the back of a spoon or your fingers. Sprinkle tiny bits of the remaining sesame seeds over sparsely covered areas, and set the remaining seeds aside.

Lift the parchment with the sesame-covered slab and place it into one baking sheet. Bake for 1 1/2 hours.

Remove from the oven and place the remaining piece of parchment over the top. Cover with the remaining baking sheet and invert the pans.

Remove the top piece of parchment and discard it. Sprinkle the remaining sesame seeds over the uncovered areas. Press them into the surface, and bake 30 minutes longer.

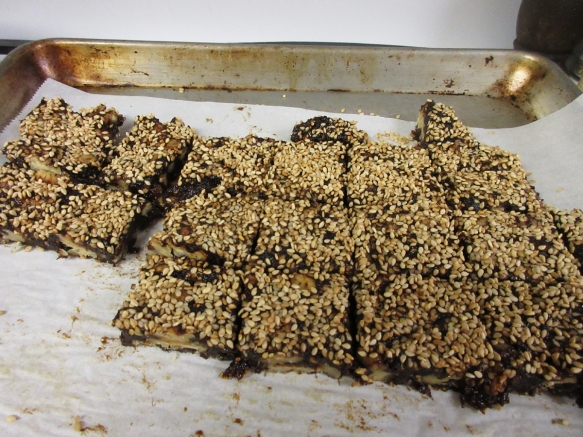
Remove and cool the walnut-figgy slab. Using a flatware knife, cut the slab into 1-inch squares. Place the squares onto a large platter and leave them at room temperature for 4 to 8 hours to firm and dry slightly.
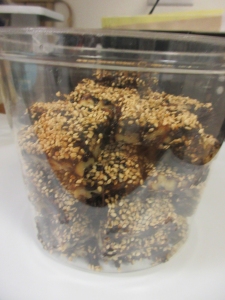
Store in a covered container in the refrigerator for up to 6 months. Covered in plastic wrap and stored at room temperature, the Walnut and Figgy Bites will keep for up to 2 months. For longer storage, put the confections in heavy-duty zip-lock bags and freeze for up to 6 months.


Plum Goodies E copy

NAUGHTY LITTLE NIBBLES MAKES US HAPPY!

CHOCOLATE FIREBALLS and TAHINI PEANUT CONFECTIONS

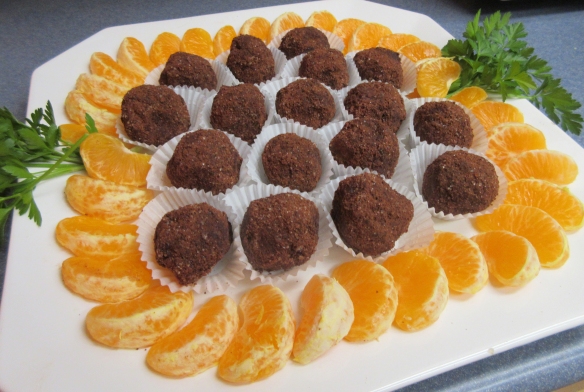
Homemade fruit and nut confections are often considered non-glamorous and too homespun by some. True, they may not be perfectly shaped and are a bit out of round, but let’s look from a different point of view. By others, they’re beloved, delicious, and most appreciated because they’ve been lovingly hand-made by someone whose desire is to bring a tasty little treat to the table or to offer as a sweet gift.

I’ve made two happily concocted confections to share on this blog–Chocolate Fireballs and Tahini Peanut Confections. Each one is vastly different from the other, yet they pair well together.

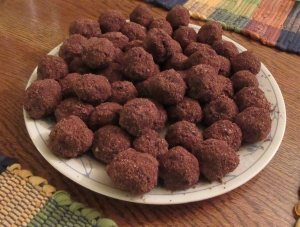
First, the Chocolate Fireballs: Most people find chocolate a total charmer. It’s no wonder–chocolate has compelling flavor that hits the tongue and totally wins you over. I say, “Go ahead–devour the chocolate!” These little treats contain no sugar, yet they’re deliciously sweet with nothing more than the earthy gifts of Mother Nature.
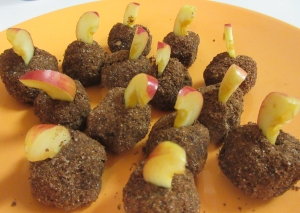
A little heads-up: These babies contain cayenne within the confections and also in the coating. I would judge the heat level to be between mildly spiced to just a tad more–not at the medium level, though. But, since everyone has a different spice tolerance, I thought it would be helpful to prepare you for a delightful little touch of heat and provide a little warning to those with sensitive taste buds.

If you know your guests enjoy spicy foods, say nothing and let the touch of spice be a pleasant surprise. You can enjoy watching them light up when that tiny blast of heat hits those little receivers on the tongue.
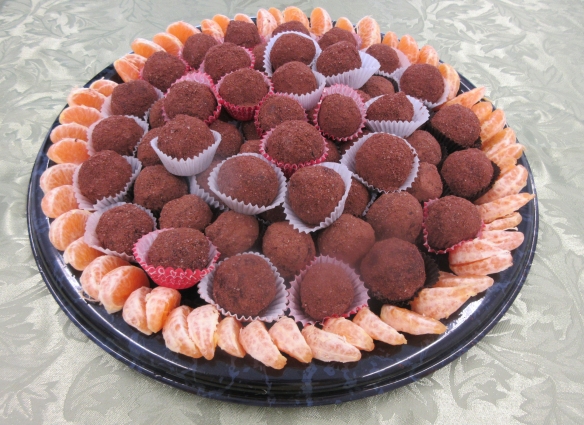
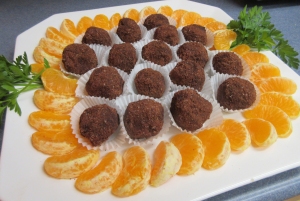
One day, when unexpected relatives dropped in for a visit, I reached into the freezer for these treats and arranged them on a dessert platter lined with a doily. Unwilling to wait for them to defrost, the cousins snapped them up and devoured them with gusto. That defining moment revealed that the confections were just as enjoyable eaten at room temperature or taken directly from the freezer. These tasty nibbles also make ideal gifts for the grandparents on your holiday list.

CHOCOLATE FIREBALLS

Yield: about 25 one-inch confections

Confections

1 1/2 cups whole almonds

1 1/2 cups walnuts

3 cups pitted dates, snipped in half

5 tablespoons raw cacao powder or unsweetened cocoa powder

1/4 cup plus 1 tablespoon maple syrup

2 teaspoons vanilla extract

1 teaspoon ground cinnamon

1/2 teaspoon caramel extract

1/2 teaspoon black pepper

1/2 teaspoon cayenne

5 to 6 tablespoons water

Coating

6 tablespoons almond meal

4 tablespoons unsweetened cocoa powder

3 tablespoons organic sugar

1/4 teaspoon cayenne

TO MAKE THE CONFECTIONS, put the almonds and walnuts in the food processor and process until the nuts are finely ground but still retain a little texture. If you prefer a confection with a little crunch, process briefly so the nuts still retain their crunchy nature. Process a little longer for a smoother texture. Transfer the nuts to a large bowl.

Put the dates, cacao powder, maple syrup, vanilla, cinnamon, caramel extract, pepper, and cayenne in the food processor. Add 5 tablespoons of the water and pulse and process until the ingredients are smooth and creamy or lightly textured as desired.

Pour the date mixture into the bowl with the nuts and use your hands to thoroughly combine the ingredients. If the mixture seems too stiff, add the remaining 1 tablespoon of water and mix well to incorporate it completely. Set aside for 5 minutes.

TO MAKE THE COATING, combine the Coating ingredients in a separate bowl. Using your hands, roll the confection mixture into 1-inch balls or small logs, then, roll them in the coating, covering them completely.

Put the confections in a covered container. If using within a week or two, store the confections in the refrigerator. For longer storage, put them in the freezer. Frozen, the confections will keep for up to 3 months.

There are several ways to enjoy the confections. Some people enjoy them right from the freezer. Others prefer them partially defrosted, about 10 minutes out of the freezer. They’re also delicious served completely defrosted.

Notes:

When preparing this recipe, be sure to snip the dates in half with a kitchen scissors to avoid date pits that might damage the food processor.


Cocoa Powder vs. Raw Cacao

Most supermarkets sell unsweetened cocoa powder, while natural food markets sell both unsweetened cocoa powder and raw cacao powder. Between them there’s a world of difference.

Unsweetened cocoa powder has shed all or most of its natural fat content, leaving only a minute amount of its natural cocoa butter intact. Raw cacao powder is considerably more expensive, but some cooks consider it worth the extra price. Because it still contains its natural cocoa butter (the magical fat that boosts the flavor of the chocolate), raw cacao delivers richer flavor with more depth.

The two points to consider when deciding which chocolate to buy for baking or confections are flavor and fat content. If you’re aiming for lower fat foods, stick to the unsweetened cocoa powder. If the fat content is not a consideration, go for the more intense flavor and choose the raw cacao powder.

Caramel Extract: Caramel extract is not available in grocery stores. I order it online from J.R. Watkins – https://www.jrwatkins.com

******************************************************

TAHINI PEANUT CONFECTIONS

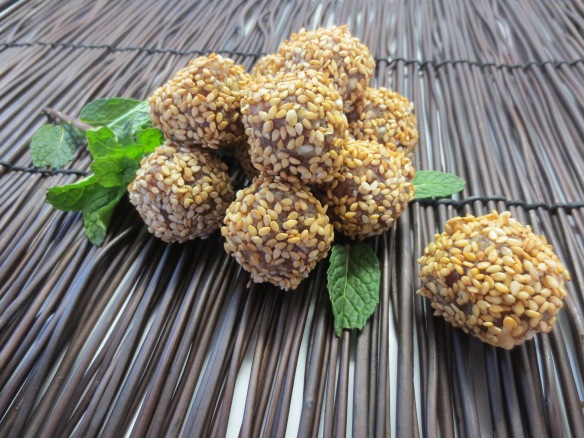
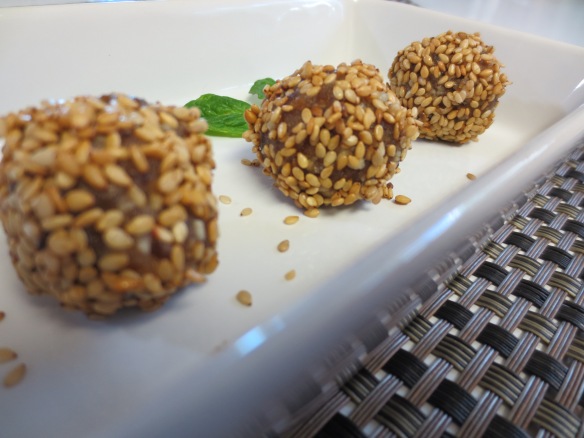
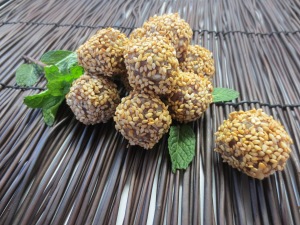
If you’re invited to dinner or a holiday party, bring some of these confections along as a hostess gift and watch the recipients beam with joy. With their captivating sesame flavor and date-sweetened goodness, these little tidbits make outstanding holiday gifts. Prepare these well ahead and keep them frozen so you can be ready when the festive season comes along. The act of giving is reward itself, but you’ll receive extra gratitude when you present these treats in an attractive jar or box attractively wrapped in their holiday best.

My hubby is a happy camper when he can reach into the freezer any time year-round and pluck a sweet frozen treat from the plastic container I attempt to keep filled. He claims they taste better when frozen–personally, I think he just doesn’t want to wait the ten or fifteen minutes for them to reach room temperature.
Yield: 45 to 50 confections

2 cups firmly packed pitted dates, snipped in half

1 cup roasted unsalted peanuts

1/2 cup tahini

2 to 6 tablespoons water

1/4 teaspoon caramel extract

Coating

1 cup natural or toasted sesame seeds

TO MAKE THE CONFECTIONS, combine the dates, peanuts, tahini, water, and caramel extract in the food processor and pulse and process until well blended. Longer processing will create a smoother confection. If you prefer a chunkier confection, you can control the texture by shorter processing and stopping the machine frequently to check the results.

Form the mixture into balls, using about one teaspoon for each confection. Roll, squeeze, and use your fingers to form the mixture into balls or ovals.

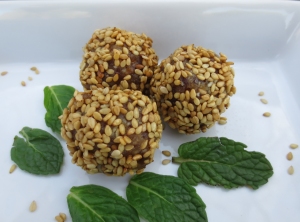
TO COAT THE CONFECTIONS, put the sesame seeds in a small, deep bowl and roll each ball in the seeds, coating it completely.

IF PLANNING AHEAD FOR GIFTING, put the finished confections in a covered container and store it in the refrigerator for up to 2 weeks or in the freezer for up to 3 months. Be sure to thaw the confections completely before wrapping them for gifting.

TO SERVE THE CONFECTIONS AT HOME for your own family or guests, line an attractive dish with a doily, arrange the confections on the dish, and garnish with a sprig of fresh mint. They’re delicious eaten at room temperature, chilled, or even frozen.

A PLATTER OF COOKIES FOR OLD SAINT NICK

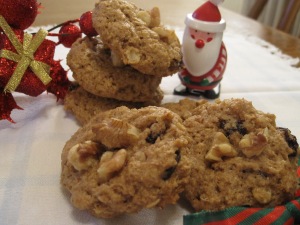
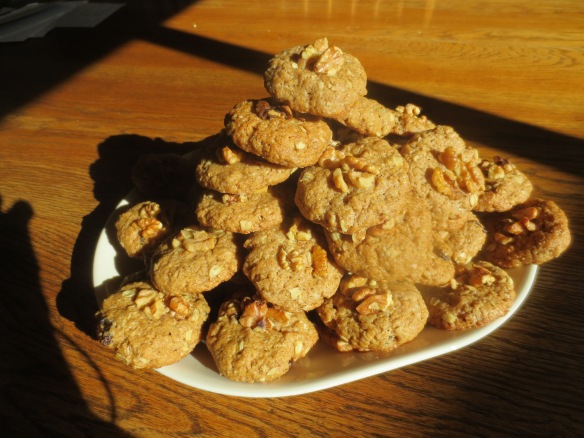
Because so many cookies share common ingredients like flour, sugar, and margarine or oil, they need that little something unique to make them stand apart. With a generous measure of creamy pureed walnuts, these delicious cookies offer melt-in-the-mouth soft centers and delightfully crunchy outsides.

But giving them that extra-special touch is black walnut extract, a flavor that makes these cookies an outstanding treat for Old Saint Nick.

I wasn’t able to find black walnut extract at the grocery store but discovered JR Watkins an excellent online source for unique flavoring extracts.

Going to a cookie exchange party or a holiday potluck?  Bring along a batch or two of these little gems and reap the compliments.

OLD SAINT NICK’S WICKED WALNUT COOKIES

Yield: 4 1/2 dozen

2 cups raw walnuts

3 cups whole wheat pastry flour

1 1/4 cups organic sugar

1 cup old-fashioned rolled oats

1/2 cup raisins

1 teaspoon baking powder

1/2 teaspoon baking soda

1/4 teaspoon ground cinnamon

1 cup mashed bananas (about 2 large)

2/3 cup vegan margarine

1 1/4 teaspoons black walnut extract, maple extract, almond extract, or an extra teaspoon vanilla extract

1 teaspoon vanilla extract

1/4 cup water

2 tablespoons flaxseeds or ground flaxseed meal

  1. Preheat the oven to 350 degrees F. Line two large rimmed baking sheets with parchment paper.
  2. Chop 1/2 cup of the walnuts into small pieces and set aside. Combine the flour, sugar, oats, raisins, baking powder, baking soda, and cinnamon in a large bowl and mix well. Make sure the raisins are well coated with flour to prevent them from sinking to the bottom of the batter. Set aside.
  3. Put the remaining 1 1/2 cups of walnuts in a food processor. Process until they become a creamy walnut butter, stopping occasionally to scrape down the work bowl. Add the bananas, vegan margarine, black walnut extract, and vanilla extract and process until smooth and creamy, stopping occasionally to scrape down the work bowl.
  4. Add the wet ingredients to the dry ingredients and mix well. The dough will become quite stiff.
  5. Pour the water and flaxseeds in a blender. Process on high speed for 1 to 2 minutes to form a thick slurry. Stir the slurry into the dough, mixing thoroughly to distribute it evenly.
  6. Roll teaspoonfuls of dough into 1-inch balls and place them 1 1/2 inches apart of the prepared baking sheet. Flatten them slightly with your hands or the bottom of a glass and press a piece of the reserved chopped walnuts into the center of each cookie.
  7. Bake for 14 to 18 minutes or until the cookies are lightly browned on the bottom. If the cookies on the top rack need browning, move them to the bottom rack for another 2 to 3 minutes. Transfer the cookies to a cooling rack or plate and let cool completely.


THE FBI LOVES THESE THUMBPRINTS!

ALMOND THUMBPRINT CUTIES

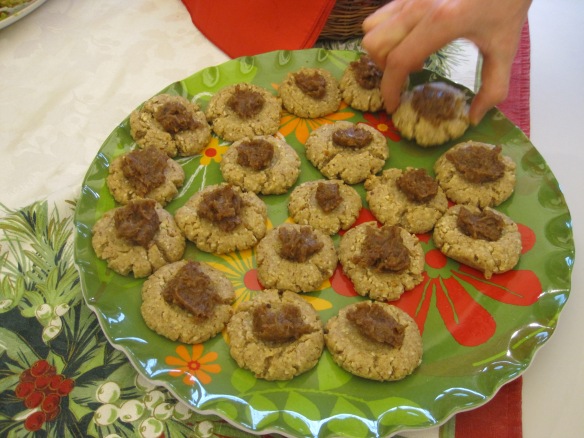
If you’re hunting for a super-easy cookie recipe you can whip up in a hurry, this is your sweet treat–you and these little cuties will be best buds in a flash! But a quick assembly is not their only assets. These babies are delicious and make good keepers as well.

Traditional thumbprint cookies are filled with fruity jam, but these little treats feature centers filled with dates and almond butter, giving them an edge over jam because they deliver an appealing depth of flavor with more complexity that goes beyond sweetness from the jam.

You’ll know what I mean when you taste them. Admittedly, dates certainly are sweet, but their sweetness is strictly from nature and more subtle and satisfying–not like the extreme sweetness you get from processed sugar.

Yield: about 3 dozen

ALMOND THUMBPRINT CUTIES

Cuties

1 cup almonds

1 1/3 cups all purpose flour

1/2 cup plus 2 tablespoons vegan margarine

1/2 cup plus 3 tablespoons organic sugar

2 tablespoons water

1 teaspoon almond extract

1/2 teaspoon vanilla extract

Filling

15 pitted dates, snipped in half

2 tablespoons almond butter

2 tablespoons water

1/2 teaspoon almond extract

1/2 teaspoon vanilla extract

  1. Preheat the oven to 350 degrees F. Line two large rimmed baking sheets with parchment paper.

2. To make the cuties, put the almonds in a food processor. Process until they are ground into a finely textured meal. Add the flour, vegan margarine, sugar, water, almond extract, and vanilla extract, and process until well blended, stopping occasionally to scrape down the work bowl.

3. Roll heaping tablespoonfuls of dough into 1-inch balls and place them 1 1/2 inches apart on the prepared baking sheet.

4. Use your thumb or finger to press a deep indentation into the top of each cookie. Use your fingers to smooth out any cracks in the dough. Bake for 12 to 15 minutes, or until the tops turn a light golden. Transfer the cookies to a cooling rack or plate and let cool completely.

5. To make the filling, put the dates, almond butter, water, almond extract, and vanilla extract in a food processor. Pulse to break up the dates, and then process until smooth and creamy, stopping occasionally to scrape down the work bowl.

6. Place heaping teaspoonfuls of the date mixture into each thumbprint. Set the cookies aside in a single layer for about 3 hours, or until the filling becomes firm and dry. Stored at room temperature in a covered container, Almond Thumbprint Cuties will keep for 1 or 2 days; refrigerated, for 1 week, and in the freezer, 3 months.

A PANFORTE TO DAZZLE CHOCOLATE LOVERS!

Chocolate Panforte

Panforte

CHOCOLATE PANFORTE

For those unfamiliar with this very special holiday treat, panforte is a divinely rich confection packed with dried fruits, nuts, and spices, baked in a 7-or 8-inch slab, and coated with confectioner’s sugar. The traditional Italian recipe contains glazed fruits, but I much prefer the sweet, tangy flavor dried fruits contribute to the recipe. When chocolate and lots of spice is added to the mixture, each bite becomes pure nirvana, delivering a delicious melt-in-the-mouth medley of fruit, nut, spice, and chocolate flavors all at once. In other words, all those heavenly flavors and textures you could possibly desire in a holiday candy.

This recipe is ideal for plan-ahead kitchen wizards who love to make their cookies and confections well-ahead of the holiday and freeze or refrigerate them. Then, when they need them, they can easily reach into the fridge or freezer and the muss and fuss is well behind.

Chocolate PanforteDuring the autumn season, I make several batches of panforte, wrap them in double layers of plastic wrap, and tuck them into the fridge. Knowing I’ll be entertaining and going to several parties during the holiday season, my early prep serves me quite well.

A homemade panforte also makes an fabulous gift that can be safely shipped to friends and family across the country without spoilage. Once they taste, the lucky recipients will send you messages filled with OMGs!

Panforte

Entertaining at home during the holidays, I like to serve the panforte as an extra treat. Several hours before dessert time, I remove the panforte from the refrigerator and allow it to come to room temperature for best flavor. Then, I unwrap a slab and put it on a colorful plate garnished with real or plastic holly. If the panforte is the only dessert, I’ll cut it into thin wedges like a pie. When serving it along with other desserts, I cut it into bite-size pieces, about 1-inch square. Because it’s quite rich, a little goes a long way.

Panforte makes an impressive homemade gift. Before gifting, tie a holiday ribbon over the plastic wrap, make a large bow, and present the panforte with a happy holiday wish. I like to add a touch of holly to the wrapping–it does such a great job of conveying the holiday message and makes an attractive addition to the presentation.

Here’s the process: Line the pie pans with parchment. Roast the nuts. Cut the fruits, Combine the fruits. Add spices and nuts. Make syrup and add to mixture. Spoon and press into parchment-lined pans. Bake. Cool. Dust with confectioner’s sugar. Ready to wrap.

Chocolate PanforteChocolate Panforte


Chocolate PanforteChocolate Panforte

Chocolate PanforteChocolate Panforte

Chocolate PanforteCHOCOLATE PANFORTE

Yield: four 8-inch round slabs

Panforte

2 cups pecansChocolate Panforte

1 3/4 cups walnuts

1 1/4 cups almonds

1 cup dried dried apricots, diced (i used Melissa’s)

1 cup flour (oat, all purpose, or whole wheat pastry flour)

3/4 cup plus 2 tablespoons organic sugar

1/2 cup raisins

1/2 cup chopped dates

1/2 cup sweetened dried cranberries (I used Melissa’s from melissas.com)

Zest of 1 lemon or orange

1 tablespoon plus 1 1/2 teaspoons ground cinnamon

1 1/2 teaspoons ground nutmegChocolate Panforte

3/4 teaspoon ground cloves

3/4 teaspoon ground cardamom

3/4 teaspoon ground black pepper

Chocolate Syrup

1 cup organic sugar

1 cup agave nectar

4 ounces unsweetened chocolate, broken into several pieces

1 cup powdered sugar

Preheat the oven to 350 degrees F. and have ready 2 large rimmed baking sheets and four 8-inch pie pans or cake pans lined with enough parchment to drape generously over the sides. Place 2 pans on each baking sheet. Set aside.

TO MAKE THE PANFORTE, spread the pecans, walnuts, and almonds on one of the baking sheets and toast them in the oven for 9 minutes. Immediately transfer the nuts to a large platter to cool and turn off the oven.

In an extra large bowl, combine the apricots, flour, sugar, raisins, dates, cranberries, lemon zest, cinnamon, nutmeg, cloves, cardamom, and pepper.

When the nuts are cool, add them to the bowl and mix well to distribute the ingredients evenly. Set aside.

TO MAKE THE SYRUP, combine the sugar and agave nectar in a 2 to 3-quart saucepan and mix well. Put the chocolate in a bowl and place it near the stove-top. Attach a candy thermometer to the side of the saucepan and place the pan over medium-high heat. Boil until the temperature reaches 225 degrees F., approximately 5 minutes. This can happen very quickly. Do not stir during the boiling.

Turn off the heat as soon as the mixture reaches 225 degrees F. and stir in the chocolate. Continue stirring until the chocolate is completely melted.

Pour the chocolate syrup into the fruit-nut mixture and use a heavy-duty wooden spoon to stir and coat the ingredients completely. The mixture quickly becomes quite stiff and you’ll need to apply muscle power to combine the syrup and fruit-nut mixture.

Preheat the oven to 325 degrees F. Use a metal spoon to distribute the mixture equally among the prepared pans, a heaping spoonful at a time, packing it down before adding another. Bake for 30 minutes. Let cool completely for several hours before removing the panforte slabs from the pans.

Then, carefully, remove the parchment from each slab and dust each heavily with the powdered sugar on both sides, using your hands to coat them completely.

TO SERVE THE PANFORTE, use a sharp, heavy-duty knife to cut the panforte into very thin wedges or into 1-inch pieces. If not serving right away, double-wrap each panforte in plastic wrap. The panforte will keep for a month or two at room temperature or for 1 year in the refrigerator.

Panforte

CHOCOLATE? YES! BRING IT ON FOR BREAKFAST!!!!

Chocolate Chocolate Chip MuffinsCHOCOLATE CHOCOLATE CHIP MUFFINS

Chocolate for breakfast is my favorite! And it’s actually a better way for me to indulge than eating it at night. That naughty little chocolate has the power to keep me up at night. As tempting as it is to reach for the chocolate as an after-dinner treat, I resist. It takes a heck of a lot of will power, but I really prefer a good night’s sleep and to wake up feeling great.

Chocolate doesn’t affect everyone like that, but those of us who are sensitive to the caffeine-like substance  in chocolate called theobromine, actually get a high from eating it. 

These muffins offer some SERIOUS CHOCOLATE–inside and out. So I offer them at a time of day when more than half the world turns to coffee for that morning boost.

I’ve enhanced the muffins with chocolate chips and enriched them with plenty of pure cocoa powder, so these outrageous little babies offer heaven in every bite for those of us with a passion for chocolate.

Once you bite into these muffins, you might feel like you’re eating dessert, but consider the wheat bran and bananas a healthy dose of dietary fiber that justifies their presence at the morning meal. I like to include this recipe as part of the muffin party for its uniqueness. Served with seasonal fruit, either as a fruit salad, attractively sliced, or presented whole with knives and a cutting board, the muffin breakfast or brunch makes a festive gathering pure fun.

Chocolate Chocolate Chip MuffinsCHOCOLATE CHOCOLATE CHIP MUFFINS

Yield: 1 baker’s dozen–yep, that’s 13 unless you overfill the muffin pan like I did.

1 1/4 cups plain or vanilla soymilk

1 tablespoon apple cider vinegar, rice vinegar, or distilled vinegar

1 1/2 cups whole wheat pastry flourChocolate Chocolate Chip Muffins

1 1/4 cups wheat bran

2/3 cup packed brown sugar

2/3 cup dairy-free chocolate chips

1/3 cup organic sugar

4 tablespoons unsweetened cocoa or raw cacao powder

1 tablespoon baking powder

1/2 teaspoon salt

1/4 teaspoon baking soda

1 cup mashed bananas

2 tablespoons organic canola oil

1 1/2 teaspoons vanilla extract

1/4 teaspoon caramel extract

Topping

1/3 cup dairy-free chocolate chips

1/3 cup toasted sliced or slivered almonds

  1. Preheat the oven to 350 degrees F. and line 2 six-section muffin tins with paper baking cups. Alternatively, use an ungreased silicone 12-section muffin pan. Put the muffin pans on a large rimmed baking sheet.
  2. Combine the soymilk and vinegar in a medium bowl, stir well, and set aside to thicken.
  3. In a large bowl combine the whole-wheat pastry flour, wheat bran, brown sugar, chocolate chips, organic sugar, cocoa powder, baking powder, salt, and baking soda. Mix well to distribute all the dry ingredients evenly and set aside.
  4. Add the bananas to the bowl with the soured soymilk, along with the canola oil, and vanilla and caramel extracts. Mix well and add the wet ingredients to the dry ingredients, stirring briefly just until the batter well moistened. .
  5. Spoon the batter into the prepared muffin pans, over-filling each section to use all the batter. For the baker’s dozen, reserve some of the batter to fill an oven-proof custard cup or ramekin.
  6. For the topping, sprinkle the chocolate chips into the center of each muffin, and the sliced almonds over the remaining exposed surface. Bake for 23 to 26 minutes, or until a toothpick inserted near the center of several muffins comes out clean. Cool 15 to 20 minutes before serving to allow easy release from the baking pans.

Chocolate Chocolate Chip MuffinsVariation:

Espresso Chocolate Chocolate Chip Muffins

Grind 2 tablespoons of espresso coffee beans into a very fine powder in a mini blender. After spooning the muffin batter into the muffin pans, sprinkle the tops lightly with the espresso powder. Then, add the chocolate chips and toasted sliced almonds.

Suggestions:

Turn your one-dozen muffins into four dozen of the cutest little mini muffins you’ve ever seen by baking them in mini muffin pans. For ease in moving the muffins in and out of the oven, have 2 large rimmed baking sheets ready with two mini muffin pans on each of the baking sheets. Spoon the batter into the mini muffin pans and bake for 20 to 24 minutes. Allow the minis to cool for 30 minutes before removing from the pans.

To prepare well ahead of the holidays, put the baked mini muffins on metal or plastic dishes or trays and put them, uncovered, in the freezer. When completely frozen, transfer the muffins to a heavy-duty zipper-lock bag and seal tightly. Defrost the muffins before packaging them for gift giving.

HELLO, SUGAR PLUM FAIRY. THANK YOU FOR THE SWEET GIFT!

SUGAR PLUM SPICED NUTS

Dish w:white cupAn ideal gift for special friends at holiday time or simply an extra-special treat to serve on a dessert table, these nutty delights can be made well in advance of the holiday rush. They’re good keepers if you store them in airtight containers.

Wrap it for Christmas, tie it in blue and white Hanukkah colors, decorate it in red, green, and black for Kwanzaa–any which way you play with decorating the finished nuts, you’ll have a very special homemade treat for sharing or giving. Holiday cheers!!!!

Walnuts

The success of this recipe depends on two factors:

  •  Measuring all ingredients in advance of assembly
  •  Applying patience and stirring until the liquid is completely absorbed

Closeup on dish

The recipe actually comes together quickly once you have everything ready.


SUGAR PLUM SPICED NUTS

 Yield: 31/2 cupsChristmas jar

 1/2 cup powdered sugar or more if needed

Spice Mixture

2 teaspoons ground cinnamon

2 teaspoons ground cloves

2 teaspoons ground allspice

2 teaspoons ground nutmeg

2 teaspoons ground cardamom

2 teaspoons ground ginger

1/4 teaspoon ground cayenne pepperwhite cup

1/4 teaspoon salt

COATING

1 tablespoon organic canola oil

1/3 cup organic sugar

3/4 cup apple juice

3 cups coarsely chopped raw walnuts

  1. Place the powdered sugar in a medium bowl and set it aside.To make the spice mixture, combine the cinnamon, cloves, allspice, nutmeg, cardamom, ginger, cayenne, and salt in a small bowl or cup. Stir the mixture well and set aside near the stove.
  2. To make the coating, pour the canola oil into a large nonstick skillet. Place the Hanukkah jarorganic sugar, apple juice, and walnuts in separate cups or bowls and set them aside near the skillet. Now you’re ready to begin.
  3. Heat the canola oil over high heat for about 1 minute. Add the organic sugar and stir another minute until hot and bubbly.
  4. Pour in the apple juice and stir constantly for about 1 minute, until the sugar is completely dissolved.
  5. Quickly stir in the walnuts and continue stirring over high heat until all the liquid evaporates and the mixture becomes sticky and shiny. Cook for 1 to 2 minutes longer, or until all the liquid is absorbed.
  6. Sprinkle in 2 tablespoons of the spice mixture and toss to coat the walnuts, stirring for 1 minute. Turn off the heat and add the remaining spice mixture, tossing continuously.
  7. Pour the spiced walnuts into the bowl with the powdered sugar and toss to give them a white dusting. Spread the walnuts in a single layer on a large dish or baking sheet to cool completely. Stored in an airtight container at room temperature, Sugarplum Spiced Walnuts will keep for up to 1 month.

Note: This recipe is not limited to just walnuts. It works quite well with all nuts.

white cup w:ribbonGift wrapped jar

HELP SANTA DELIVER HOMEMADE GIFTS!

 Scrub bestGRAPEFRUIT AND POPPY SEED SUGAR SCRUB

For the friend or family member who really adores body care products, this homemade, Bow w:pineconecreamy white and almond-scented body scrub makes such a welcome holiday gift. Also unique is that a body scrub makes a delightful departure from the calorie-laden baked goodies that are so popular for holiday gifting. And it takes practically no time to whip it up in your home kitchen.

Recipe by Poppy of Bunny Kitchen

Poppy portrait w:kittiesI have always had a deep connection with animals as far back as I can remember. It probably comes as no surprise, therefore, that I became a strict vegetarian at the age of 6 and am now a devout vegan in my twenties. I work in a wildlife hospital, treating and rehabilitating all kinds of wild animals for the hopeful eventual release back to the wild.

I am also studying in my final year forBow Hanukkah a degree in Animal Management, carrying out research into a disease affecting pigeons and other birds which causes great suffering, yet is much unstudied.

I share vegan recipes, DIY tips, inspirational animal stories and general health resources on Scrub side viewmy blog which has evolved somewhat over the years from an amateur baking blog to a fully vegan blog.

My spare time is usually centred around food, I love getting creative in the kitchen along with spending time with my 24 rescued pets!

GRAPEFRUIT AND POPPY SEED SUGAR SCRUB

Bow red & greenThis super exfoliating and pretty polka dot sugar scrub can be mixed up in minutes.

Per cup of scrub, mix together:

60ml/1/4 cup almond oilScrub top view

200g/1 cup granulated sugar

1 tablespoon poppy seeds

A few drops of vitamin e oil (optional)

 Then stir in:

8 drops of grapefruit essential oil.

 Jar and label and give as a thoughtful gift.

The finishing touch is a puffy, colorful bow taped to the top or one that’s wrapped around the jar.

Bow horiz

HOMEMADE WITH LOVE!

WINTER FRUIT BUTTER & SPICED PLUM BUTTERS

Nothing is quite as special as a homemade gift that’s irresistibly delicious, versatile, Plum Butt gifthealthful, and, best of all, made with that extra pinch of love! Here are two easy-as-pie fruit butter recipes that come together quickly and don’t require the fuss and extra time that canning involves. Refrigerated, the fruit butters keep for up to three months without losing their great flavors.


Plum Butt Gift 2In winter, dried fruits lend such versatility. Imagine turning a clump of dried fruits into naturally sweet fruit butters you can spoon into little decorated jars and give as thoughtful gifts during the holidays. And how wonderful it is to be the lucky recipient of such a special gift.

Those who celebrate Kwanzaa place Kwanzaa Plum Buttstrong emphasis on giving homemade gifts. Wrapped in Kwanzaa colors–red, green, and black, either of these recipes make an ideal gift during the week of the Kwanzaa celebration from December 26 to January 1. Wrap the jars in blue fabric and ribbon for Hanukkah gifting.

Fruit butters also make delicious spreads on morning toast, pita crisps, or crackers. But Winter Fruit Butterthat’s not all–use the spreads in place of jelly to make the best P B & J you ever ate!

Here’s another easy and quick idea that can perk up a humdrum breakfast:

Put a few dollops of fruit butter on top of your morning oatmeal or hot cereal, sprinkle some nuts on top, and enjoy that little touch of something different for breakfast.

When I make oatmeal for breakfast, I usually make a fruit salad with whatever fruits are in season to put on top. Then I sprinkle raisins and nuts over the fruit. One day I decided to present something a little different and brought a bowl of fruit butter to the table. That small idea became a great idea, and received an instant thumbs up.

W Frut Butt w:toastThis is the recipe that began my fruit butter adventures:

WINTER FRUIT BUTTER

 Yield: about 2 1/2 cups

2 cups dried apple slices

18 pitted dates

12 pitted prunes

1 1/2 cups water, divided

  1. Combine the apples, dates, and prunes and 1 cup of the water in a 2-quart saucepan. Cover and bring to a boil over high heat. Reduce the heat to low, and steam for 10 minutes.
  2. Transfer fruits to a food processor and add the remaining 1/2 cup water. Process until smooth and creamy. Transfer to a bowl and use immediately or chill and use later.
  3. When ready for gifting, spoon the fruit butter into two 8- to 10-ounce jars, cover, and tie them with bright holiday ribbons.

Notes:

If you want sweeter fruit butter, add 2 or more dates to the processor.

If you prefer a softer fruit butter, add 1 or more tablespoons of water until the mixture reaches the desired consistency. The fruit butter will thicken as it chills.

************************************

As I experimented with enhancements to the basic fruit butter recipe, I became aware that it really didn’t take more that just a few spices to heighten the flavor.

Spiced Plum ButterThis thick, fruity butter with a subtle hint of exotic spices takes off where apple butter is left behind. With more depth of flavor and more robust volume than apple butter, this treat makes a thoughtful holiday gift prepared with loving hands and given from the heart. Spoon the fruit butter into attractive jars, tie them with bright ribbons, and they’re ready to make someone special very happy.

SPICED PLUM BUTTER

Yield: about 2 1/2 cups

20 pitted prunes (about 7 1/2 ounces)

20 pitted dates (about 6 ounces)

15 dried apricots or Turkish apricots (about 3 1/2 ounces)

1 1/4 cups water

2 sticks cinnamon

2 star anise or 3 whole black peppercorns

2 whole allspice berries

2 whole cloves

  1. Combine the prunes, dates, apricots, water, and cinnamon sticks in a 2-quart saucepan. Wrap the star anise, allspice berries, and cloves in a small piece of cheesecloth, tie it securely with string, and bury it in the bottom of the saucepan.
  2. Cover the pan and bring to a boil over high heat. Reduce the heat to low and steam for 10 minutes.
  3. Remove the spices and cinnamon sticks and transfer the fruits and any remaining liquid to the food processor. Process until smooth and creamy. Spoon the fruit butter into two 8- to 10-ounce jars and set aside to cool at room temperature. Cover the jars, label them, and chill. Refrigerated the plum butter will keep for up to 3 months.
  4. When the plum butter is ready for gifting, create a colorful wrapping with cloth or paper and tie with bright ribbons.

Notes:

If you plan on making a double batch, you don’t need to double the spices. They will hold up well and still deliver great flavor.

If you have a spice bag, use it in place of the cheesecloth. Alternatively, put the spices into a tea ball and place it at the bottom of the saucepan.


Taste the Irrestibles — Resistance is Futile!

irresistible on platterIRRESISTIBLES

My goal was to come up with a special cookie for the holiday cookie tray–and to make a cookie with a long shelf life so the recipe could be prepared in advance for giving as gifts.

I just love it when a first-time experiment comes together on the first try. That was my reward when I decided to do something unique with a fruit and nut mixture that often serves as the base of many commercial raw fruit bars.

I loaded the fruity mixture with tons of nuts and wanted to see what would happen if I formed it into cookies and baked them. But for how long? And how big should I make them?

I took a stab at making them 2 inches in diameter and baking them 15 for minutes. OMG! Irresistible On baking panThey were absolutely IRRESISTIBLE! Yet, with their unusual texture they really weren’t like the familiar crispy cookies most people know, nor were they confections–but, interestingly, somewhere in-between.

It was not only the irresistible flavor these offer, but also the exceptional crunchy-on-the-outside chewy-on-the-inside texture that was so appealing. Here’s another thing I noticed: They kept amazingly well sitting on my kitchen counter in a heavy-duty plastic bag I had left open for several days. When I sealed the plastic bag, the cookies would lose their crunch. The following week I packed them in my suitcase and took them to Massachusetts when visiting my daughter, and they still tasted irresistibly delicious.

I had a few of these little goodies left at home sitting on the counter in an open plastic bag and was delighted that time (about 3 weeks) had not diminished their exceptional flavor or texture.

They’re great travelers! Take them on a plane trip, pack them on a road trip (the kids will love ’em), wrap them in a gift box and ship them to far-away friends and family. All they need is a good home equipped with a pack of cookie monsters.

I knew I had something special and that they would make welcome little homemade gifts during the holidays. If I wrapped them in blue ribbon, I might bring them to a Hanukkah party. I could tie them up with a red and green bow and they would be perfect nibbles for my friend’s Grandma for Christmas.  And by putting the Irresistibles in a gift box wrapped with red, green, and black, they would make the perfect homemade Kwanzaa gift for someone special.

Here are a few handy notes that will help bring the recipe together with ease. You’ll need:

  • A hammer for coarsely chopping the almonds
  • A hand-crank nut mill for coarsely grinding the walnuts
  • A large food processor, at least 11 cup capacity
  • Kitchen scissors for snipping the dates and dried apricots

When the Irresistibles are baked and cooled, treat yourself to one, or two, or—-maybe just one more!

IRRESISTIBLES

Yield: about 50 cookies


2 1/2 cups almonds, dividedIrresistible Single

1 1/2 cups walnuts, divided

2 tablespoons raw cacao nibs


1 1/2 cups pitted dates, snipped in half

3/4 cup maple syrup

1/2 cup Turkish apricots, snipped in half

1/2 cup rolled oats

3 tablespoons unsweetened cocoa powder or raw cacao powder

2 tablespoons water

1 teaspoon ground cinnamon

1/2 teaspoon ground nutmeg


30 whole almonds

  1. Preheat the oven to 325 degrees F. and line 3 large rimmed baking sheets with parchment.
  2. Put 1 cup of the almonds in a heavy-duty plastic bag, seal it, and coarsely chop the nuts with a hammer. Transfer the nuts to a large mixing bowl. Put 1/2 cup of the walnuts in a hand-crank nut mill and coarsely grind them. Add them to the bowl with the the almonds, add the cacao nibs, and set aside.
  3. Put the remaining 1 1/2 cups of almonds into the food processor and process to form a coarse meal. Add the remaining 1 cup walnuts, the dates, maple syrup, apricots, rolled oats, cocoa powder, water, cinnamon, and nutmeg and pulse and process to form a slightly chunky mixture. You may have to stop the machine several times to redistribute the ingredients, but patience pays off. The mixture will be very solid.
  4. When the ingredients are evenly distributed and none of the apricots and nuts are larger than 1/8 inch in size, transfer the mixture to the bowl with the chopped nuts.
  5. Roll up your sleeves and use your hands to work the nuts and nibs into the mixture, incorporating them thoroughly into the firm “dough.”
  6. Lightly oil your hands and roll the mixture into balls about 1 to 1 1/4 inches in diameter. Space them about 1-inch apart on the prepared baking sheets. Use the heel of your hand or fingers to press down on the balls, forming cookies about 2 inches in diameter.
  7. Press an almond into the center of each cookie and bake for 15 minutes. Do NOT overbake! Cool the cookies completely before removing them from the pan.
  8. To store the Irresistibles, put them in a heavy-duty plastic bag, but do not seal it. They keep well at room temperature for up to 1 week. For longer storage, put the Irresistibles in the refrigerator for up to 3 months.