PLUM GOODIES FOR THE SWEET TABLE!


PLUM GOODIES

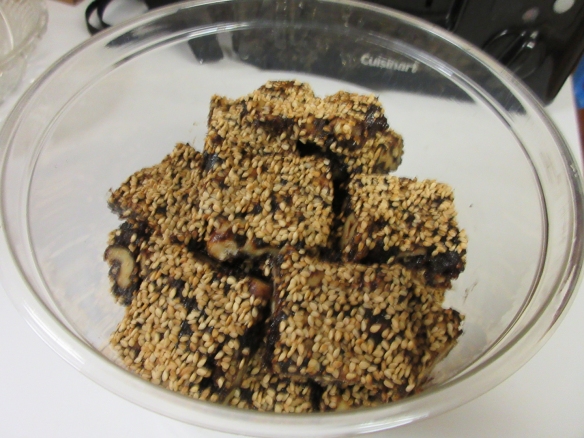
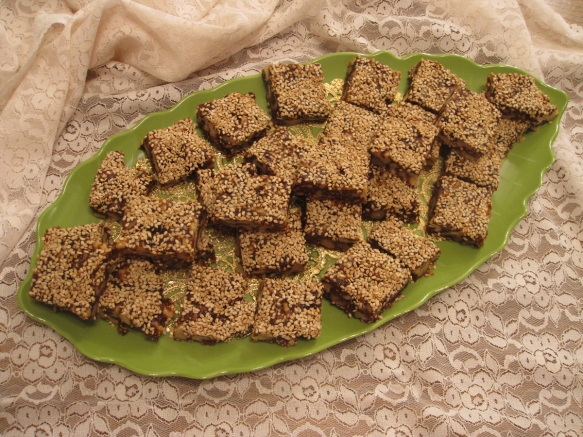
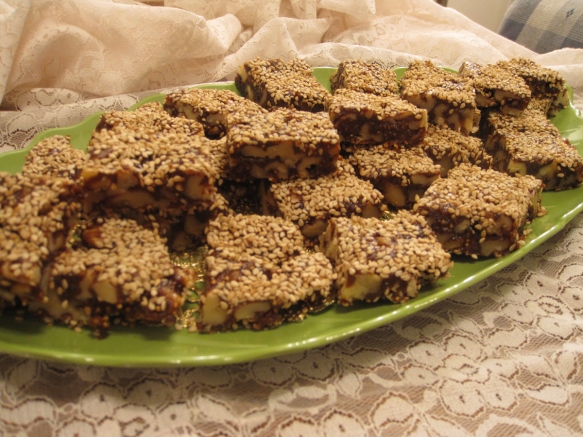
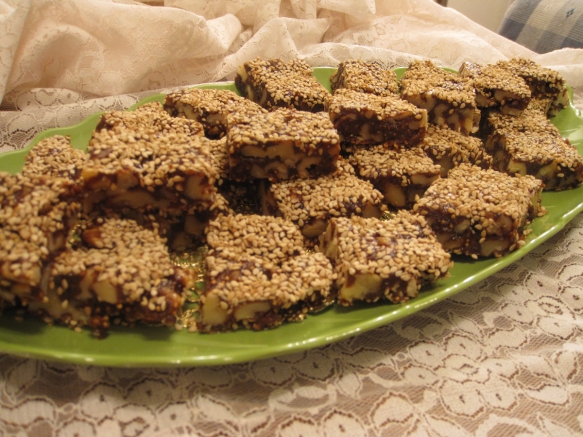
Plum Goodies B copyFigs and prunes seldom get the respect they deserve, but when they’re combined with walnuts and formed into delicious, bite-sized nibbles, they command much more than just respect. They get a blast of loving attention with smiles. Serving these at small gatherings as little after-lunch confections, I noticed guests reaching for seconds and thirds.

These little tidbits not only become desirable confections on the dessert tray, but they also make healthful treats to include in school kids’ lunchboxes or a between-meal snacks for little ones who need a healthful energy boost during the day.

They’re great keepers, too! Just pile them into a plastic container with a cover and set them aside on the countertop so they’re convenient for frequent nibbling—especially for the little ones.

For holiday parties, we tend to pull out all the stop. After all, the holidays come only once a year and we just have to go all out and prepare a fun sweet table loaded with everything from cookies and bars to truffles and confections. Be sure to add these little two-bite treats to your repertoire of collected recipe favorites. They might just become new favorites.

I made a batch of these for our own pleasure and put a heaping mound of them on a dish when a neighborhood friend came over with a loaf of his delicious sourdough bread. With enthusiasm, he popped one into his mouth and nodded with a smile of approval. As we sat at the table with our foodie friend and chatted about recipes, we noticed he kept reaching for another Plum Goodie, and another, and another. When he took the last one, he looked at me in wonder and asked, “Did I just eat the whole plate of these?”

Of course, my husband and I just giggled. It was the best testimonial I have ever encountered.
Plum Goodies E copy

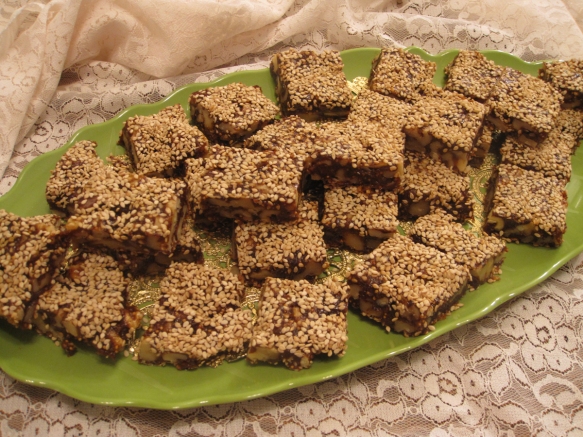
They disappeared so quickly I didn’t have the chance to plate them. That means I have to get to work and bake up another batch — soon! I love that this recipe makes a hearty quantity of about 40 little squares.

Because these tasty confections are so unique, they would even make a lovely homemade hostess gift to bring when visiting friends during the holiday season. Consider these as a delicious holiday gift for Grandma, who doesn’t need another scarf or pair of slippers but  loves to nibble on sweet treats.

Dried fruits are a holiday bonus, providing pleasant diversity from the limited variety of fresh fruits like apples, pears, and oranges available during the winter season. To vary this recipe, try replacing the prunes with dried apricots or peaches. Both would offer delightful flavor paired with the definitive flavor of the sesame seeds that cover both the top and bottom of these treats.
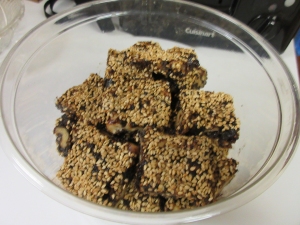
PLUM GOODIES

 Yield: about 40 one-inch squares

10 ounces dried calmyrna or golden figs, trimmed and snipped in half

1 1/4 cups pitted prunes

12 pitted dates, snipped in half

3/4 cup water

2 3-inch cinnamon sticks

2 to 3 whole star anise
 

1/4 cup plus 3 tablespoons organic sugar

1 or 2 tablespoons water, as needed

1 tablespoon fresh lemon or lime juice

1/2 teaspoon ground cinnamon


3 cups walnuts


3/4 cup toasted sesame seeds

Combine the figs, prunes, dates, water, cinnamon sticks, and star anise in a 2 to 3-quart Plum Goodies A copysaucepan. Cover the pan and bring to a boil over high heat. Decrease the heat to low and steam for 10 minutes.
Discard the cinnamon sticks and anise and transfer the mixture to a food processor, including any liquid remaining in the pan. Add the sugar, water, lemon juice, and ground cinnamon and process until smooth and completely pureed. The mixture will be very thick.

Spoon the mixture into a medium bowl and add the walnuts. Mix well with a large spoon to incorporate the walnuts evenly throughout the mixture.

Preheat the oven to 200 degrees and have ready two large rimmed baking sheets. Cut 2 pieces of parchment to fit the baking sheets. Place one piece of parchment directly on the countertop, and set the other aside.

Sprinkle 1/3 of the sesame seeds into the center of the parchment and spread them evenly over a 6-inch diameter.

Carefully drop small spoonfuls of the walnut-fig mixture to cover the sesame seeds, and flatten the mixture with the back of a spoon, spreading it out to create a rectangle about 11 inches by 14 inches. Sprinkle the next 1/3 of the remaining sesame seeds over the top, pressing them down with the back of a spoon or your fingers. Sprinkle tiny bits of the remaining sesame seeds over sparsely covered areas, and set the remaining seeds aside.

Lift the parchment with the sesame-covered slab and place it into one baking sheet. Bake for 1 1/2 hours.

Remove from the oven and place the remaining piece of parchment over the top. Cover with the remaining baking sheet and invert the pans.

Remove the top piece of parchment and discard it. Sprinkle the remaining sesame seeds over the uncovered areas. Press them into the surface, and bake 30 minutes longer.

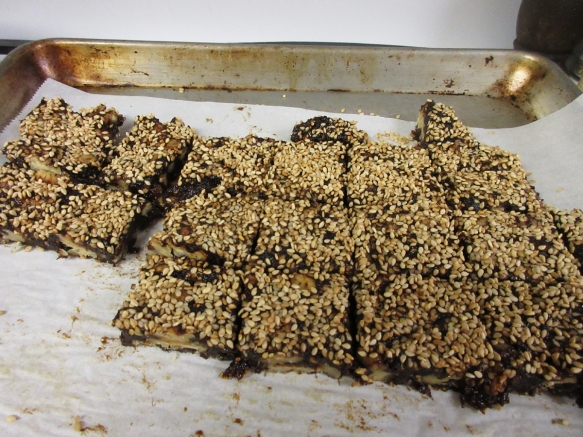
Remove and cool the walnut-figgy slab. Using a flatware knife, cut the slab into 1-inch squares. Place the squares onto a large platter and leave them at room temperature for 4 to 8 hours to firm and dry slightly.
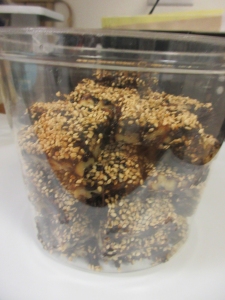
Store in a covered container in the refrigerator for up to 6 months. Covered in plastic wrap and stored at room temperature, the Walnut and Figgy Bites will keep for up to 2 months. For longer storage, put the confections in heavy-duty zip-lock bags and freeze for up to 6 months.


Plum Goodies E copy

NAUGHTY LITTLE NIBBLES MAKES US HAPPY!

CHOCOLATE FIREBALLS and TAHINI PEANUT CONFECTIONS

Homemade fruit and nut confections are often considered non-glamorous and too homespun by some. True, they may not be perfectly shaped and are a bit out of round, but let’s look from a different point of view. By others, they’re beloved, delicious, and most appreciated because they’ve been lovingly hand-made by someone whose desire is to bring a tasty little treat to the table or to offer as a sweet gift.

I’ve made two happily concocted confections to share on this blog–Chocolate Fireballs and Tahini Peanut Confections. Each one is vastly different from the other, yet they pair well together.

First, the Chocolate Fireballs: Most people find chocolate a total charmer. It’s no wonder–chocolate has compelling flavor that hits the tongue and totally wins you over. I say, “Go ahead–devour the chocolate!” These little treats contain no sugar, yet they’re deliciously sweet with nothing more than the earthy gifts of Mother Nature.
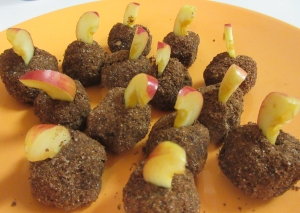
A little heads-up: These babies contain cayenne within the confections and also in the coating. I would judge the heat level to be between mildly spiced to just a tad more–not at the medium level, though. But, since everyone has a different spice tolerance, I thought it would be helpful to prepare you for a delightful little touch of heat and provide a little warning to those with sensitive taste buds.

If you know your guests enjoy spicy foods, say nothing and let the touch of spice be a pleasant surprise. You can enjoy watching them light up when that tiny blast of heat hits those little receivers on the tongue.
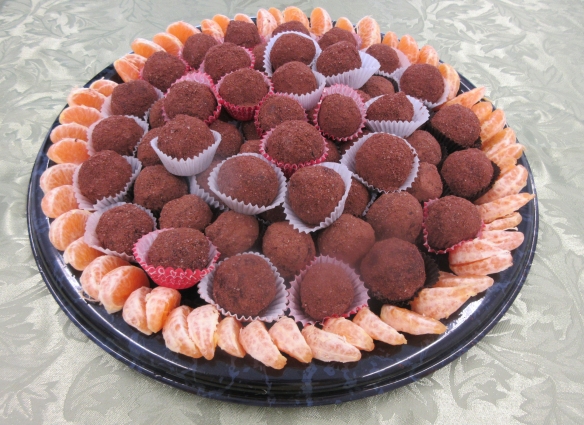
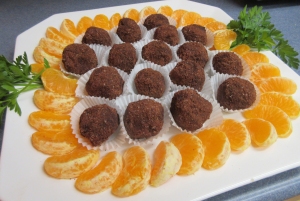
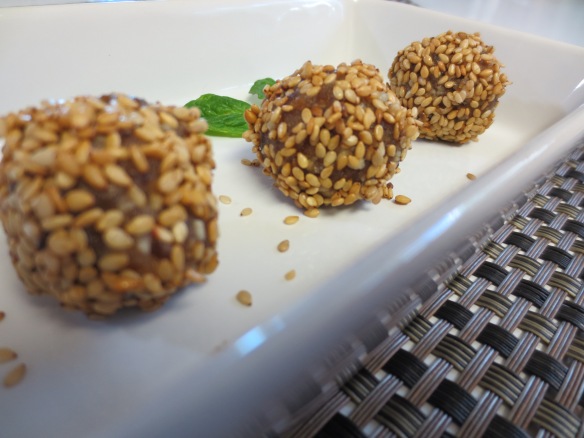
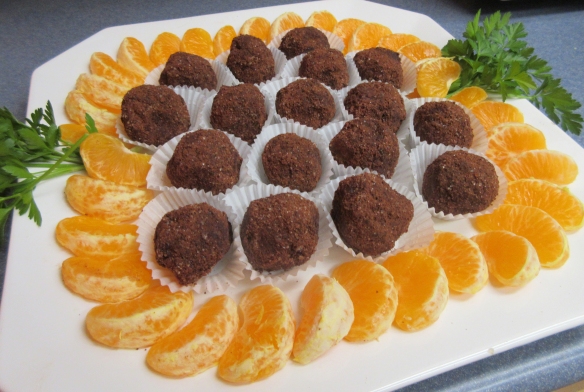
One day, when unexpected relatives dropped in for a visit, I reached into the freezer for these treats and arranged them on a dessert platter lined with a doily. Unwilling to wait for them to defrost, the cousins snapped them up and devoured them with gusto. That defining moment revealed that the confections were just as enjoyable eaten at room temperature or taken directly from the freezer. These tasty nibbles also make ideal gifts for the grandparents on your holiday list.

CHOCOLATE FIREBALLS

Yield: about 25 one-inch confections

Confections

1 1/2 cups whole almonds

1 1/2 cups walnuts

3 cups pitted dates, snipped in half

5 tablespoons raw cacao powder or unsweetened cocoa powder

1/4 cup plus 1 tablespoon maple syrup

2 teaspoons vanilla extract

1 teaspoon ground cinnamon

1/2 teaspoon caramel extract

1/2 teaspoon black pepper

1/2 teaspoon cayenne

5 to 6 tablespoons water

Coating

6 tablespoons almond meal

4 tablespoons unsweetened cocoa powder

3 tablespoons organic sugar

1/4 teaspoon cayenne

TO MAKE THE CONFECTIONS, put the almonds and walnuts in the food processor and process until the nuts are finely ground but still retain a little texture. If you prefer a confection with a little crunch, process briefly so the nuts still retain their crunchy nature. Process a little longer for a smoother texture. Transfer the nuts to a large bowl.

Put the dates, cacao powder, maple syrup, vanilla, cinnamon, caramel extract, pepper, and cayenne in the food processor. Add 5 tablespoons of the water and pulse and process until the ingredients are smooth and creamy or lightly textured as desired.

Pour the date mixture into the bowl with the nuts and use your hands to thoroughly combine the ingredients. If the mixture seems too stiff, add the remaining 1 tablespoon of water and mix well to incorporate it completely. Set aside for 5 minutes.

TO MAKE THE COATING, combine the Coating ingredients in a separate bowl. Using your hands, roll the confection mixture into 1-inch balls or small logs, then, roll them in the coating, covering them completely.

Put the confections in a covered container. If using within a week or two, store the confections in the refrigerator. For longer storage, put them in the freezer. Frozen, the confections will keep for up to 3 months.

There are several ways to enjoy the confections. Some people enjoy them right from the freezer. Others prefer them partially defrosted, about 10 minutes out of the freezer. They’re also delicious served completely defrosted.

Notes:

When preparing this recipe, be sure to snip the dates in half with a kitchen scissors to avoid date pits that might damage the food processor.


Cocoa Powder vs. Raw Cacao

Most supermarkets sell unsweetened cocoa powder, while natural food markets sell both unsweetened cocoa powder and raw cacao powder. Between them there’s a world of difference.

Unsweetened cocoa powder has shed all or most of its natural fat content, leaving only a minute amount of its natural cocoa butter intact. Raw cacao powder is considerably more expensive, but some cooks consider it worth the extra price. Because it still contains its natural cocoa butter (the magical fat that boosts the flavor of the chocolate), raw cacao delivers richer flavor with more depth.

The two points to consider when deciding which chocolate to buy for baking or confections are flavor and fat content. If you’re aiming for lower fat foods, stick to the unsweetened cocoa powder. If the fat content is not a consideration, go for the more intense flavor and choose the raw cacao powder.

Caramel Extract: Caramel extract is not available in grocery stores. I order it online from J.R. Watkins – https://www.jrwatkins.com

******************************************************

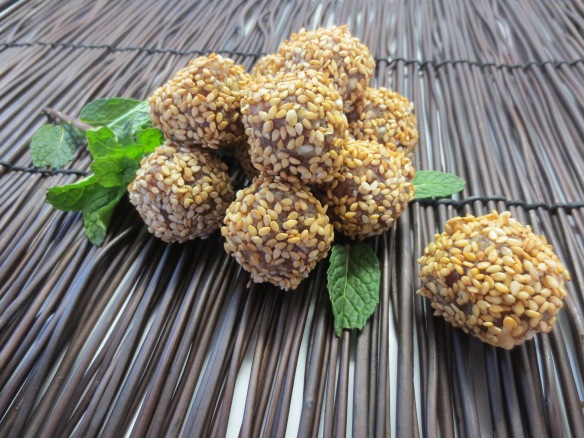
TAHINI PEANUT CONFECTIONS

If you’re invited to dinner or a holiday party, bring some of these confections along as a hostess gift and watch the recipients beam with joy. With their captivating sesame flavor and date-sweetened goodness, these little tidbits make outstanding holiday gifts. Prepare these well ahead and keep them frozen so you can be ready when the festive season comes along. The act of giving is reward itself, but you’ll receive extra gratitude when you present these treats in an attractive jar or box attractively wrapped in their holiday best.

My hubby is a happy camper when he can reach into the freezer any time year-round and pluck a sweet frozen treat from the plastic container I attempt to keep filled. He claims they taste better when frozen–personally, I think he just doesn’t want to wait the ten or fifteen minutes for them to reach room temperature.
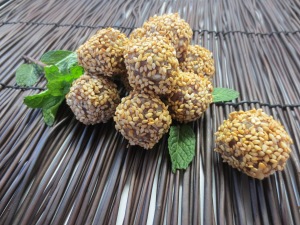
Yield: 45 to 50 confections

2 cups firmly packed pitted dates, snipped in half

1 cup roasted unsalted peanuts

1/2 cup tahini

2 to 6 tablespoons water

1/4 teaspoon caramel extract

Coating

1 cup natural or toasted sesame seeds

TO MAKE THE CONFECTIONS, combine the dates, peanuts, tahini, water, and caramel extract in the food processor and pulse and process until well blended. Longer processing will create a smoother confection. If you prefer a chunkier confection, you can control the texture by shorter processing and stopping the machine frequently to check the results.

Form the mixture into balls, using about one teaspoon for each confection. Roll, squeeze, and use your fingers to form the mixture into balls or ovals.

TO COAT THE CONFECTIONS, put the sesame seeds in a small, deep bowl and roll each ball in the seeds, coating it completely.

IF PLANNING AHEAD FOR GIFTING, put the finished confections in a covered container and store it in the refrigerator for up to 2 weeks or in the freezer for up to 3 months. Be sure to thaw the confections completely before wrapping them for gifting.

TO SERVE THE CONFECTIONS AT HOME for your own family or guests, line an attractive dish with a doily, arrange the confections on the dish, and garnish with a sprig of fresh mint. They’re delicious eaten at room temperature, chilled, or even frozen.

I BROUGHT A GHOST TO THE HOLIDAY TABLE!

GHOST PUMPKIN RAGOUT

White pumpkin 2My idyllic vision was to make a dramatic presentation of a tasty, savory stew served inside a plump white pumpkin. I could even picture the dramatic moment I would lift the lid of the pumpkin, stand back, and let my dinner guests watch in amazement as the giant plume of steam rose up from the steaming stew.

After several experiments, I found it impossible to prevent the pumpkin from totally collapsing or half the stew from oozing out the bottom of the cooked pumpkin. Neither was a pretty site. I was glad I hadn’t experimented on guests.

It would have been a beautiful holiday dish and a magnificent presentation–would have–but—–

I tried the experiment about three times and just gave up in frustration! Yet, somehow I hoped to bring a rich, flavorful stew to the table that included scooping up some of that delicious, delicately sweet pumpkin flesh as I was spooning out the stew.

White Pumpkin RagoutMy instincts led me to cook and serve them separately and allow the two to meet up in the soup bowl. That worked like a charm! Here’s a little detail about ghost pumpkins:

Ghost pumpkins, also called albino, Snowball, Casper, Lumina, Baby Boo, Cotton Candy Pumpkin, stand apart from the familiar orange jack-o-lanterns in many ways. Their flesh is considerably thicker and shows off a gorgeous hue of brilliant golden orange. The texture is pleasantly firm and delightfully moist.

White pumpkin 1The white pumpkin’s best-kept secret is its pleasantly sweet flavor, though not as sweet as butternut or kabocha, the Japanese pumpkin. White pumpkins are still less common than the jack-o-lanterns but are becoming more available at chain groceries and farm stands.

A perfect marriage, the white pumpkin is the ideal mate to enhance this celebratory ragout that needs little else to bring pleasure and satiety to a holiday meal.

To give this flavorful ragout its moment in the sun, I served it in a wide, shallow soup bowl and heaped the serving into the center. Serve the stew with plenty of hearty whole-grain bread to mop up any bits of delicious sauce that remains in the bowl.

 GHOST PUMPKIN RAGOUT

 Yield: 12 to 14 hearty servings

1 medium or large ghost pumpkin or 2 large butternut squashes

5 cups waterWhite Pumpkin Ragout

2 cups dry red wine

2 (6-ounce) cans tomato paste

1/2 cup low-sodium soy sauce

4 cloves garlic, crushed

2 sticks cinnamon

2 teaspoons dried thyme

2 bay leaves

3 medium carrots, angle sliced

2 to 3 medium leeks, white part only, cleaned and thickly sliced

2 medium yams, cut into bite-size pieceswhite-pumpkins

1 pound baby white rose potatoes, scrubbed

1 large sweet onion, coarsely chopped

1/2 small cauliflower, chopped

2 small beets, diced

1/2 pound green beans, trimmed, cut into 1 1/2-inch lengths

1/2 pound button or cremini mushrooms, thickly sliced

1 cup red lentilsWhite pumpkin 2

Juice of 1 lemon, or to taste

1/4 cup natural sesame seeds

1 pound frozen peas, thawed and held at room temperature

  1. Preheat the oven to 350 degrees F. Wash the pumpkin and dry it. Using a firm paring knife, cut a 5 or 6-inch diameter hole in the top and gently lift it out by the stem. Use a large spoon to remove the seeds and stringy matter from the pumpkin. Set the seeds aside to roast separately. Place the pumpkin on a large rimmed baking sheet lined with parchment paper or aluminum foil. Bake for 50 to 60 minutes, or until soft when gently pressed, yet still firm.
  2. When the pumpkin is cool enough to handle, cut it into 2-inch chunks, peeling the skin as you go. Set the chunks aside.
  3. While the pumpkin is roasting, combine the water, red wine, tomato paste, soy sauce, garlic, cinnamon sticks, thyme, and bay leaves in a 12-quart stockpot.
  4. Add the carrots, leeks, yams, potatoes, onion, cauliflower, beets, green beans, mushrooms, and red lentils. Cover the stockpot and bring to a boil over medium-high heat. Reduce the heat to medium and simmer gently for 15 to 20 minutes, or until the vegetables are just softened.
  5. Before serving, add the lemon juice to taste and adjust seasonings, if needed.
  6. To serve, spoon some of the pumpkin pieces into wide soup bowls. Spoon the ragout over the pumpkin and sprinkle the top with sesame seeds. The finishing touch is a generous sprinkling of plump peas over the top.

Note:

Butternut squashes make the perfect stand-in if ghost pumpkin is unavailable. Bake them at 400 degrees F. til tender, about 50 to 60 minutes.

Don’t throw those pumpkin seeds away!

roasted-pumpkin-seedsRoasted Pumpkin Seeds

Clean the stringy flesh clinging to the seeds by rinsing them in a bowl of water. Put the seeds on a large rimmed baking sheet and sprinkle with 1 or 2 teaspoons of canola oil. Use your hands to mix the seeds and coat them with the oil. Sprinkle the tops lightly with salt and pepper and toss with a spatula. Put the pan in the oven and roast at 200 degrees for 8 to 10 hours. I let the seeds roast overnight.

HATCH CHILES BRING SPARKLE TO THE HOLIDAY TABLE!

Roasted Sweet Potatoes 2

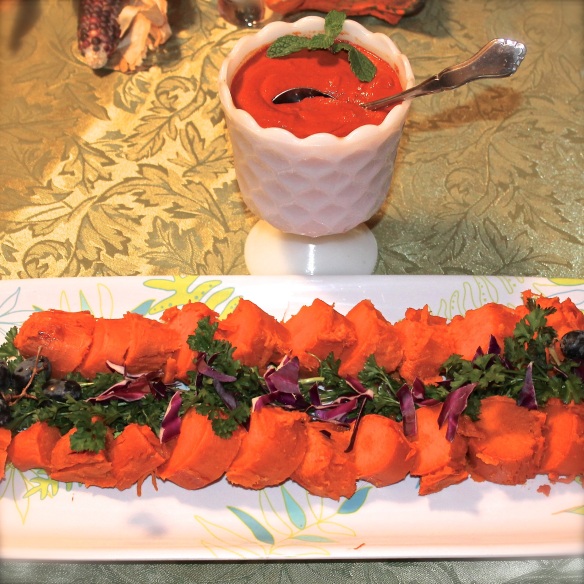
vvplogoYour roasted sweet potatoes will practically dance with holiday spirit when they’re drizzled with the zesty nature of this mild chile sauce. And I promise the sauce has just enough mojo to put a magic touch on your festive meal. The sauce can be prepared a day or two ahead and served warmed, chilled, or at room temperature. Leftovers keep well in the fridge for at least 4 or 5 days.

To create a creamy, smooth as velvet sauce, it helps to have a high-speed blender, but with patient soaking and longer blending it should work just fine with a regular blender.

I experimented with this dish for Thanksgiving for the first time. It was such a big hit, I felt it could be a terrific side dish any time during the holiday season.

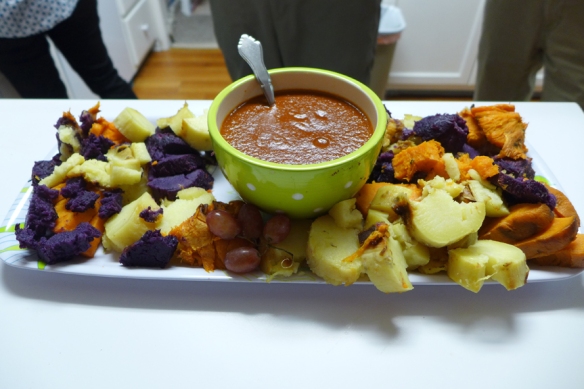
Then, the following year, I decided to bring more colors to the platter with multi-colored sweet potatoes. In addition to the familiar orange yams, my local Korean market had yellow sweet potatoes and a delicious variety of purple ones called Okinawan sweet potatoes. The lighting wasn’t at its best for a great photo, but I think the result is so appealing I wanted to share it.

Multi-color potatoes 2

ROASTED SWEET POTATOES WITH SIZZLING CHILE SAUCE

Yield: 6 servings

Sweet Potatoes

5 or 6 medium yellow or orange sweet potatoesRoasted Sweet Potatoes

Sizzling Chile Sauce (recipe below)

Parsley sprigs, for garnish

3 to 4 tablespoons chopped purple cabbage, for garnish

  1. Preheat the oven to 400 degrees F. (Gas Mark 6) and have ready a large rimmed baking sheet lined with aluminum foil.
  1. Scrub the sweet potatoes, put them on the prepared baking sheet, and roast for 50 to 60 minutes, or until they are soft when gently pressed. Prepare the Sizzling Chile Sauce while the sweet potatoes are baking.
  1. When the sweet potatoes are done, peel them and cut them into 1-inch thick slices. Multi-color Sweet PotatoesArrange them on a large platter, overlapping the slices. Garnish with the parsley and cabbage. Alternatively, drizzle some of the sauce over the center of each potato slice.
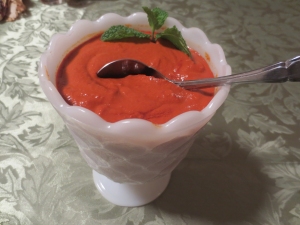
 

Sizzling Chile Sauce (Makes about 3 cups)

Chile Sauce2 ounces (56g) Melissa’s dried Hatch chiles or California chiles (about 8 to 10 dried chiles)

3 cups (720 ml) boiling water

2/3 cup (160 ml) chopped onions

5 garlic cloves, coarsely chopped

2 teaspoons extra virgin olive oil

1/3 cup (80 ml) coarsely chopped almonds

2 tablespoons toasted sesame seeds

1 teaspoon salt

1/4 cup (60 ml) brown sugar

1/4 cup (60 ml) rice vinegar or other mild vinegar

  1. Prepare the Sizzling Chile Sauce while the sweet potatoes are baking. Using kitchen scissors, cut the chiles open and discard the seeds, ribs, and stems. Snip the chiles into coarse pieces and put them in a bowl. Pour the boiling water over the chiles to cover. Set aside to soften for about 1 hour.
  1. Meanwhile, combine the onions, garlic, and olive oil in a 10-inch (25 cm) skillet. Cook and stir over high or medium-high heat for 2 to 3 minutes, or until the onions begin to soften. Add 1 or more tablespoons of water if needed to prevent burning the onions and garlic.
  1. Add the almonds and sesame seeds to the pan and cook another minute or two.
  1. Transfer the onion mixture to a blender and add the salt, brown sugar, and vinegar.
  1. When the chiles have softened, use a slotted spoon to transfer them to the blender. Add 1 cup (240 ml) of the chile soak water and process for a full minute or two until the sauce becomes smooth and creamy. Adjust seasonings, if needed, and serve the sauce on the side.

Alternative serving suggestion: Spoon a line of the sauce down the center of the overlapped sweet potato slices and add a pinch of minced parsley over the sauce. Serve the remaining sauce on the side.


This recipe is part of a fun blogging chain that includes about 96 innovative bloggers sharing amazing holiday recipes. You can easily move backward or forward through the Potluck chain to explore a banquet of tantalizing recipe posts crossing many continents.

To venture over to the blog that precedes mine in the Potluck, click on the go back buttongo_bck-300x257


go_forward-300x243To venture over to the blog that follows mine in the Potluck click on the go forward button


To start at the beginning of the Potluck, click on the stay calm button

Stay-Calm-Beginning-Red


Enjoy the fun holiday recipes and have a holiday blast!!!!!


Carrots + Julienne Peeler = Love at First Cut!


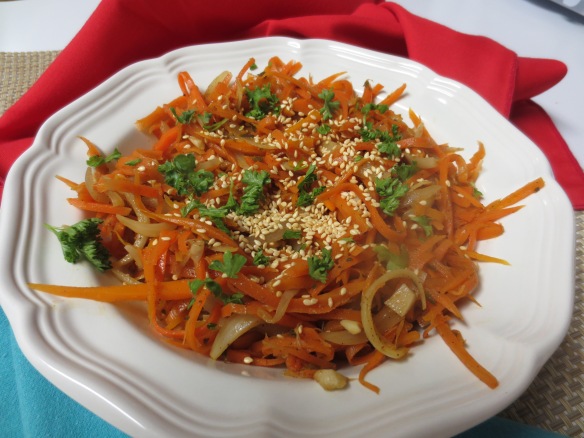
Carrot Matchstick 2CARROT MATCHSTICK STIR-FRY

What I love about putting a carrot dish on the buffet table is how its bright, dazzling color jumps out and instantly perks up the whole array of dishes on the table. But I know not everyone loves carrots.

I’ve noticed how I always tended to cater to my family’s tastes and included their favorite veggie dishes at special holiday meals. One liked cooked peas, another preferred green beans, while others would only eat broccoli. No doubt, other households faced similar likes and dislikes.

But as my children grew into adults and made their way in the world, their dining experiences helped to broaden their tastes considerably. Thank goodness! We creative cooks just can’t help being attracted to nuanced ideas. We’re constantly inspired to explore unique flavors, different vegetables, ethnic recipes, exotic herb blends, and anything that brings pleasant change to the palate.

Someone recently asked me where I found inspiration for new dishes. Like many of you, I’m surrounded with inspiration. Perhaps a trip to the market or farmer’s market will jump-start a recipe idea, sometimes it’s a color that inspires, or a bunch of gorgeous radishes pops out and an idea forms in my mind.

A perfect example of an inspiration is the julienne peeler my daughter bought for me. It’s a Julienne peelervegetable peeler with a row of tiny little teeth where the cutting blade would normally be. I’d never seen one before and thought I’d try it out on a carrot. First, I peeled the carrot with a regular peeler, then, applied the julienne peeler, cutting in long strips. What a fabulous discovery this little tool is! I kept playing with it until I had julienned four whole carrots. There was the start of this new dish!

It’s really easy and tasty as can be. What makes this dish stand apart is its unique appearance. Cutting the carrots ultra-thin like this makes them cook within a minute or two. Look for a julienne peeler in shops that specialize in kitchenware or order it from Crate & Barrel or Williams Sonoma. A good quality julienne peeler costs about $12 and really pays off. I also bought one that cost much less, but it doesn’t work as well.

Have fun with the new kitchen toy! I’m going to try mine on potatoes and parsnips next.

Carrot MatchstickCARROT MATCHSTICK STIR-FRY

Yield: 4 to 5 servings

4 medium carrots, peeled and cut into long matchsticks with a julienne peeler

1 small onion, sliced vertically into half moons

3 cloves garlic, minced

1 teaspoon sesame oil

1/4 cup water


1 to 2 teaspoons soy sauce, Tamari, or Bragg Liquid Aminos

1 to 3 teaspoons fresh lemon juice

Salt and pepper to taste


1 tablespoon sesame seeds

1 to 2 teaspoons minced parsley

  1. Put the carrots, onion, garlic, sesame oil, and water in a large, deep skillet. Cook and stir over high heat for 1 to 2 minutes or until just tender. Add 1 or more tablespoons water if needed to prevent burning. When the carrots are soft, turn off the heat.
  2. Add soy sauce, lemon juice, and season to taste with salt and pepper.
  3. Transfer the carrots to an attractive serving bowl and garnish with the sesame seeds and a sprinkle of minced parsley.