PLUM GOODIES FOR THE SWEET TABLE!


PLUM GOODIES

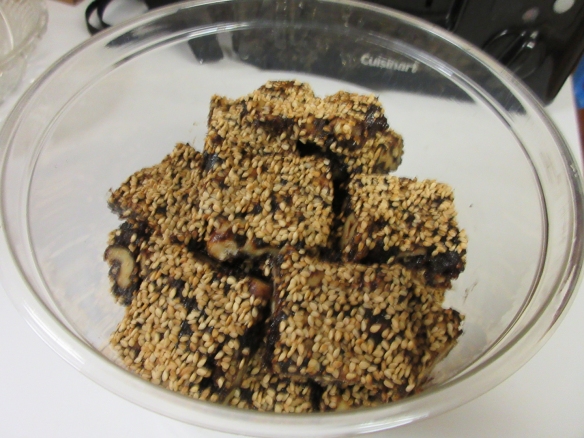
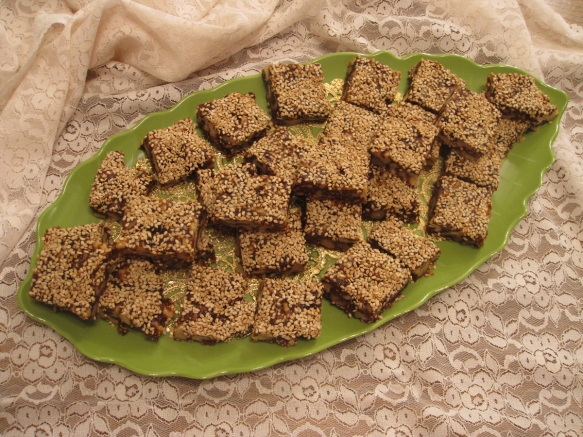
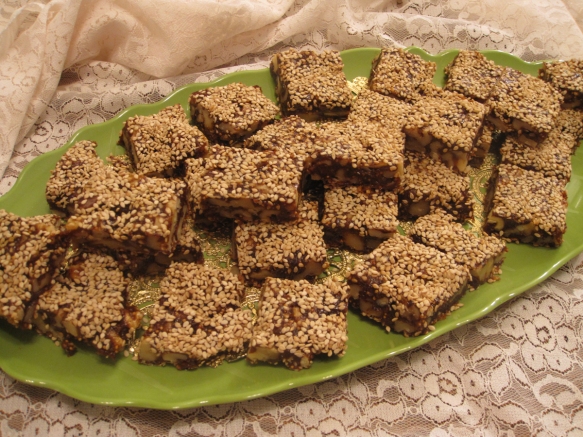
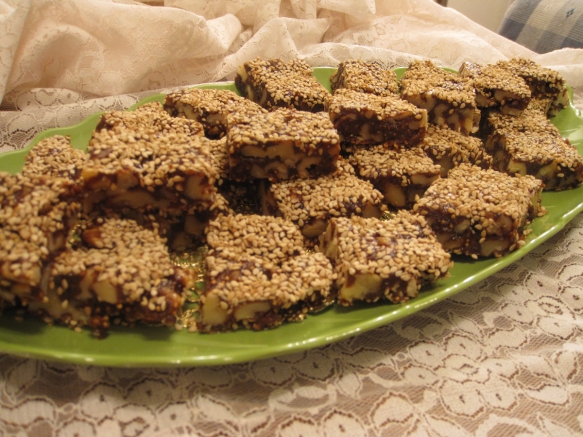
Plum Goodies B copyFigs and prunes seldom get the respect they deserve, but when they’re combined with walnuts and formed into delicious, bite-sized nibbles, they command much more than just respect. They get a blast of loving attention with smiles. Serving these at small gatherings as little after-lunch confections, I noticed guests reaching for seconds and thirds.

These little tidbits not only become desirable confections on the dessert tray, but they also make healthful treats to include in school kids’ lunchboxes or a between-meal snacks for little ones who need a healthful energy boost during the day.

They’re great keepers, too! Just pile them into a plastic container with a cover and set them aside on the countertop so they’re convenient for frequent nibbling—especially for the little ones.

For holiday parties, we tend to pull out all the stop. After all, the holidays come only once a year and we just have to go all out and prepare a fun sweet table loaded with everything from cookies and bars to truffles and confections. Be sure to add these little two-bite treats to your repertoire of collected recipe favorites. They might just become new favorites.

I made a batch of these for our own pleasure and put a heaping mound of them on a dish when a neighborhood friend came over with a loaf of his delicious sourdough bread. With enthusiasm, he popped one into his mouth and nodded with a smile of approval. As we sat at the table with our foodie friend and chatted about recipes, we noticed he kept reaching for another Plum Goodie, and another, and another. When he took the last one, he looked at me in wonder and asked, “Did I just eat the whole plate of these?”

Of course, my husband and I just giggled. It was the best testimonial I have ever encountered.
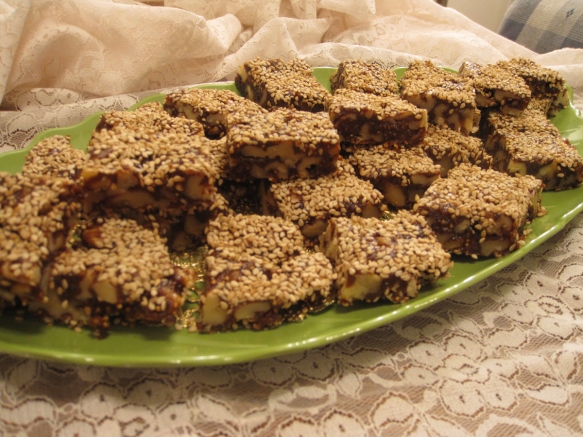
Plum Goodies E copy

They disappeared so quickly I didn’t have the chance to plate them. That means I have to get to work and bake up another batch — soon! I love that this recipe makes a hearty quantity of about 40 little squares.

Because these tasty confections are so unique, they would even make a lovely homemade hostess gift to bring when visiting friends during the holiday season. Consider these as a delicious holiday gift for Grandma, who doesn’t need another scarf or pair of slippers but  loves to nibble on sweet treats.

Dried fruits are a holiday bonus, providing pleasant diversity from the limited variety of fresh fruits like apples, pears, and oranges available during the winter season. To vary this recipe, try replacing the prunes with dried apricots or peaches. Both would offer delightful flavor paired with the definitive flavor of the sesame seeds that cover both the top and bottom of these treats.
PLUM GOODIES

 Yield: about 40 one-inch squares

10 ounces dried calmyrna or golden figs, trimmed and snipped in half

1 1/4 cups pitted prunes

12 pitted dates, snipped in half

3/4 cup water

2 3-inch cinnamon sticks

2 to 3 whole star anise
 

1/4 cup plus 3 tablespoons organic sugar

1 or 2 tablespoons water, as needed

1 tablespoon fresh lemon or lime juice

1/2 teaspoon ground cinnamon


3 cups walnuts


3/4 cup toasted sesame seeds

Combine the figs, prunes, dates, water, cinnamon sticks, and star anise in a 2 to 3-quart Plum Goodies A copysaucepan. Cover the pan and bring to a boil over high heat. Decrease the heat to low and steam for 10 minutes.
Discard the cinnamon sticks and anise and transfer the mixture to a food processor, including any liquid remaining in the pan. Add the sugar, water, lemon juice, and ground cinnamon and process until smooth and completely pureed. The mixture will be very thick.

Spoon the mixture into a medium bowl and add the walnuts. Mix well with a large spoon to incorporate the walnuts evenly throughout the mixture.

Preheat the oven to 200 degrees and have ready two large rimmed baking sheets. Cut 2 pieces of parchment to fit the baking sheets. Place one piece of parchment directly on the countertop, and set the other aside.

Sprinkle 1/3 of the sesame seeds into the center of the parchment and spread them evenly over a 6-inch diameter.

Carefully drop small spoonfuls of the walnut-fig mixture to cover the sesame seeds, and flatten the mixture with the back of a spoon, spreading it out to create a rectangle about 11 inches by 14 inches. Sprinkle the next 1/3 of the remaining sesame seeds over the top, pressing them down with the back of a spoon or your fingers. Sprinkle tiny bits of the remaining sesame seeds over sparsely covered areas, and set the remaining seeds aside.

Lift the parchment with the sesame-covered slab and place it into one baking sheet. Bake for 1 1/2 hours.

Remove from the oven and place the remaining piece of parchment over the top. Cover with the remaining baking sheet and invert the pans.

Remove the top piece of parchment and discard it. Sprinkle the remaining sesame seeds over the uncovered areas. Press them into the surface, and bake 30 minutes longer.

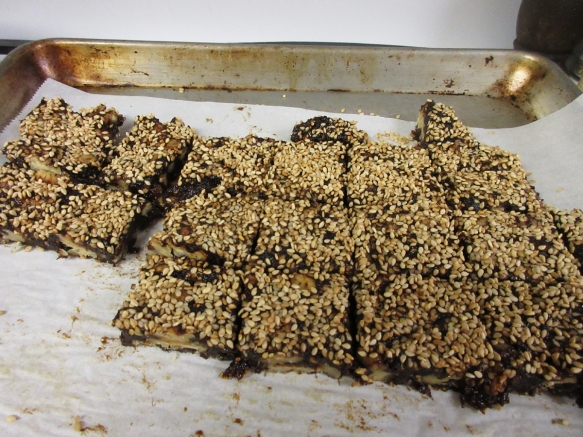
Remove and cool the walnut-figgy slab. Using a flatware knife, cut the slab into 1-inch squares. Place the squares onto a large platter and leave them at room temperature for 4 to 8 hours to firm and dry slightly.
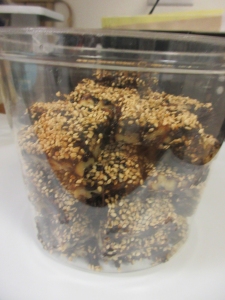
Store in a covered container in the refrigerator for up to 6 months. Covered in plastic wrap and stored at room temperature, the Walnut and Figgy Bites will keep for up to 2 months. For longer storage, put the confections in heavy-duty zip-lock bags and freeze for up to 6 months.


Plum Goodies E copy

TIME TO DRESS IN GLEAMING AUTUMN COLORS!

HIDDEN TREASURE SALAD

FOR THE HALLOWEEN FESTIVITIES

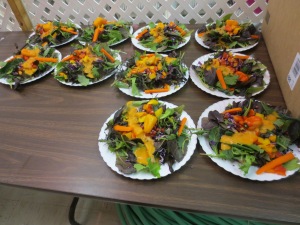
A Halloween treasure hunt is always a fun adventure, and even more intriguing when the hunt is right on your plate. This autumn-inspired salad hides a delicious and highly nutritious little treasure that becomes even tastier when drizzled with a lively dressing made from a base of cooked sweet potatoes.

I prepared this salad for a banquet held in late October and was fortunate enough to hear some of the enthusiastic comments. I think it was the dramatic fall colors that sparked a few oooohs.

And I have to confess, I had fun concocting this salad course–the colors still dazzle me! I love the brilliant color contrast of those deep purple lettuces accented with the yellows and oranges that top the greens.

I thought the Hidden Treasure Salad made such an eye appealing presentation, why serve it just for Halloween. The salad would make a gorgeous first course for Thanksgiving, too! And, the ingredients are available throughout the entire autumn and winter season.

I hope you’ll give the Tangy Sweet Potato Dressing a try. It was the autumn season, my favorite time of year, that inspired me to cook up some sweet potatoes and create a unique and very tasty salad topping that shines a spotlight on these lovely spuds–they’re one of my favorite foods.

I’m aware I’ve strayed from my December holiday dishes, but how could I resist–this is a simple recipe that just wants to be shared for the fun of it. Enjoy!

HIDDEN TREASURE SALAD

FOR THE HALLOWEEN FESTIVITIES

Yield: 6 servings

Hidden Treasure Salad

12 mini white potatoes

6 yellow or orange mini bell peppers


12 ounces mixed baby lettuces

1 red bell pepper, chopped

1 yellow bell pepper, chopped

1 orange bell pepper, chopped

4 cups finely chopped purple cabbage


2 medium carrots, cut into 2-inch long, thin julienne

1 cup pomegranate seeds

6 large pimento stuffed green olives (optional)

Tangy Sweet Potato Dressing (Makes about 2 3/4 cups)

1 1/2 cups plus 2 tablespoons water

3/4 pound yellow or orange sweet potato, peeled, cooked, and mashed

1/2 cup fresh lemon juice

5 to 6 pitted dates, snipped in half

1 garlic clove

1 1/4 teaspoons garlic powder

1 1/4 teaspoons onion powder

1 teaspoon ground nutmeg

1 teaspoon salt, or to taste

TO MAKE THE HIDDEN TREASURE SALAD, preheat the oven to 400 degrees F. Put the mini potatoes and mini bell peppers on a baking sheet and put them in the oven. Set the timer for 20 minutes and remove the mini peppers. Set them aside to cool. Roast the potatoes 10 minutes longer for a total of 30 minutes. Remove them and set them aside to cool while preparing the remaining salad ingredients.

Combine the lettuces, red, yellow, and orange bell peppers, and purple cabbage in a large salad bowl and mix well.

TO ASSEMBLE THE SALAD, place 2 mini potatoes in the center of each salad plate. Heap the lettuce mixture over the potatoes. Place 2 or more carrot sticks on each plate and sprinkle the salad with pomegranate seeds. Top each salad with a roasted mini pepper and a pimento stuffed green olive. Serve the dressing on the side.

TO MAKE THE DRESSING, combine all the dressing ingredients in a blender and process until smooth and creamy.

Using a funnel, pour the dressing into one or two narrow-neck bottles for easy serving. Use immediately or chill until ready to serve.

For convenience, the dressing can be prepared up to 2 days ahead. Refrigerated, it will keep for up to 6 days.

Note:

For a tasty dressing variation, a add 3 tablespoons rice vinegar and 3 pitted dates and blend until smooth and creamy.


STUFFED EGGPLANT IN GRAND HOLIDAY STYLE

PECAN CRUSTED STUFFED EGGPLANT

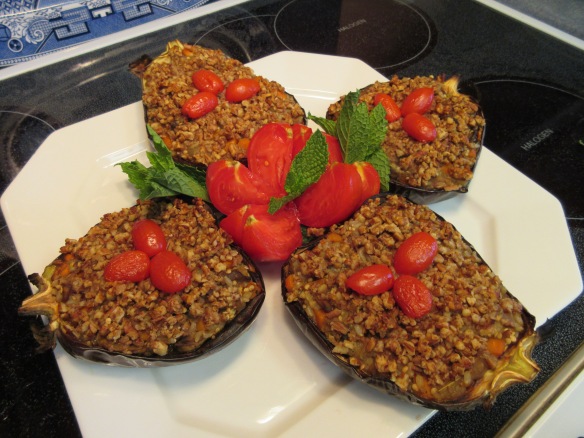
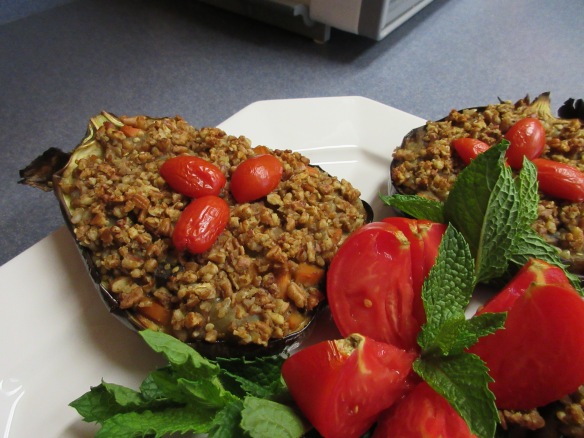
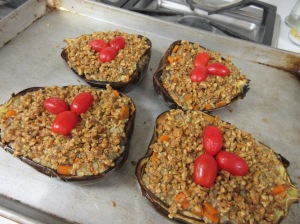
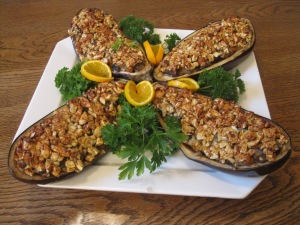
An elegant dish for the festive occasion, these stuffed eggplants not only make an attractive presentation but they also bring delicious pleasure to the lucky guests who have come for holiday dinner. If the guests are eggplant lovers–even better!

To save time during the busy holiday season, you can make this dish a day ahead and cover it in plastic wrap before baking. Then, next day bring the eggplants to room temperature and bake them shortly before serving.

To determine which size eggplants to buy, it helps to be a little familiar with your guests appetites. Very hearty eaters will be able to handle one-half of the large 1-pound eggplant. Once it’s stuffed, it’s pretty impressive in size.

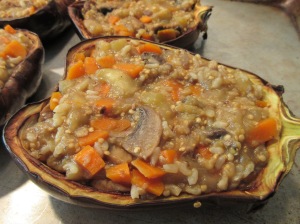
Those with more average appetites will be very satisfied with one-half of a 1/2-pound eggplant. Keep in mind that the mushrooms, carrots, and the brown rice mixed with the eggplant make even this size a robust serving.

I’ve chosen pecans for the crusty topping because of their natural sweetness, but chopped cashews or walnuts would also make excellent choices to give the topping a pleasing crunch.

PECAN CRUSTED STUFFED EGGPLANT

 Yield: 8 average servings or 4 very hearty servings

Eggplant Stuffing

4 small eggplants, about 1/2 pound each for average servings or 2 large eggplants (1 pound each), for very hearty eater

1/2 pound fresh button, mushrooms halved and thinly sliced

7 garlic cloves, minced

2 medium carrots, diced

1/2 cup water

1 1/2 teaspoons extra virgin olive oil

1 tablespoon plus 1 teaspoon soy sauce

1 tablespoon plus 1 teaspoon cider vinegar

1 tablespoon plus 1 teaspoon fresh lemon juice

1 cup cooked short grain brown rice

3/4 teaspoon salt, or to taste

1 teaspoon garlic powder

1 teaspoon onion powder

Freshly ground black pepper

1 or 2 pinches cayenne

Topping

3/4 cup pecans, coarsely ground in a nut mill

1 tablespoon white miso

2 teaspoons Dijon mustard

Have ready a large, rimmed baking sheet. Cut the eggplants in half lengthwise. Using a serrated grapefruit knife or paring knife scoop out the eggplant flesh, chop it into bite-size pieces, and set it aside in a medium bowl.

Brush the shells inside and out lightly with oil, put the shells on the baking sheet, and put them under the broiler for 3 to 5 minutes, until the flesh is soft and golden brown. Remove and cool.

Preheat the oven to 350 degrees F. Transfer the chopped eggplant flesh to a large skillet. Add the mushrooms, garlic, carrots, water, and oil and cook and stir over high heat for about 3 to 4 minutes.
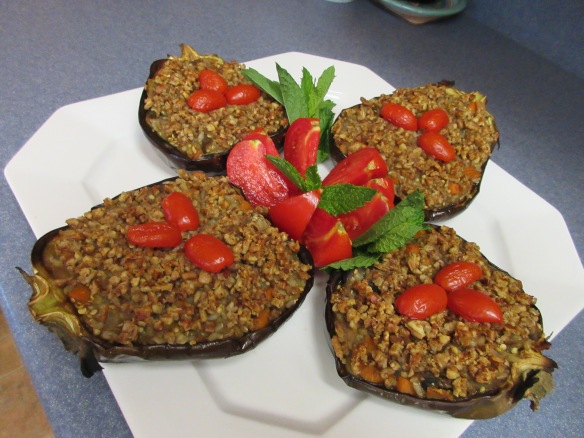
Add the soy sauce, vinegar, and lemon juice and cook another 1 or 2 minutes. Add the rice, salt, garlic powder, onion powder, pepper, and cayenne. Adjust seasoning if needed. Mix well and stuff the mixture into the eggplant shells, filling them to the rim. Store extra stuffing in the refrigerator and see note for leftover suggestion.

Put the topping ingredients in a small bowl and use the fingers to mix it well. Spoon the topping over the eggplant and press gently to secure it. Bake for 20 to 30 minutes and serve.

Note: Extra eggplant stuffing is delicious as an appetizer spread that can be spooned onto toasted pita wedges or crackers. These handy leftovers bring a delicious appetizer to the table quickly.

CRANBERRIES COME TO BRUNCH DRESSED IN HOLIDAY RED!

 Cranberry Muffins

CRANBERRY MUFFINS

If you’re a cranberry lover like I am, you, too, will revel with joy at the sight of these voluptuous golden muffins with a fluff of bright red berries on top and a confetti of cheery red bits of cranberries dotted throughout the batter.

The sweet-tart flavor blend is heavenly–that first bite will confirm that. But don’t take my word for it–bake up a batch of these little sweeties and I’ll bet you’ll find these muffins just as irresistible as I do.

They’re ideal breakfast treats with their hearty base of rolled oats and delicate sweetness. To create a crunchy texture, add 1/2 cup of chopped walnuts, pecans, or hazelnuts.

For an appealing holiday Brunch, I like to make the Cranberry Muffins along with another Cranberry Muffinsmuffin variety. I can make them in advance and tuck them into the freezer. About 20 minutes before serving, I take them out of the freezer and put them on a parchment-lined baking sheet. Then, I tuck them into a preheated 375-degree F. oven and in 20 minutes they’ll start to fill the kitchen with crazy-tempting aromas.

I always include a colorful fruit salad with chopped apples, pears, Fuyu persimmons, navel oranges, strawberries (if they look plump and fresh) and pomegrante seeds. If I can find some beautiful red or black grapes, those add a wonderful touch of color and rich sweetness.

Vegan sausages, either homemade or prepared, always make a tasty and very satisfying addition to a festive holiday Brunch. And the finishing touch can be a steaming cup of herbal tea, coffee, or hot chocolate.

This recipe makes a dozen muffins, but could easily make two recipients happy with a wrapped box of half-dozen each. To spread the joy even further, follow the suggestion below to create four dozen adorable little mini muffins and package them in small gift boxes tied with holiday ribbons.

 Cranberry Muffins

CRANBERRY MUFFINS

Yield: 12 muffins

1 1/4 cups soymilk

1 tablespoon apple cider vinegar, rice vinegar, or distilled vinegar

2 1/3 cups fresh cranberries, divided

3/4 cup plus 1 tablespoon organic sugar, divided

2 cups whole wheat pastry flour

1 1/4 cups wheat bran

1/2 cup old fashioned rolled oats

1/2 cup golden raisins

2 teaspoons baking powderCranberry Muffins

1 teaspoon ground cinnamon

1/2 teaspoon ground cardamom

1/2 teaspoon salt

1/2 teaspoon baking soda

1/2 cup mashed ripe banana

3 tablespoons organic canola oil

3 tablespoons maple syrup

1/2 teaspoon vanilla

  1. Preheat the oven to 400 degrees F. and line two 6-section muffin pans with paper baking cups or use an ungreased 12-section silicone muffin pan. Put the muffin pans on a large rimmed baking sheet.
  2. Pour the soymilk into a medium bowl and add the vinegar. Stir well and set aside to sour.
  3. Coarsely chop the cranberries in the food processor. Remove 1/3 cup of the cranberries to a small bowl and stir in 1 tablespoon of the sugar. Set aside for the topping. Transfer the remaining 2 cups of cranberries to a large bowl and add the remaining 3/4 cups sugar.
  4. Add the flour, wheat bran, rolled oats, raisins, baking powder, cinnamon, cardamom, salt, and baking soda to the bowl and stir well.
  5. Stir the bananas, canola oil, maple syrup, and vanilla into the soured soymilk and mix well. Add the wet ingredients to the dry ingredients and mix thoroughly to form a thick batter.
  6. Spoon the batter into the prepared muffin pans, filling each section to the brim. Place a dollop of the reserved cranberry topping onto the center of each muffin and bake for 28 to 33 minutes or until a toothpick comes out clean. Cool the muffins 10 to 15 minutes before removing.

Cranberry MuffinsNote:

Because cranberries are so seasonal, you may consider substituting fresh apples, pears, peaches, nectarines, plums, apricots, or berries to enjoy this tasty recipe year round.

Suggestion:

Turn your one-dozen muffins into four dozen of the cutest little mini muffins you’ve ever seen by baking them in mini muffin pans. Baked in metal mini pans, the muffins will be done in 12 to 14 minutes. The silicone mini muffin pans make slightly larger minis and will bake in 15 to 20 minutes.

To prepare well ahead of the holidays, put the baked mini muffins on metal or plastic dishes or trays and tuck them, uncovered, into the freezer. When completely frozen, transfer the muffins to a heavy-duty plastic bag and seal tightly. Frozen, the muffins will keep for 3 to 4 months. Be sure to defrost the muffins before packaging them for gift giving.

WHAT’S FOR DESSERT ON THANKSGIVING? BET YOU CAN GUESS!!`

 WILLIAMSBURG PUMPKIN PIE

Wiliamsburg Pumpkin‘Tis the season for pumpkin! There’s no doubt about that. Everywhere I look there are recipes for Pumpkin pie, pumpkin cheesecake, pumpkin pancakes, pumpkin muffins, pumpkin cake, pumpkin cookies, pumpkin soup, pumpkin stew, pumpkin scones, pumpkin breads, pumpkin sauces – you get the idea!

And wouldn’t something as highly anticipated as pumpkin pie be missing from the dessert table on Thanksgiving if it weren’t there? There’ll be no dessert disappointment for my family–pumpkin pie will take center stage at dessert time, along with a creamy and compassionate Satin Whipped Cream to spoon on top.

You can’t miss with this recipe that captures the spicy taste and aroma we’ve come to expect. The Pilgrims would have really appreciated this treat, especially with a dollop of Satin Whipped Cream as a finishing touch.

WILLIAMSBURG PUMPKIN PIE

Yield: 1 (9-inch) pie: 6 to 8 servings

1 Oatmeal Crumb Crust (recipe below)

Filling

1/4 cup plus 1 tablespoon arrowroot starch, (plus 2 tablespoons arrowroot for butternut squash)

1/4 cup unsweetened soymilk

1 (12.3-ounce) box extra-firm silken tofu, drained

2 cups canned pumpkin or cooked, mashed butternut squash

1 1/4 cups plus 2 tablespoons organic sugarPumpkin pie

2 teaspoons ground cinnamon

1/2 teaspoon ground nutmeg

1/2 teaspoon ground allspice

1/4 teaspoon ground cloves

1/4 teaspoon ground ginger

Pinch of salt

1 recipe Satin Whipped Cream (recipe below)

  1. Preheat the oven to 350 degrees F. and prepare the Oatmeal Crumb Crust.
  2. To make the filling, combine the arrowroot and soymilk in a blender. Process at high speed for 1 minute until smooth and slightly thickened, stopping occasionally to scrape down the blender jar. Set aside in the blender to thicken further.
  3. Put the tofu, pumpkin, sugar, cinnamon, nutmeg, allspice, cloves, ginger, and salt in the food processor. Process until smooth and creamy, leaving no bits of white tofu visible, stopping occasionally to scrape down the work bowl.
  4. Process the arrowroot mixture again and add it to the batter in food processor. Process until well incorporated.
  5. Spoon the filling into the prepared crust. Use the back of the spoon to spread the filling to the edges and smooth the top.
  6. Bake the pie in the middle of the oven for 45 to 50 minutes. The center of the pie will still be slightly soft but will firm when chilled. Let cool completely.
  7. Cover the pie with an inverted 9 or 10-inch pie pan or form a tent with aluminum foil, and refrigerate for 8 to 12 hours or overnight. Serve with Satin Whipped Cream on the side, if desired.

Oatmeal Crumb Crust

3 cups old-fashioned rolled oats

3/4 cup walnuts

4 1/2 tablespoons organic canola oil

3 tablespoons organic sugar

3 tablespoon maple syrup

1 1/2 tablespoons freshly squeezed lemon juice

3/4 teaspoon salt

  1. Have ready a 9-inch pie pan. Pour the oats into the food processor and pulse 12 to 15 times. Add the walnuts, canola oil, sugar, maple syrup, lemon juice, and salt. Pulse and process until the mixture is a fine, crumbly meal and holds together when pinched.
  2. Spoon the crust mixture into the pie pan and press it firmly and evenly into the bottom and up the sides of the pan with your fingers. Press on the edges to firm.

Satin Whipped Cream

1/2 cup cashews

1 cup water

1 small banana

6 tablespoons powdered sugar

1/2 teaspoon xanthan gum

1/4 to 1/2 teaspoon vanilla extract

  1. Put the cashews in a food processor. Process until ground into a fine meal. Transfer to a blender. Put the water, banana, sugar, xanthan gum, and vanilla extract in the blender with the cashew meal. Process for 1 to 2 minutes, or until the mixture becomes thick, smooth and creamy.
  2. Transfer the mixture to a covered container and chill for 8 to 12 hours to firm. Covered tightly and stored in the refrigerator, Satin Whipped Cream will keep for about 4 days. Before serving, fluff the mixture with a gentle stir.

Vegan Holidays highresYou can find this recipe and a host of other delicious dessert and celebration recipes in my Vegan for the Holidays Cookbook.

CAN’T BEET POMEGRANATE SALAD FOR THANKSGIVING!

sharonpalmer_headshot3Sharon Palmer RD generously shares her beautifully composed BEET AND POMEGRANATE SALAD to start the holiday meal with a pack of antioxidants packaged so appealingly no one will turn down a hearty serving.

Sharon has created an award-winning profession based on combining her two great loves–food and writing. As a registered dietitian with 16 years of health care experience, she channels her nutrition experience into writing features covering health, wellness, nutrition, and cuisine. Sharon is also a passionate writer about food and environmental issues, having published a number of features on plant-based diets, hunger, agriculture, local and organic foods, eco-friendly culinary practices, sustainability, food safety, and food security. Over 850 of Sharon’s features have been published in a variety of publications, including Better Homes & Gardens, 6x9Prevention, Oxygen, LA Times, Cooking Smart, and CULINOLOGY. Her books include The Plant-Powered Diet: The Lifelong Eating Plan for Achieving Optimal Health Beginning Today and Plant-Powered for Life: Eat Your Way to Lasting Health with 52 Simple Steps & 125 Delicious Recipes. Sharon is the editor of the acclaimed health newsletter, Environmental Nutrition and nutrition editor for Today’s Dietitian. She writes every day for her popular Plant-Powered Blog. In addition, Sharon is a nutrition advisor for the Oldways Vegetarian130 Network and served as a judge for the James Beard Journalism awards. She was the proud recipient of the Loma Linda University Distinguished Alumnus Award in 2013.

Living in the chaparral hills overlooking Los Angeles with her husband and two sons, Sharon enjoys visiting the local farmers market every week and cooking for friends and family.

Beet and Pomegranate Seed Salad pic3BEET AND POMEGRANATE SALAD

Ingredients:
4 cups packed mixed baby greens
2 cups packed assorted micro-greens
2 cups sliced baby beets, cooked and chilled
1 cup fresh pomegranate seeds
3 tablespoons coarsely chopped walnuts
1/4 cup freshly squeezed orange juice

1 tablespoon plus 1 teaspoon extra virgin olive oil
1/8 teaspoon ground black pepper
1 garlic clove, minced

Directions:
1. Arrange the baby greens in a salad bowl or on a platter. Top with the micro-greens.
2. Arrange the beets on top of the micro-greens and sprinkle with pomegranate seeds and walnuts.
3. Whisk together the orange juice, olive oil, black pepper, and garlic in a small bowl.Drizzle the vinaigrette over the salad and serve immediately.

ACORN SQUASH GETS SOME SWEET LOVE!

MAPLE SQUASHFOR ZEL MAPLE BAKED ACORN SQUASH

Laura Theodore is a 2014 TASTE Award-winning television personality, radio host, vegan chef, cookbook author and recording artist. Ms. Theodore is author of Jazzy Vegetarian Classics: Vegan Twists on American Family Favorites and Jazzy SQUASH LAURA ZELVegetarian: Lively Vegan Cuisine Made Easy and Delicious. Laura is the on-camera host of the weekly Jazzy Vegetarian cooking show on PBS and she hosts the podcast radio show, Jazzy Vegetarian Radio. Laura has made guest appearances on ABC, NBC, CBS, and FOX, and she was recently featured on The Talk on CBS <https://vimeo.com/79038409> , Insider/Entertainment Tonight, News 4-NBC, Fox News 8, Better TV, and WCBS Radio. Laura has been featured in the New York Times, New York Daily News, VegNews, Family Circle, Readers Digest, PBS Food, Naked Food and Healthy Aging, among many others. A love for good food, compassion for animals, and enthusiasm for great music has created a joyous life path for Laura Theodore. Read more at: http://www.lauratheodore.com <http://www.lauratheodore.com>

MAPLE BAKED ACORN SQUASH

Makes 4 servings
2 small acorn squash, halved and seeded
3 tablespoons maple syrup
2 teaspoons vegan margarine
1 teaspoon ground cinnamon or pumpkin pie spice


Preheat the oven to 400 degrees F. Line a rimmed baking pan with unbleached parchment paper. Put the acorn squash halves, cut-side-up, on the prepared baking pan. Put 2 heaping teaspoons maple syrup, 1/2 teaspoon margarine, and π teaspoon cinnamon or pumpkin pie spice in the center of each squash.
Tent with foil and bake 45 to 50 minutes or until the squash is soft and filling is bubbling.

A Sweet Dish for Sweet Potato Season

Sweet Potato CakesSWEET POTATO CAKES

If you’ve baked too many sweet potatoes for Thanksgiving and have leftovers, count on these scrumptious little patties to put them to work.

If you don’t have leftover baked sweet potatoes, make some tonight and put an extra 1 or 2 in the oven so you can make these fun-to-eat patties. This is one of those treasured, easy-prep side dishes that you can even make ahead and simply warm briefly in the oven.

The neat thing is they don’t need lots of your attention–once you’ve got them in the oven, you’re free to catch up on the latest issue of your favorite veggie magazine or make a sumptuous salad for dinner.

Yield: about 10 pattiesSweet Potato Cakes 2

2 tablespoons water

1 tablespoon flaxseed meal


1 (15-ounce) can cannellini or Great Northern beans, thoroughly drained and rinsed

1 cup baked, mashed sweet potatoes or yams

1/2 cup diced onions

1 teaspoon fresh lemon juice

3/4 teaspoon salt

1/2 teaspoon pepper


1 cup panko (Japanese bread crumbs) or regular bread crumbs


Garnish

5 cherry tomatoes, halved

Clusters of herbs (sage, basil, parsley, cilantro) or cooked broccoli florets


  1. Preheat the oven to 375 degrees F. and line a large rimmed baking sheet with parchment paper.
  1. In a small bowl, combine the water and flaxseed meal and stir well to moisten the meal completely. Set aside to thicken. Alternatively, combine them in a blender and process until the mixture forms a thick slurry.
  1. Put the beans in the food processor and add the sweet potatoes, onions, lemon juice, salt, and pepper. Process until well combined. Add the flaxseed meal and process briefly until incorporated.
  1. Sprinkle the panko onto a large, shallow bowl or recessed dish and have a spoon ready. Use about 3 to 4 heaping tablespoons of the sweet potato mixture to form patties. Drop each one into the panko and spoon the panko over the top and sides. Use a metal spatula to carefully transfer the patties to the prepared baking sheet and use your hands or the back of a spoon to flatten them slightly.
  1. Bake for 20 to 25 minutes. Carefully turn the patties over with the spatula and bake 15 to 20 minutes longer, or until firm. Transfer the patties to an attractive serving platter and top each one with a cherry tomato half. Garnish the platter with herbs or cooked broccoli florets.


A Delicious Edible Wreath!

CHRISTMAS CARROT WREATH

Christmas Carrot Wreath2Something about the holiday season stirs up the creative juices and urges us to put extra energy into meals we prepare to celebrate with family and friends. On the one hand, we must admit we love the praise that comes when someone says, “Wow! That looks great!” It says others recognize  we’ve put a little extra love into the dish because we wanted to bring  something special to the table.

On the other hand, we simply love the process of creativity and thoroughly enjoy puttering in the kitchen to come up with a dish that’s our very own creation. And we don’t mind spending extra time to play with seasonings until our creation zings with flavor! Because I was so inspired by foods of the holiday season, I created my Vegan for the Holidays cookbook. This recipe is one of the tasty treasures.Vegan Holidays highres

Our final effort goes into making our masterpiece look as magnificent and enticing as it tastes–a little garnish of mint sprigs or a fluff of shredded purple cabbage, perhaps a sprinkle of ground nuts–and we’ve relished every moment spent in our favorite comfy niche, the kitchen.

The Christmas Carrot Wreath is one of those creations I envisioned. It definitely took a few tries before it came together, but it was time well spent. I learned lots in the process (we always do, don’t we?).

I’ll be playing more with the garnishing–I know that needs work. And I’ll re-post the new, enhanced photo as the season progresses. For now, enjoy the dish. It’s never failed to receive praise.

You’ll be tempted to sing “Deck the Halls” when this golden wreath comes to the table. Baked in a ring mold, this carrot dish makes a unique accompaniment to any entree. It’s deliciously moist, delicately sweet, and has a texture reminiscent of a light, airy muffin. Prepare it in advance and reheat it briefly by covering it with aluminum foil, and tucking it into a preheated 350-degree F. oven for 10 to 12 minutes.

CHRISTMAS CARROT WREATH

Yield: 6 servings

3/4 pound carrots (about 3 large), peeled and sliced

1/2 cup vanilla or plain soymilk

1 1/2 teaspoons rice vinegar, apple cider vinegar, or distilled vinegar

1/3 cup organic canola oil

1 tablespoon plus 1 teaspoon freshly squeezed lemon juice

1/2 teaspoon almond extract

1 1/4 cups whole-wheat pastry flour

1/3 cup light brown sugar, firmly packed

1 teaspoon baking powderChristmas Carrot Wreath2

1/2 teaspoon baking soda

1/2 teaspoon salt

Garnish

1 bunch parsley, cilantro, or mint

1/3 cup diced red bell pepper

2 tablespoons sliced almonds

  1. Preheat the oven to 350 degrees F. and lightly oil a 4-cup metal ring mold. Set aside.
  2. Put the carrots in a covered 2-quart saucepan with enough water to cover. Cover and bring to a boil, immediately decrease the heat to medium, and simmer for 5 minutes, or until the carrots are fork tender.
  3. Meanwhile, combine the soymilk and vinegar in a medium bowl and set aside for 5 minutes to thicken slightly. Stir in the oil, lemon juice, and almond extract; set aside.
  4. Using a slotted spoon, drain the carrots thoroughly and transfer them to a bowl. Mash them well with a fork or potato masher. Measure 1 cup of the mashed carrots and set aside. Use the remaining carrots for another recipe.
  5. Combine the flour, brown sugar, baking powder, baking soda, and salt in a large bowl and mix well.
  6. Add the mashed carrots and wet ingredients to the dry ingredients and mix thoroughly. Spoon the carrot batter into the prepared mold and bake for 25 to 30 minutes, or until a toothpick inserted into the center comes out clean. Let cool for about 10 minutes. Invert the mold onto a serving platter.
  7. To garnish, form a wreath of green herbs around the perimeter of the serving platter, if desired. Sprinkle with the diced red bell pepper and sliced almonds. Cut into portions and serve.

Note:

The ring mold I use is an old-fashioned aluminum jello mold made to look like copper. A Bundt pan or spring-form pan with a tube in the center would also work.  An angel-food cake pan might work, but it’s best to use a shallow metal mold for ease in unmolding the wreath.