PLUM GOODIES FOR THE SWEET TABLE!


PLUM GOODIES

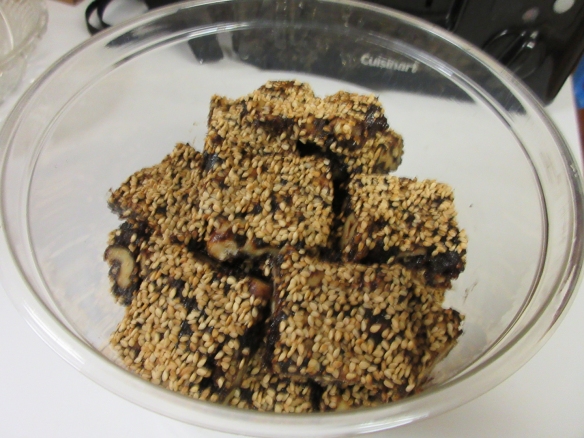
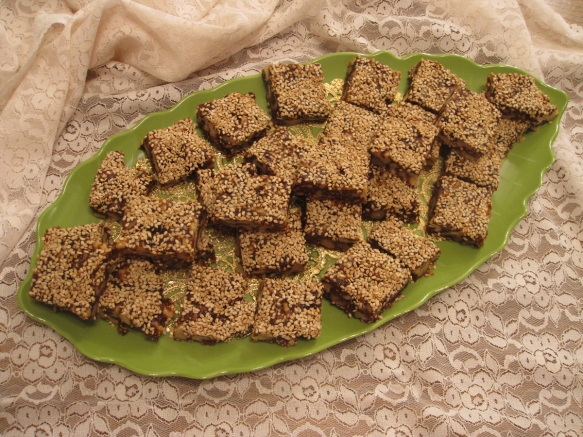
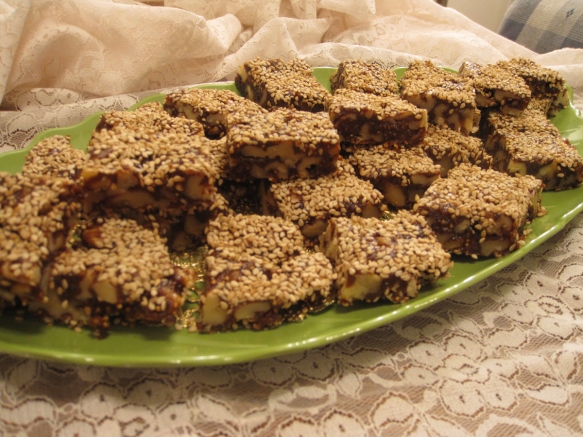
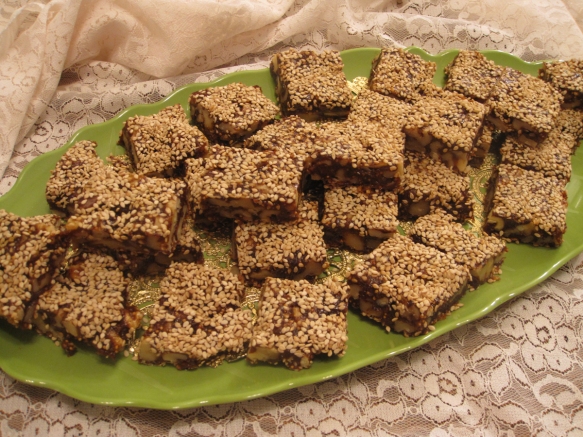
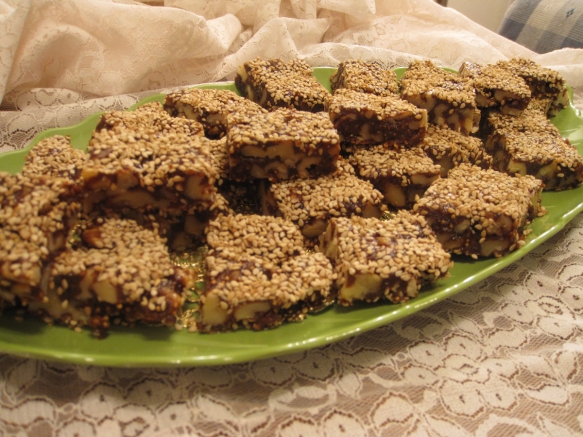
Plum Goodies B copyFigs and prunes seldom get the respect they deserve, but when they’re combined with walnuts and formed into delicious, bite-sized nibbles, they command much more than just respect. They get a blast of loving attention with smiles. Serving these at small gatherings as little after-lunch confections, I noticed guests reaching for seconds and thirds.

These little tidbits not only become desirable confections on the dessert tray, but they also make healthful treats to include in school kids’ lunchboxes or a between-meal snacks for little ones who need a healthful energy boost during the day.

They’re great keepers, too! Just pile them into a plastic container with a cover and set them aside on the countertop so they’re convenient for frequent nibbling—especially for the little ones.

For holiday parties, we tend to pull out all the stop. After all, the holidays come only once a year and we just have to go all out and prepare a fun sweet table loaded with everything from cookies and bars to truffles and confections. Be sure to add these little two-bite treats to your repertoire of collected recipe favorites. They might just become new favorites.

I made a batch of these for our own pleasure and put a heaping mound of them on a dish when a neighborhood friend came over with a loaf of his delicious sourdough bread. With enthusiasm, he popped one into his mouth and nodded with a smile of approval. As we sat at the table with our foodie friend and chatted about recipes, we noticed he kept reaching for another Plum Goodie, and another, and another. When he took the last one, he looked at me in wonder and asked, “Did I just eat the whole plate of these?”

Of course, my husband and I just giggled. It was the best testimonial I have ever encountered.
Plum Goodies E copy

They disappeared so quickly I didn’t have the chance to plate them. That means I have to get to work and bake up another batch — soon! I love that this recipe makes a hearty quantity of about 40 little squares.

Because these tasty confections are so unique, they would even make a lovely homemade hostess gift to bring when visiting friends during the holiday season. Consider these as a delicious holiday gift for Grandma, who doesn’t need another scarf or pair of slippers but  loves to nibble on sweet treats.

Dried fruits are a holiday bonus, providing pleasant diversity from the limited variety of fresh fruits like apples, pears, and oranges available during the winter season. To vary this recipe, try replacing the prunes with dried apricots or peaches. Both would offer delightful flavor paired with the definitive flavor of the sesame seeds that cover both the top and bottom of these treats.
PLUM GOODIES

 Yield: about 40 one-inch squares

10 ounces dried calmyrna or golden figs, trimmed and snipped in half

1 1/4 cups pitted prunes

12 pitted dates, snipped in half

3/4 cup water

2 3-inch cinnamon sticks

2 to 3 whole star anise
 

1/4 cup plus 3 tablespoons organic sugar

1 or 2 tablespoons water, as needed

1 tablespoon fresh lemon or lime juice

1/2 teaspoon ground cinnamon


3 cups walnuts


3/4 cup toasted sesame seeds

Combine the figs, prunes, dates, water, cinnamon sticks, and star anise in a 2 to 3-quart Plum Goodies A copysaucepan. Cover the pan and bring to a boil over high heat. Decrease the heat to low and steam for 10 minutes.
Discard the cinnamon sticks and anise and transfer the mixture to a food processor, including any liquid remaining in the pan. Add the sugar, water, lemon juice, and ground cinnamon and process until smooth and completely pureed. The mixture will be very thick.

Spoon the mixture into a medium bowl and add the walnuts. Mix well with a large spoon to incorporate the walnuts evenly throughout the mixture.

Preheat the oven to 200 degrees and have ready two large rimmed baking sheets. Cut 2 pieces of parchment to fit the baking sheets. Place one piece of parchment directly on the countertop, and set the other aside.

Sprinkle 1/3 of the sesame seeds into the center of the parchment and spread them evenly over a 6-inch diameter.

Carefully drop small spoonfuls of the walnut-fig mixture to cover the sesame seeds, and flatten the mixture with the back of a spoon, spreading it out to create a rectangle about 11 inches by 14 inches. Sprinkle the next 1/3 of the remaining sesame seeds over the top, pressing them down with the back of a spoon or your fingers. Sprinkle tiny bits of the remaining sesame seeds over sparsely covered areas, and set the remaining seeds aside.

Lift the parchment with the sesame-covered slab and place it into one baking sheet. Bake for 1 1/2 hours.

Remove from the oven and place the remaining piece of parchment over the top. Cover with the remaining baking sheet and invert the pans.

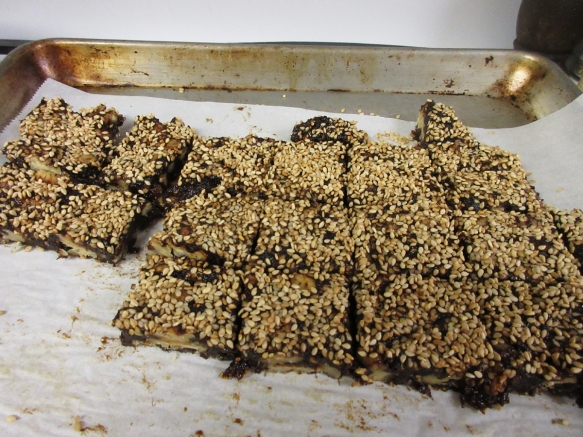
Remove the top piece of parchment and discard it. Sprinkle the remaining sesame seeds over the uncovered areas. Press them into the surface, and bake 30 minutes longer.

Remove and cool the walnut-figgy slab. Using a flatware knife, cut the slab into 1-inch squares. Place the squares onto a large platter and leave them at room temperature for 4 to 8 hours to firm and dry slightly.
Store in a covered container in the refrigerator for up to 6 months. Covered in plastic wrap and stored at room temperature, the Walnut and Figgy Bites will keep for up to 2 months. For longer storage, put the confections in heavy-duty zip-lock bags and freeze for up to 6 months.


Plum Goodies E copy

ANYONE READY FOR DESSERT?

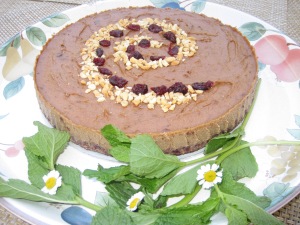
CINNAMON PEANUT BUTTER TORTE

You’ve planned a delicious appetizer for your holiday gathering and decided the entrée will be a savory dish–a cherished old family favorite. You’ve added a few well-loved side dishes and everyone’s favorite roasted potatoes. Now, what to do for an awesome dessert that doesn’t take too much fussing, yet looks sensational?

Here’s what I noticed over the years after preparing and serving many a holiday dinner: The appetizers and entrée may be exceptional, and perhaps even lavish, but most likely it’s the dessert that everyone remembers. And it’s no surprise–sweet memories linger longer.

If you loved peanut butter since you were a kid and could never get enough of it, you’ll find this well-endowed peanut butter torte easy to ravish. This torte is deliriously rich in flavor, densely packed with peanut butter, and perfectly accented with cinnamon to bring out its sweetness. The list of ingredients in this dessert relies mostly on simple, whole foods, yet, the dessert gives the impression of a much more complex preparation.

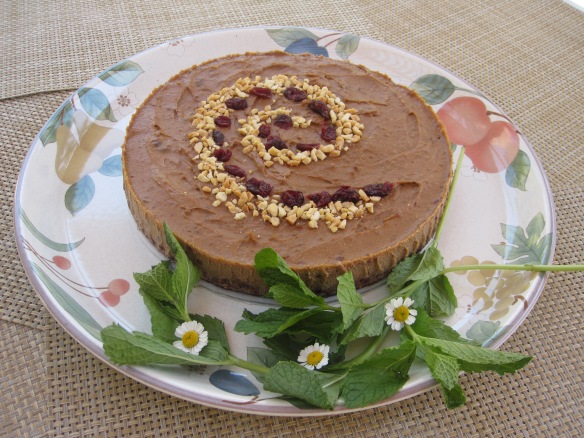
The bonus for the host is that this tantalizing treat can be prepared several days ahead and left in the freezer until shortly before serving. That’s such a bonus for a crazy-busy holiday season when you really don’t have lots of time to spend on each course. I consider it a blessing when I can make the dessert well ahead and tuck it out of site until serving time.

CINNAMON PEANUT BUTTER TORTE

Yield: 10 to 12 servings

Crust

1 1/2 cups whole almonds

1 1/2 cups sweetened dried cranberries

4 to 5 tablespoons water


Filling

1 1/3 cups pitted dates, snipped in half

1 cup smooth or chunky unsalted peanut butter

3/4 cup well-mashed firm tofu

1/2 cup unsweetened soy milk

1/4 cup organic sugar

2 teaspoons ground cinnamon

1/2 teaspoon vanilla extract


Garnish

2 tablespoons sweetened dried cranberries

1 tablespoon coarsely ground dry-roasted unsalted peanuts

6 to 8 sprigs fresh min

TO MAKE THE CRUST, cover the base of a 9-inch springform pan with a piece of parchment paper 2 inches larger. Snap the collar back onto the base, and cut off the excess paper with scissors. Lightly oil the sides of the pan and set aside.

Put the almonds into the food processor and process until they become a coarse, slightly chunky meal.

Add the cranberries and water and pulse and process until the cranberries are broken down into tiny bits and the mixture holds together when gently pressed. You may have to stop occasionally to scrape down the work bowl. Spoon the crust mixture into the bottom of the springform pan and press the mixture firmly with the back of a spoon to distribute it evenly. Set aside and wash and dry the work bowl.

TO MAKE THE FILLING, put the dates, peanut butter, tofu, soy milk, sugar, cinnamon, and vanilla extract in the food processor. Process until the mixture is smooth and creamy.

Transfer the filling to the springform pan, and use a rubber spatula to spread the filling evenly over the crust.

Sprinkle the cranberries and peanuts over top and gently press them into the surface. If desired, sprinkle them in a design of your choosing. Freeze the torte until firm, about 8 to 12 hours. Remove it from the freezer about 10 to 15 minutes before serving.

TO SERVE THE TORTE, run a knife around the edge of the pan to loosen the torte. Place the pan on a large serving platter. Carefully lift off the collar. Decorate the platter with the mint and cut the torte into wedges.


CELEBRATE A WHITE CHRISTMAS AT THE TABLE

WHITE CHRISTMAS TRIO WITH SAVORY WALNUT SAUCE

A beautiful main dish, this trio features a tasty grain as the base, topped with a hearty serving of vegetables. The final topping is a snowy white, ultra creamy walnut sauce garnished with fresh pomegranate seeds and a sprinkle of parsley.

While it looks complicated, it’s really quite manageable with good planning. The bulgur, vegetables, and the sauce can each be made a day ahead and stored in a container that can be gently warmed in the oven. You don’t even have to warm the sauce–just enjoy it at room temperature and it will be delightfully creamy and delicious.

This is a fun dish to serve because it lends itself to inventively creative presentations. Assembling the dish will tap into your innovative notions and allow you go be as expressive as your inner artist allows. If you prefer simplicity, that’s totally OK and your family will still enjoy a luscious and healthy whole grain dish complete with vegetables and a unique, walnut-based sauce that’s white as snow to top off the White Christmas Trio.

To fill out the meal, I would also add legumes, a side vegetable, and a gorgeous salad. Of course, a delicious appetizer makes a great start to the festivities. Perhaps the Yin Yang Thanksgiving Paté. A lighter choice might be the Smoky Garlic Stuffed Endive. I’ve posted some fun choices for your holiday dessert and will let you explore the many recipes by clicking on Desserts.

WHITE CHRISTMAS TRIO WITH SAVORY WALNUT SAUCE

Yield: 6 to 8 servings

Bulgur Wheat

1 1/2 cups coarse bulgur wheat or Basmati brown rice

3 cups water

1 1/2 teaspoons salt

1/3 cup raisins

Walnut Sauce

3 cups walnuts

3 cups vanilla soymilk

1 to 2 tablespoons nutritional yeast

1 teaspoon salt, or to taste

1/2 teaspoon organic sugar

1/4 teaspoon pepper

Pinch cayenne (optional)

Vegetables

2 large carrots, coarsely grated

2 large zucchini squashes, coarsely grated

1 large yellow summer squash, coarsely grated

1 medium onion, chopped

2 tablespoons water

1 tablespoon extra virgin olive oil

2 cloves garlic, thinly sliced, crosswise

1/2 teaspoon oregano

1/2 teaspoon basil

1/2 teaspoon marjoram

1/2 to 1 teaspoon salt or to taste

Freshly ground black pepper

Juice of 1/2 lemon

Garnish

1/2 to 3/4 cup pomegranate seeds

2 tablespoons finely chopped parsley

TO MAKE THE BULGUR WHEAT, combine the bulgur, water, and salt in a 2-quart saucepan. Cover, and bring to a boil over high heat. Reduce the heat to low, and steam for 12 to 15 minutes (steam Basmati brown rice 35 to 45 minutes, or until tender).

Put the raisins in a small bowl and cover with hot water. Set aside to plump them while preparing the remaining ingredients.

TO MAKE THE WALNUT SAUCE, put the walnuts, soymilk, nutritional yeast, salt, pepper, and sugar in a blender. Process until smooth and creamy. Adjust seasonings as needed. The sauce will thicken when standing. Set aside in a saucepan and warm gently before serving.

TO MAKE THE VEGETABLES, combine the carrots, zucchini, yellow squash, onions, water, olive oil, garlic, oregano, basil, marjoram, salt and pepper in a large deep skillet. Cook and stir over medium-high heat until the vegetables are soft, about 5 to 7 minutes. Add 1 or more tablespoons of water as needed to prevent burning the vegetables. Adjust seasonings and add lemon juice to taste.

Drain the water from the reserved raisins and add them to the vegetables and toss well.

TO ASSEMBLE THE DISH:

  • Mound the bulgur wheat onto a large serving platter.
  • Spoon some of the walnut sauce over the bulgur, leaving a 1-inch border of the bulgur showing.
  • Form a ring of the cooked vegetables, leaving a 1-inch border of bulgur wheat around the edges.
  • Finish with a sprinkle of pomegranate seeds and parsley over the top.
  • Serve the remainder of the walnut sauce on the side.

NAUGHTY LITTLE NIBBLES MAKES US HAPPY!

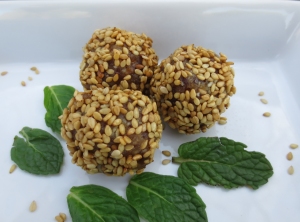
CHOCOLATE FIREBALLS and TAHINI PEANUT CONFECTIONS

Homemade fruit and nut confections are often considered non-glamorous and too homespun by some. True, they may not be perfectly shaped and are a bit out of round, but let’s look from a different point of view. By others, they’re beloved, delicious, and most appreciated because they’ve been lovingly hand-made by someone whose desire is to bring a tasty little treat to the table or to offer as a sweet gift.

I’ve made two happily concocted confections to share on this blog–Chocolate Fireballs and Tahini Peanut Confections. Each one is vastly different from the other, yet they pair well together.

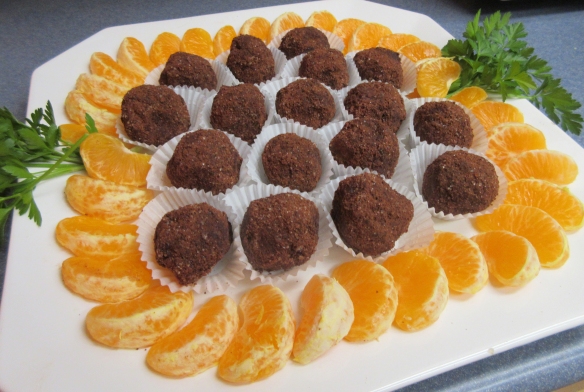
First, the Chocolate Fireballs: Most people find chocolate a total charmer. It’s no wonder–chocolate has compelling flavor that hits the tongue and totally wins you over. I say, “Go ahead–devour the chocolate!” These little treats contain no sugar, yet they’re deliciously sweet with nothing more than the earthy gifts of Mother Nature.
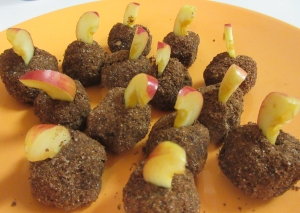
A little heads-up: These babies contain cayenne within the confections and also in the coating. I would judge the heat level to be between mildly spiced to just a tad more–not at the medium level, though. But, since everyone has a different spice tolerance, I thought it would be helpful to prepare you for a delightful little touch of heat and provide a little warning to those with sensitive taste buds.

If you know your guests enjoy spicy foods, say nothing and let the touch of spice be a pleasant surprise. You can enjoy watching them light up when that tiny blast of heat hits those little receivers on the tongue.
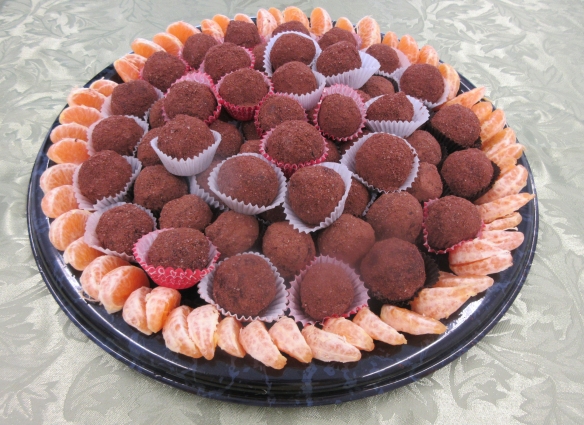
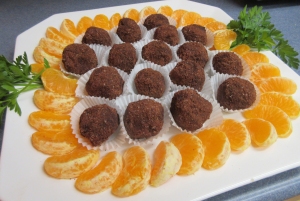
One day, when unexpected relatives dropped in for a visit, I reached into the freezer for these treats and arranged them on a dessert platter lined with a doily. Unwilling to wait for them to defrost, the cousins snapped them up and devoured them with gusto. That defining moment revealed that the confections were just as enjoyable eaten at room temperature or taken directly from the freezer. These tasty nibbles also make ideal gifts for the grandparents on your holiday list.

CHOCOLATE FIREBALLS

Yield: about 25 one-inch confections

Confections

1 1/2 cups whole almonds

1 1/2 cups walnuts

3 cups pitted dates, snipped in half

5 tablespoons raw cacao powder or unsweetened cocoa powder

1/4 cup plus 1 tablespoon maple syrup

2 teaspoons vanilla extract

1 teaspoon ground cinnamon

1/2 teaspoon caramel extract

1/2 teaspoon black pepper

1/2 teaspoon cayenne

5 to 6 tablespoons water

Coating

6 tablespoons almond meal

4 tablespoons unsweetened cocoa powder

3 tablespoons organic sugar

1/4 teaspoon cayenne

TO MAKE THE CONFECTIONS, put the almonds and walnuts in the food processor and process until the nuts are finely ground but still retain a little texture. If you prefer a confection with a little crunch, process briefly so the nuts still retain their crunchy nature. Process a little longer for a smoother texture. Transfer the nuts to a large bowl.

Put the dates, cacao powder, maple syrup, vanilla, cinnamon, caramel extract, pepper, and cayenne in the food processor. Add 5 tablespoons of the water and pulse and process until the ingredients are smooth and creamy or lightly textured as desired.

Pour the date mixture into the bowl with the nuts and use your hands to thoroughly combine the ingredients. If the mixture seems too stiff, add the remaining 1 tablespoon of water and mix well to incorporate it completely. Set aside for 5 minutes.

TO MAKE THE COATING, combine the Coating ingredients in a separate bowl. Using your hands, roll the confection mixture into 1-inch balls or small logs, then, roll them in the coating, covering them completely.

Put the confections in a covered container. If using within a week or two, store the confections in the refrigerator. For longer storage, put them in the freezer. Frozen, the confections will keep for up to 3 months.

There are several ways to enjoy the confections. Some people enjoy them right from the freezer. Others prefer them partially defrosted, about 10 minutes out of the freezer. They’re also delicious served completely defrosted.

Notes:

When preparing this recipe, be sure to snip the dates in half with a kitchen scissors to avoid date pits that might damage the food processor.


Cocoa Powder vs. Raw Cacao

Most supermarkets sell unsweetened cocoa powder, while natural food markets sell both unsweetened cocoa powder and raw cacao powder. Between them there’s a world of difference.

Unsweetened cocoa powder has shed all or most of its natural fat content, leaving only a minute amount of its natural cocoa butter intact. Raw cacao powder is considerably more expensive, but some cooks consider it worth the extra price. Because it still contains its natural cocoa butter (the magical fat that boosts the flavor of the chocolate), raw cacao delivers richer flavor with more depth.

The two points to consider when deciding which chocolate to buy for baking or confections are flavor and fat content. If you’re aiming for lower fat foods, stick to the unsweetened cocoa powder. If the fat content is not a consideration, go for the more intense flavor and choose the raw cacao powder.

Caramel Extract: Caramel extract is not available in grocery stores. I order it online from J.R. Watkins – https://www.jrwatkins.com

******************************************************

TAHINI PEANUT CONFECTIONS

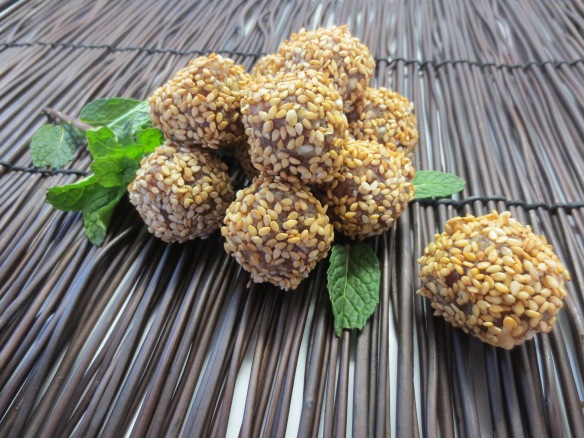
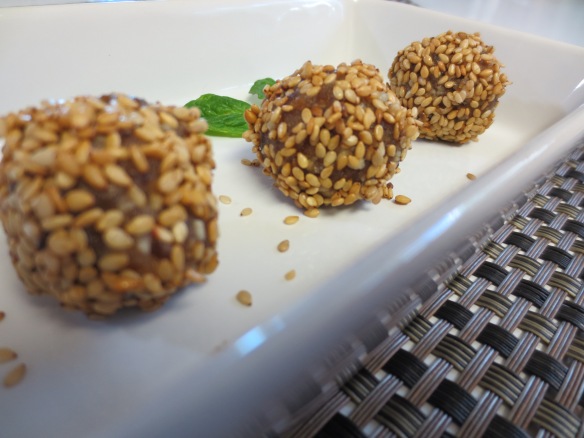
If you’re invited to dinner or a holiday party, bring some of these confections along as a hostess gift and watch the recipients beam with joy. With their captivating sesame flavor and date-sweetened goodness, these little tidbits make outstanding holiday gifts. Prepare these well ahead and keep them frozen so you can be ready when the festive season comes along. The act of giving is reward itself, but you’ll receive extra gratitude when you present these treats in an attractive jar or box attractively wrapped in their holiday best.

My hubby is a happy camper when he can reach into the freezer any time year-round and pluck a sweet frozen treat from the plastic container I attempt to keep filled. He claims they taste better when frozen–personally, I think he just doesn’t want to wait the ten or fifteen minutes for them to reach room temperature.
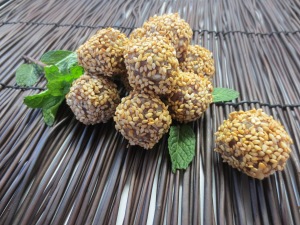
Yield: 45 to 50 confections

2 cups firmly packed pitted dates, snipped in half

1 cup roasted unsalted peanuts

1/2 cup tahini

2 to 6 tablespoons water

1/4 teaspoon caramel extract

Coating

1 cup natural or toasted sesame seeds

TO MAKE THE CONFECTIONS, combine the dates, peanuts, tahini, water, and caramel extract in the food processor and pulse and process until well blended. Longer processing will create a smoother confection. If you prefer a chunkier confection, you can control the texture by shorter processing and stopping the machine frequently to check the results.

Form the mixture into balls, using about one teaspoon for each confection. Roll, squeeze, and use your fingers to form the mixture into balls or ovals.

TO COAT THE CONFECTIONS, put the sesame seeds in a small, deep bowl and roll each ball in the seeds, coating it completely.

IF PLANNING AHEAD FOR GIFTING, put the finished confections in a covered container and store it in the refrigerator for up to 2 weeks or in the freezer for up to 3 months. Be sure to thaw the confections completely before wrapping them for gifting.

TO SERVE THE CONFECTIONS AT HOME for your own family or guests, line an attractive dish with a doily, arrange the confections on the dish, and garnish with a sprig of fresh mint. They’re delicious eaten at room temperature, chilled, or even frozen.

LET’S GET READY FOR A VEGAN THANKSGIVING DINNER

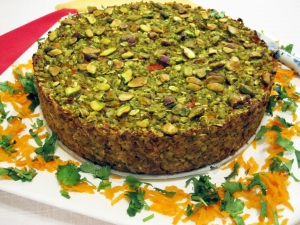
PISTACHIO AND SWEET PEA TORTE

WITH ROASTED TOMATO AIOLI

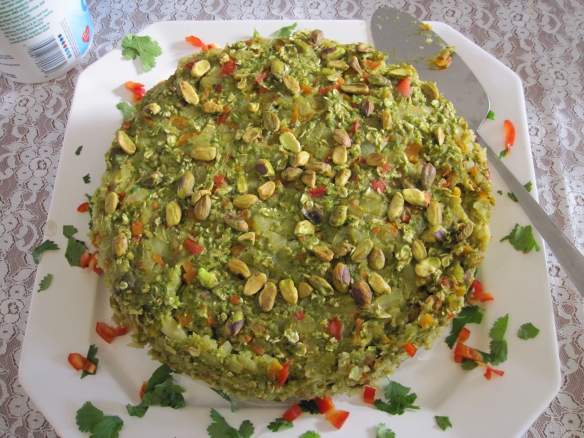
Vegan Thanksgiving yearns for a classic signature dish that becomes a cherished must-have for the Thanksgiving main course. Deliciously seasoned with flamboyant flavors, captivatingly aromatic, and visually appealing, this unique torte is a first-rate holiday entrée that delivers plenty of pizzazz. If you favor sauces to dress up the presentation, include the irresistible Roasted Tomato Aioli, an elegant complement to the torte. Both the torte and the aioli can be prepared a day ahead.

I’ve served this main-dish torte at other times during the winter and spring seasons and it’s always a hit. But mostly, I save it for Thanksgiving or Christmas dinner–that makes it special, and I change it out with other main dishes so it maintains its special status.

I know the long list of ingredients makes it look scary, but it actually comes together rather well. I’ve even made it two days ahead because it keeps perfectly. And when I bring it to the table, it always gets a few WOWs–feels really nice to hear them.
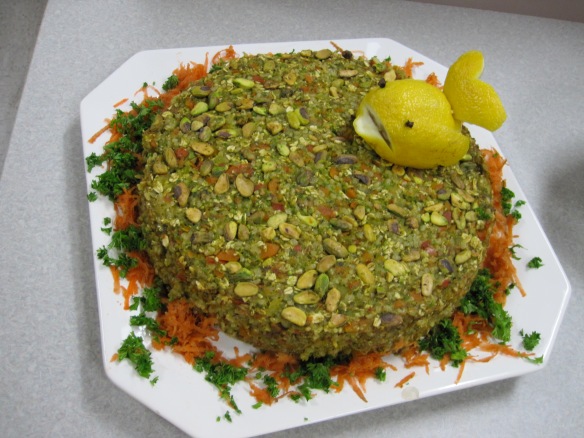
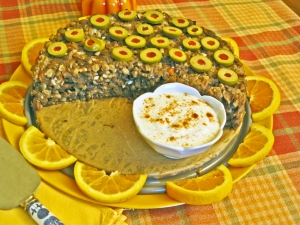
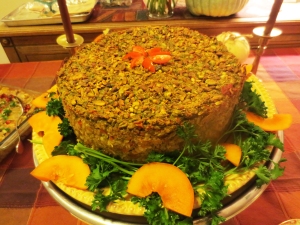
Although I’ve specified shredded carrots as part of the garnish, sometimes I use sliced persimmons or half slices of oranges. The orange colors set this dish up for an eye-appealing presentation.

Important: Because there are ingredients that require advance preparation, read the recipe thoroughly well in advance of preparing it. That way, you can have the rice cooked and ready, the pistachios roasted and ground, and the frozen peas completely thawed.

PISTACHIO AND SWEET PEA TORTE

WITH ROASTED TOMATO AIOLI


Makes about 10 to 12 servings

Torte

1 1/2 cups water

1/2 cup cashews or walnuts

1 tablespoon plus 14 teaspoon white vinegar or rice vinegar

2 1/2 cups old-fashioned rolled oats

2 teaspoons baking powder

1 3/4 teaspoons salt

1/2 teaspoon baking soda

1/2 cup plus 3 tablespoons coarsely ground roasted pistachios


2 medium onions, diced

2 medium carrots, diced

1 stalk celery, diced

1 red bell pepper, diced

6 cloves garlic, minced

1 (2-inch) piece fresh ginger, peeled and grated

1 teaspoon ground cumin

1 teaspoon ground coriander

1 teaspoon poultry seasoning

1/2 teaspoon fennel seeds, coarsely ground with a mortar and pestle

1/2 teaspoon dried oregano

1/2 teaspoon dried marjoram

1/2 teaspoon ground turmeric

Pinch cayenne

Freshly ground pepper


3 cups cooked short-grain brown rice

1 pound frozen peas, thawed

1 medium carrot, shredded, for garnish

3 tablespoons minced fresh parsley, for garnish

Aioli

1 pound Roma tomatoes, cut in half lengthwise

1 cup water

1/2 cup cashews or walnuts

2 cloves garlic

1 tablespoon plus 2 teaspoons freshly squeezed lemon juice

3/4 teaspoon salt

1/4 teaspoon ground smoked paprika or liquid smoke

TO PREPARE THE PAN, cover the base of a 9-inch springform pan with a piece of parchment paper 2 inches larger. Snap the collar back onto the base, and cut away the excess paper with scissors. Lightly oil the sides of the pan, place it on a baking sheet, and set aside.

TO MAKE THE TORTE, pour 1 cup of the water and the cashews into a blender. Process on high speed until smooth and milky. Transfer to a small bowl, stir in the vinegar and set aside to sour.

Combine the oats, baking powder, salt, and baking soda in a large bowl and mix well. Stir in 1/2 cup of the ground pistachios.

Preheat the oven to 375 degrees F. Combine the remaining 1/2 cup of water, onions, carrots, celery, red bell pepper, garlic, ginger, cumin, coriander, poultry seasoning, fennel seeds, oregano, marjoram, turmeric, cayenne, and pepper in a large skillet. Cook and stir over medium-high heat for 10 to 12 minutes, or until the vegetables are softened. Add 1 or more tablespoons of water as needed to prevent burning.

Add the cooked vegetables and the cooked rice to the oat mixture and combine well.

Put the peas in a food processor. Process until creamy, stopping occasionally to scrape down the work bowl. Add the peas and the soured cashew milk to the vegetable mixture and mix well.

Spoon the mixture into the prepared springform pan and spread to the edges, packing the mixture firmly. Smooth the top and sprinkle with the remaining 3 tablespoons of pistachios. Bake for 55 to 60 minutes, or until the torte is firm when gently pressed. Let cool at least 30 minutes before serving.

TO MAKE THE AIOLI, put the tomatoes on a baking sheet, cut side up, and broil about 3 inches from the heat for 15 to 20 minutes, turning twice while broiling, until completely soft.

Meanwhile, put the water, cashews, and garlic in a blender. Process until smooth, stopping occasionally to scrape down the blender jar. Add the broiled tomatoes, lemon juice, salt, and paprika to the cashew mixture. Process until smooth and creamy, stopping occasionally to scrape down the blender jar. Transfer the sauce to a 1-quart saucepan and simmer over medium heat for about 5 minutes.

TO SERVE THE TORTE, place the springform pan on a large serving platter. To unmold, run a knife around the edge to loosen the torte. Carefully lift off the collar. Garnish the edge of the platter with the shredded carrot and minced parsley. Cut the torte into serving-size wedges and serve with aioli on the side.

TIME TO DRESS IN GLEAMING AUTUMN COLORS!

HIDDEN TREASURE SALAD

FOR THE HALLOWEEN FESTIVITIES

A Halloween treasure hunt is always a fun adventure, and even more intriguing when the hunt is right on your plate. This autumn-inspired salad hides a delicious and highly nutritious little treasure that becomes even tastier when drizzled with a lively dressing made from a base of cooked sweet potatoes.

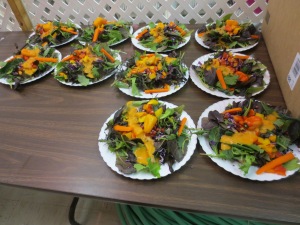
I prepared this salad for a banquet held in late October and was fortunate enough to hear some of the enthusiastic comments. I think it was the dramatic fall colors that sparked a few oooohs.

And I have to confess, I had fun concocting this salad course–the colors still dazzle me! I love the brilliant color contrast of those deep purple lettuces accented with the yellows and oranges that top the greens.

I thought the Hidden Treasure Salad made such an eye appealing presentation, why serve it just for Halloween. The salad would make a gorgeous first course for Thanksgiving, too! And, the ingredients are available throughout the entire autumn and winter season.

I hope you’ll give the Tangy Sweet Potato Dressing a try. It was the autumn season, my favorite time of year, that inspired me to cook up some sweet potatoes and create a unique and very tasty salad topping that shines a spotlight on these lovely spuds–they’re one of my favorite foods.

I’m aware I’ve strayed from my December holiday dishes, but how could I resist–this is a simple recipe that just wants to be shared for the fun of it. Enjoy!

HIDDEN TREASURE SALAD

FOR THE HALLOWEEN FESTIVITIES

Yield: 6 servings

Hidden Treasure Salad

12 mini white potatoes

6 yellow or orange mini bell peppers


12 ounces mixed baby lettuces

1 red bell pepper, chopped

1 yellow bell pepper, chopped

1 orange bell pepper, chopped

4 cups finely chopped purple cabbage


2 medium carrots, cut into 2-inch long, thin julienne

1 cup pomegranate seeds

6 large pimento stuffed green olives (optional)

Tangy Sweet Potato Dressing (Makes about 2 3/4 cups)

1 1/2 cups plus 2 tablespoons water

3/4 pound yellow or orange sweet potato, peeled, cooked, and mashed

1/2 cup fresh lemon juice

5 to 6 pitted dates, snipped in half

1 garlic clove

1 1/4 teaspoons garlic powder

1 1/4 teaspoons onion powder

1 teaspoon ground nutmeg

1 teaspoon salt, or to taste

TO MAKE THE HIDDEN TREASURE SALAD, preheat the oven to 400 degrees F. Put the mini potatoes and mini bell peppers on a baking sheet and put them in the oven. Set the timer for 20 minutes and remove the mini peppers. Set them aside to cool. Roast the potatoes 10 minutes longer for a total of 30 minutes. Remove them and set them aside to cool while preparing the remaining salad ingredients.

Combine the lettuces, red, yellow, and orange bell peppers, and purple cabbage in a large salad bowl and mix well.

TO ASSEMBLE THE SALAD, place 2 mini potatoes in the center of each salad plate. Heap the lettuce mixture over the potatoes. Place 2 or more carrot sticks on each plate and sprinkle the salad with pomegranate seeds. Top each salad with a roasted mini pepper and a pimento stuffed green olive. Serve the dressing on the side.

TO MAKE THE DRESSING, combine all the dressing ingredients in a blender and process until smooth and creamy.

Using a funnel, pour the dressing into one or two narrow-neck bottles for easy serving. Use immediately or chill until ready to serve.

For convenience, the dressing can be prepared up to 2 days ahead. Refrigerated, it will keep for up to 6 days.

Note:

For a tasty dressing variation, a add 3 tablespoons rice vinegar and 3 pitted dates and blend until smooth and creamy.


STUFFED EGGPLANT IN GRAND HOLIDAY STYLE

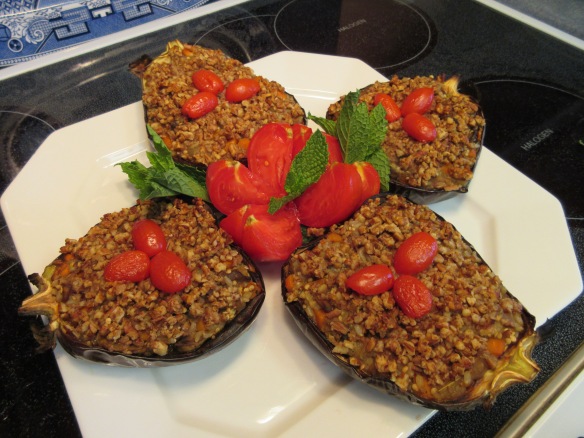
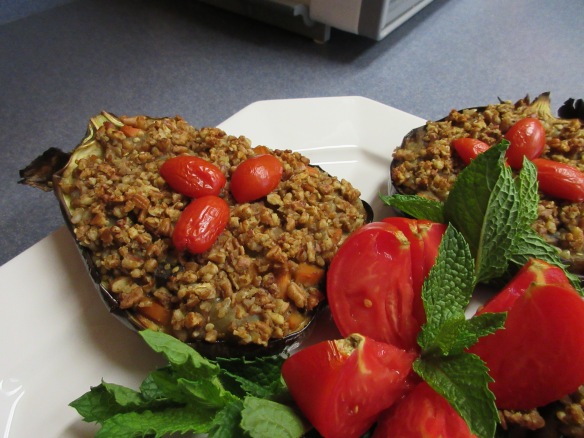
PECAN CRUSTED STUFFED EGGPLANT

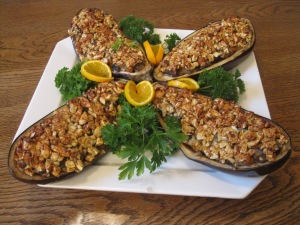
An elegant dish for the festive occasion, these stuffed eggplants not only make an attractive presentation but they also bring delicious pleasure to the lucky guests who have come for holiday dinner. If the guests are eggplant lovers–even better!

To save time during the busy holiday season, you can make this dish a day ahead and cover it in plastic wrap before baking. Then, next day bring the eggplants to room temperature and bake them shortly before serving.

To determine which size eggplants to buy, it helps to be a little familiar with your guests appetites. Very hearty eaters will be able to handle one-half of the large 1-pound eggplant. Once it’s stuffed, it’s pretty impressive in size.

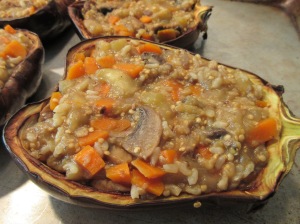
Those with more average appetites will be very satisfied with one-half of a 1/2-pound eggplant. Keep in mind that the mushrooms, carrots, and the brown rice mixed with the eggplant make even this size a robust serving.

I’ve chosen pecans for the crusty topping because of their natural sweetness, but chopped cashews or walnuts would also make excellent choices to give the topping a pleasing crunch.

PECAN CRUSTED STUFFED EGGPLANT

 Yield: 8 average servings or 4 very hearty servings

Eggplant Stuffing

4 small eggplants, about 1/2 pound each for average servings or 2 large eggplants (1 pound each), for very hearty eater

1/2 pound fresh button, mushrooms halved and thinly sliced

7 garlic cloves, minced

2 medium carrots, diced

1/2 cup water

1 1/2 teaspoons extra virgin olive oil

1 tablespoon plus 1 teaspoon soy sauce

1 tablespoon plus 1 teaspoon cider vinegar

1 tablespoon plus 1 teaspoon fresh lemon juice

1 cup cooked short grain brown rice

3/4 teaspoon salt, or to taste

1 teaspoon garlic powder

1 teaspoon onion powder

Freshly ground black pepper

1 or 2 pinches cayenne

Topping

3/4 cup pecans, coarsely ground in a nut mill

1 tablespoon white miso

2 teaspoons Dijon mustard

Have ready a large, rimmed baking sheet. Cut the eggplants in half lengthwise. Using a serrated grapefruit knife or paring knife scoop out the eggplant flesh, chop it into bite-size pieces, and set it aside in a medium bowl.

Brush the shells inside and out lightly with oil, put the shells on the baking sheet, and put them under the broiler for 3 to 5 minutes, until the flesh is soft and golden brown. Remove and cool.

Preheat the oven to 350 degrees F. Transfer the chopped eggplant flesh to a large skillet. Add the mushrooms, garlic, carrots, water, and oil and cook and stir over high heat for about 3 to 4 minutes.
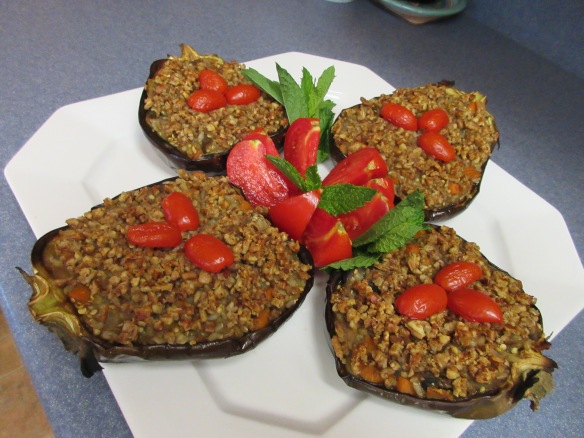
Add the soy sauce, vinegar, and lemon juice and cook another 1 or 2 minutes. Add the rice, salt, garlic powder, onion powder, pepper, and cayenne. Adjust seasoning if needed. Mix well and stuff the mixture into the eggplant shells, filling them to the rim. Store extra stuffing in the refrigerator and see note for leftover suggestion.

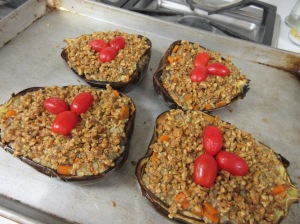
Put the topping ingredients in a small bowl and use the fingers to mix it well. Spoon the topping over the eggplant and press gently to secure it. Bake for 20 to 30 minutes and serve.

Note: Extra eggplant stuffing is delicious as an appetizer spread that can be spooned onto toasted pita wedges or crackers. These handy leftovers bring a delicious appetizer to the table quickly.

AMBROSIAL VARIATIONS ON A CHESTNUT BUTTER THEME

AMBROSIAL VARIATIONS ON A CHESTNUT BUTTER THEME

Chestnuts are certainly not a familiar food item in most households. That’s largely because our once flourishing American chestnut trees suffered devastating blight that killed them all. By the 1950s all the millions of chestnut trees growing along the slopes of the eastern Appalachian had died.

And no one was able to make a delicious Chestnut Butter!

Three cheers for The American Chestnut Foundation that’s making great progress to bring the trees back using plant pathology technology, but it will be several years before we will see commercial crops of chestnuts available from those trees.

There are a few growers in California and Washington whose trees were not affected by blight. Every year their chestnuts are harvested in September and become available for online orders in October. Scroll down to the bottom of the feature for links so you can enjoy making Chestnut Butter like I do every year.

The chestnut season is very brief–September through November. I like to place an early order and have some delivered in October and some delivered the week before Thanksgiving. They really add a special sweet touch to a savory stuffing. And they make a delicious Chestnut Butter.

Grocery stores, of course, will be brimming with imported chestnuts, mainly from China. Those will be available through the early spring months.

For cooking and peeling fresh chestnuts, visit my post for the visual, step-by-step process, so you can enjoy the pleasure of cooking and eating fresh chestnuts.

If you don’t plan to cook fresh chestnuts, there are definitely excellent alternatives. The markets will have jarred cooked and peeled chestnuts ready to eat. Many Asian and Middle Eastern markets will have vacuum-packed pouches of cooked, ready-to-eat chestnuts that you can put to work in your favorite recipes.

Now for the joy of Chestnut Butter and it’s many variations. The recipes are easy to make and will keep for up to one week in the fridge. Chestnut butter, so creamy and flavorful, makes a delightful spread on morning toast. It’s also great on crackers, but that’s not all. Consider putting a dollop on the dinner dish to dip into as a condiment, kind of like you might do with chutney.

My desire to create a delicious, low-fat, ultra creamy chestnut spread resulted in this awesome thick, satin-smooth spread that melts in the mouth. 

CINNAMON SPICE MAPLE CHESTNUT BUTTER

Yield: about 2 cups

2 cups coarsely chopped cooked and peeled chestnuts

6 tablespoons vanilla soymilk

1/4 cup maple syrup

1/2 teaspoon ground cinnamon

1/2 teaspoon maple extract

1/4 teaspoon ground ginger

1/4 teaspoon salt

Combine all the ingredients in a food processor and process for a full 2 minutes to create a silky smooth butter. Transfer to an attractive serving bowl and provide a spreading knife. Enjoy!

************************************************

Quicker than making apple butter, this delicious fruity chestnut butter takes no more than 20 minutes to prepare from start to finish and offers a welcome change from jams and jellies for morning toast, bagels, pita bread, and even muffins. The standard PB&J tastes even better with this chestnutty spread standing in for the jelly. Throughout autumn and winter, when the weather brings us a few shivers, we crave hearty foods with zesty flavors. Count of this chestnut-based fruit spread to chase away the winter blues. 

APPLE CHESTNUT BUTTER

Yield: about 3 cups

3 cups dried apple rings, well-packed

1 1/4 cups water

1/2 cup organic sugar

1/2 cup golden raisins

1 rounded cup cooked, peeled chestnuts

1 teaspoon rosewater

1 teaspoon orange blossom water

1/2 to 1 teaspoon lemon juice

1/4 teaspoon ground cardamom

  1. Combine the apples, water, sugar, and raisins in a 2-quart saucepan. Cover and bring to a boil over high heat. Reduce the heat to low and steam 10 minutes.
  2. While the apple medley is cooking, place the chestnuts, rosewater, orange blossom water, lemon juice, and cardamom in the food processor and set aside.
  3. When the apple medley is cooked, add it to the food processor along with all the liquid in the pan. Pulse and process until the mixture is smooth and creamy. You may have to stop the machine, scrape down the sides of the workbowl, and process until all the ingredients are well incorporated.
  4. Spoon into a serving bowl and serve with spreading knives. To store, cover tightly with plastic wrap and refrigerate. Keeps for up to two weeks.

**********************************************

With the addition of a bit of kitchen sorcery and a whirl in the food processor, this chestnut butter leans to the savory side. Naturally sweet and starchy chestnuts become transformed into an irresistible creamy spread that stands out on any variety of bread, bagel, or cracker. Consider this buttery spread as a tasty accompaniment to any savory dish, and use as you would a relish or a spread on your favorite bread or rolls.

GARLICKY CHESTNUT BUTTER

 Yield: about 1 1/4 cups

1/3 cup chopped onion

2 cloves garlic, coarsely chopped

1/4 teaspoon dried thyme

1/2 cup water, divided

1 1/4 cups cooked and peeled coarsely chopped chestnuts

1/4 teaspoon salt

1 sprig parsley, for garnish

  1. Cook and stir the onion, garlic, thyme, and 1/4 cup of the water in a medium skillet over medium-high heat for 3 to 4 minutes, or until the onion has softened. Add 1 or more tablespoons of water as needed to prevent burning.
  2. Transfer the mixture to a food processor. Add the chestnuts, salt, and the remaining 1/4 cup of water. Process for 1 or 2 minutes, or until smooth and creamy, stopping occasionally to scrape down the work bowl. Transfer to a serving bowl. Garnish with the parsley if desired.

***********************************************

A heavenly, light and buttery savory spread that makes eating bread shear delight. Quickly prepared, the chestnut-enhanced butter also serves as an appetizer spread on crackers or toasted baguette slices. Serve it over polenta or as a topping over other grains like rice, bulgur wheat, wild rice, or quinoa. Even baked potatoes will welcome a few dollops of the spread as a pleasant change from the familiar sour cream and chives.

SHIITAKE CHESTNUT BUTTER

Yield: about 2 cups

6 ounces fresh shiitake mushrooms, stems discarded, sliced

1 medium onion, chopped

2 tablespoons soy sauce

1 tablespoon extra virgin olive oil

2 tablespoons water, divided

1 small garlic clove, minced

1 cup well-cooked chestnuts

2 teaspoons lime juice

1/2 teaspoon salt

1/4 teaspoon ground black pepper

1/4 teaspoon lime zest

Pinch cayenne

  1. In a large, deep skillet combine the mushrooms, onion, soy sauce, olive oil, 1 tablespoon of the water, and garlic. Cook and stir over high heat for about 5 to 7 minutes, or until the mushrooms and onions are softened, adding more water as needed to prevent burning.
  2. Transfer the mushroom/onion mixture to the food processor, add the remaining ingredients, and process until smooth and creamy. Transfer to an attractive serving bowl and serve with a spreading knife. Refrigerated, the creamy spread will keep for 1 week.


A DELICIOUS STARTER FOR THE HOLIDAY FESTIVITIES


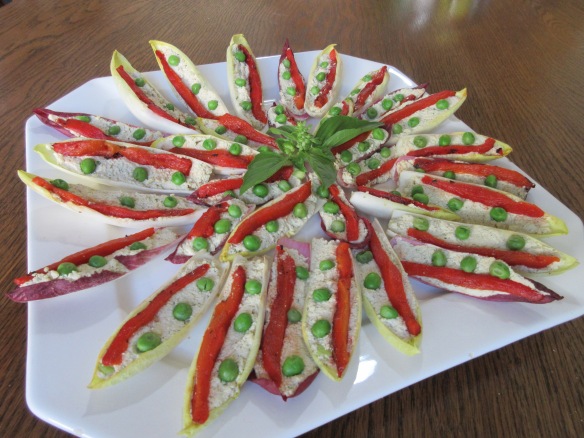
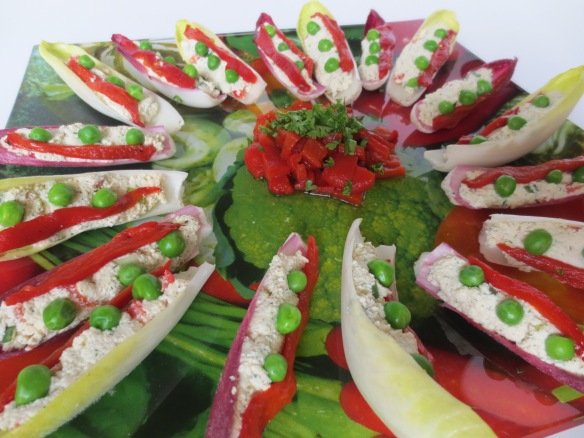
SMOKY GARLIC STUFFED ENDIVE

Hosting a holiday party can make one a little crazy during the busy month of December, when so many parties and events fill the calendar. I thought if I could make an appetizer or two a day in advance, it would take the squeeze out of getting ready for a pack of hungry invitees.

Turns out this little easy starter was perfect. In fact, it has many attributes on the plus side, aside from being very tasty. First, it’s not drippy, so it definitely won’t spill on the furniture or the floor. Second, it requires no special utensils–it’s finger food, after all, but better serve it with extra napkins–just in case. And last, it’s easy to make.

This well-seasoned smoke-flavored and bold garlicky mixture makes endive a delicious two-bite treat that can be prepared up to one day ahead. The filling is versatile enough to work as a stuffing for raw button mushrooms, celery, and hollowed tomatoes.

SMOKY GARLIC STUFFED ENDIVE

Yield: 2 1/2 cups filling for about 40 endive leaves

5 to 6 heads endive

1 pound extra firm tofu

3 to 4 cloves garlic

4 to 5 tablespoons fresh lemon juice

3 tablespoon water

2 1/2 teaspoons natural hickory seasoning (also called liquid smoke)

1 1/2 teaspoons dried dill weed

1 1/2 teaspoons salt

1/4 teaspoon pepper


2 green onions, minced

1 (15-ounce) jar roasted red peppers, cut into thin julienne, or 2 to 3 fresh red peppers, roasted and cut into thin julienne

3/4 cup frozen green peas, thawed

Paprika (optional)

  1. Separate the endive leaves and set them aside on a dish. To make the filling, rinse the tofu and drain well. Break the tofu into several chunks, and put them in the food processor.
  2. Add the garlic, lemon juice, water, hickory seasoning, dill weed, salt, and pepper and process until smooth and creamy. Taste and adjust seasonings as needed. Transfer the mixture to a bowl and add the green onions.
  3. To assemble, use a small spoon to fill each leaf with the smoky garlic mixture.
  4. Garnish each stuffed endive with a strip of red pepper and 3 green peas. Sprinkle the tops with paprika, if desired.
  5. Store leftover filling in the refrigerator where it will keep for up to 1 week.

A PLATTER OF COOKIES FOR OLD SAINT NICK

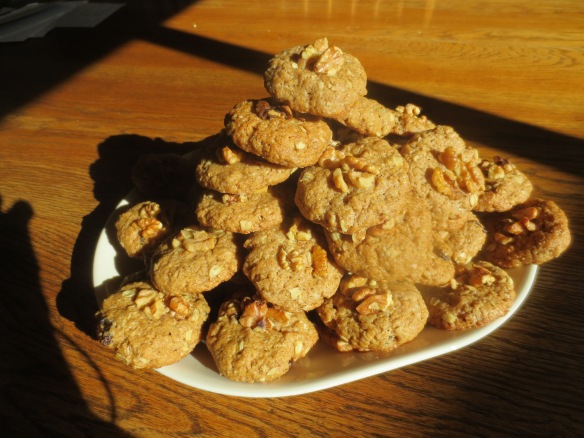
Because so many cookies share common ingredients like flour, sugar, and margarine or oil, they need that little something unique to make them stand apart. With a generous measure of creamy pureed walnuts, these delicious cookies offer melt-in-the-mouth soft centers and delightfully crunchy outsides.

But giving them that extra-special touch is black walnut extract, a flavor that makes these cookies an outstanding treat for Old Saint Nick.

I wasn’t able to find black walnut extract at the grocery store but discovered JR Watkins an excellent online source for unique flavoring extracts.

Going to a cookie exchange party or a holiday potluck?  Bring along a batch or two of these little gems and reap the compliments.

OLD SAINT NICK’S WICKED WALNUT COOKIES

Yield: 4 1/2 dozen

2 cups raw walnuts

3 cups whole wheat pastry flour

1 1/4 cups organic sugar

1 cup old-fashioned rolled oats

1/2 cup raisins

1 teaspoon baking powder

1/2 teaspoon baking soda

1/4 teaspoon ground cinnamon

1 cup mashed bananas (about 2 large)

2/3 cup vegan margarine

1 1/4 teaspoons black walnut extract, maple extract, almond extract, or an extra teaspoon vanilla extract

1 teaspoon vanilla extract

1/4 cup water

2 tablespoons flaxseeds or ground flaxseed meal

  1. Preheat the oven to 350 degrees F. Line two large rimmed baking sheets with parchment paper.
  2. Chop 1/2 cup of the walnuts into small pieces and set aside. Combine the flour, sugar, oats, raisins, baking powder, baking soda, and cinnamon in a large bowl and mix well. Make sure the raisins are well coated with flour to prevent them from sinking to the bottom of the batter. Set aside.
  3. Put the remaining 1 1/2 cups of walnuts in a food processor. Process until they become a creamy walnut butter, stopping occasionally to scrape down the work bowl. Add the bananas, vegan margarine, black walnut extract, and vanilla extract and process until smooth and creamy, stopping occasionally to scrape down the work bowl.
  4. Add the wet ingredients to the dry ingredients and mix well. The dough will become quite stiff.
  5. Pour the water and flaxseeds in a blender. Process on high speed for 1 to 2 minutes to form a thick slurry. Stir the slurry into the dough, mixing thoroughly to distribute it evenly.
  6. Roll teaspoonfuls of dough into 1-inch balls and place them 1 1/2 inches apart of the prepared baking sheet. Flatten them slightly with your hands or the bottom of a glass and press a piece of the reserved chopped walnuts into the center of each cookie.
  7. Bake for 14 to 18 minutes or until the cookies are lightly browned on the bottom. If the cookies on the top rack need browning, move them to the bottom rack for another 2 to 3 minutes. Transfer the cookies to a cooling rack or plate and let cool completely.